Monday, November 9, 2015

Pumpkin Pie Success

So, I have wanted to experiment with pumpkin pie for a long time but have never tried it until now. I have tried in the past to use different types of milk, and it has worked, so I knew it was a possibility. As a person who is lactose intolerant, most pumpkin pie is off-limits because, as a custard, it needs some sort of milk-like liquid to make it work properly. I have used rice milk in the past, but rice milk is very sugary. The other half of my experiment was to reduce the amount of sugar in the recipe but without greatly altering the flavor or texture. I had some ideas and ran with them and was happily surprised at how good it all turned out. The base of the recipe is the tried and true recipe from the can of Libby's pumpkin puree, the kind without the spices, just the pumpkin. The canned pumpkin I used was actually Trader Joe's brand, so the color is a bit different, but I think the flavor was the same.

Summer's Pumpkin Pie:
1 can(15oz.) canned pumpkin
1 can(13.5oz or however size your brand comes in) coconut milk, simmered to evaporate down to 12 oz. and cooled off
2 eggs
1/4 cup packed brown sugar
1/2 cup unsweetened applesauce
1/2 tsp. salt
1 tsp. ground cinnamon
1/2 tsp. ground ginger
1/4 tsp. ground cloves
1 unbaked deep-dish pie shell

In a large mixing bowl, mix all the items except for the pie shell, with a whisk.
Place the pie dough in a pie dish or if you are using one in a tin, leave it in the tin. Press the dough into the pie dish and with a fork, prick the dough all over to keep from puffing while baking. Place the tin or dish on a baking sheet and pour the filling into the shell.

Bake at 425 degrees for 15 minutes and then turn it down to 350. Bake for 50-60 minutes, taking the time to remove it from the oven and cover the crust edges with foil if it begins to brown too much. The center will jiggle slightly, but you don't want it to jiggle too much. The top will start to crack, but this is ok.

This needs to chill like any other pumpkin pie to let all the flavors develop properly. Because there is less sugar, the spices come through more strongly. The coconut milk is not terribly noticeable. To my taste buds, it tasted just like any other pumpkin pie, which is what my goal was. My coworkers seemed to like it, and my parents thought it was ok, but hadn't tried it with whipped cream yet. I eat mine without any topping, but by all means, put Cool Whip or whipped cream on it if you so desire! I even have an idea for how to do a gluten free version with sort of a streusel/granola topping and no dough. We'll see what I come up with, if there's any demand besides myself for Thanksgiving dinner. Those of you who will be coming to Thanksgiving this year, let me know if you're interested and I'll plan on making this for you!


Sunday, November 8, 2015

Dining-In: A Culinary Tour of America-New York, New York

The Location: New York, New York; Brooklyn, Coney Island-Little Pakistan
New York City 2013 population: 8,405,837; 32.6% white, 28.9% Hispanic. 2013 per capita income: $32,540

This is the first time I have been able to pinpoint a specific neighborhood in the city I was featuring on this blog, but with a city the size of New York, you have the luxury to be able to do this. I am very excited about this! New York is so big that it seems to have regions within it. They are known as "boroughs". Think of it like this, if New York City itself was a state, the borough would be the county in which you live. From there, the smaller neighborhoods would be like your individual city or town in which you lived. For my mind, New York City is so big, the population is so unfathomably large, that it's easier for me to think of it this way. To try and write up the history of the entire city would be ridiculous to even attempt, so I am going to keep it focused on the neighborhood I am featuring.

Little Pakistan is part of Coney Island, which is in the borough of Brooklyn. Coney Island, prior to the European invasion, was home to the Lenape Native American tribe. They referred to the island as "Narrioch," which translates to one of several things: "Land without shadows", "Always in light", "Point", or "Corner of land". The first Europeans to settle in the area were the Dutch, who named it, "Niew Amsterdam," in the early 1600's. Nobody knows for sure how it came to be called Coney Island. There are about five possible theories, though the first time a name akin to "Coney" was recorded, is on a map dating back to 1690. The island was originally unattached to the mainland, a true island, but was connected by a landfill in the 1950's.

Over the years, since the 1840's, when Coney Island was being developed, there have been issues and arguments about how much of the land should be developed and how much should be preserved for wildlife, and of the amusement side of the island, how much should be residential use and how much should be used for entertainment and amusement purposes. The amusement side of Coney Island has changed ownership many times over the years, including Donald Trump's father Fred, who wanted to demolish it all and build luxury apartments. That idea ultimately failed, but it was enough time and pressure that it lowered attendance at the parks significantly for a time. Popularity of the parks has ebbed and flowed over the years as well. Hurricane Sandy caused a lot of damage to the amusement side of the island in 2012, but it has largely been rebuilt since then.

On the other side of Coney Island, is a residential area. Little Pakistan is an ethnic enclave in this area. It resides between Beverly Road and Avenue H, and is home to about the large community of Pakistani Americans in NYC. Pakistani immigrants are one of the fastest growing immigrant groups in New York City. The neighborhood had once been home to a Jewish community, but during the 1990's, the Pakistani community grew ever larger in the area. Between 1990 and 2000, the Pakistani population doubled, and thrived in their new home. But then came 9/11 in 2001, and everything changed. This event would end up devastating Little Pakistan, as they fell under government scrutiny. In the aftermath of 9/11, the FBI swept through the neighborhood, questioning the residents. In 2002, the Department of Homeland Security created a registration program that mandated males 16 and older from 25 mostly Muslim African and Asian countries had to register with the immigration department. From there, about 500 men were rounded up by the department for various issues. Because many of them weren't yet permanent residents, they faced deportation and had to engage in legal proceedings. During this time, 20,000 residents of various South Asian communities in Brooklyn left the city altogether. Some returned to Pakistan, others moved to Australia, and some to Canada. Most never returned. 9/11 and it's consequences forced Little Pakistan to become politically active as a neighborhood. Organizations were formed to help provide legal aid to citizens, as well as helping them learn English and learn how to adapt to American culture. This has helped the community regroup and rebuild, and as of 2011, Little Pakistan now boasts a community of about 50,000 people.

I don't know about you, but I had never heard about what these groups of people were subjected to in the aftermath of 9/11. It's something the media, at least in Seattle, never really focused on. I cannot help but be reminded of what happened to the Japanese American population after the bombing of Pearl Harbor. Though the residents of these neighborhoods were not forced from their homes and jobs en masse, I hardly find that a justification for what was done to them. I am very glad to have been educated about, what I feel is an injustice, and though I try to keep this blog relatively light and politics-free, I felt I needed to share this with others. Though I am a foodie, I am also a history major, and I feel I need to stand as a witness to what happens in this country, and share it with others, so that we don't forget. And hopefully, if we remember, we won't let it happen again.

The Food: Poori and Chicken Jalfrezi
Pakistani food is something I have never had before. It was a bit of a last-minute change of plans for this city. Originally I had planned on doing Chanukah for NYC, but I have actually explored the foods of Chanukah a lot over the years, and as I had featured Jewish cuisine for Passover earlier this year, I decided to look around and see what else was out there in the city that I had never tried. I figured that if any place in this country could provide me with an unexplored cuisine, it would be NYC. And it did not disappoint! Pakistani Americans are one of the fastest growing populations in the city. I was really excited to try out the food. I was a bit nervous too, though, because I am not the world's largest fan of Indian food. India, of course, is their neighbor, and I assumed the cuisines would be very similar. But, Pakistan, is in a unique position, geographically, in that while it is next to India on one side, is it next to the Middle East on the other side, so it's influenced by both cultures in their cuisine. And I just happen to love Middle Eastern food! I chose two recipes that I thought would be good for a beginner to the world of Pakistani food, and they were awesome!

Pakistani food relies more heavily on meat than Indian cuisine, and it is Halal, which is the Muslim version of Kosher, if you will. So, you will not find any pork products in their cuisine, and not being Hindu, have a lot more beef in their dishes. Since I don't eat beef or lamb, and they don't eat pork, that basically left me with chicken, and the recipe I found was really good. Both of the recipes come from the internet and the formatting isn't conducive to cutting and pasting, so I will describe the recipes here, but provide the links in the source section at the end of this post.

Poori
This is a flat bread that was ridiculously easy to make. A half cup each of white flour and whole wheat flour, a half teaspoon of salt, a half Tablespoon of oil. The recipe didn't specify how much salt to use, so I used a half teaspoon as my best guess of what would be a proper amount. It was just about right, but I could probably have gotten away with a quarter of a teaspoon as well. Depending on your taste buds, I'd recommend between 1/4 and 1/2 teaspoon. Mix it in a bowl and then add water slowly until it all comes together in a dough. I used my hands to mix it. Cover it and let it rest for twenty minutes to relax the glutens in the flour. After that, cut it into ten pieces and roll them into small rounds. Or shapes that cannot quite be named, but are sort of blobs, but are at least flat.


Pan fry them in oil on both sides and let them drain on paper towels. I was really unsure about this one. How can something with so few ingredients, prepared so simply, taste any good? Well, it was amazing! It was a bit crunchy, but the flavor was fantastic! I gobbled them up and still have some for tonight. I hope they will be good the next day and not rock hard. You could probably use all white flour if you wanted something a bit lighter in texture, but I would not recommend using all whole wheat flour. It would be too tough. The photograph in the link for the recipe is much lighter in color than mine. I think that is what it would look like if you used only white flour. I don't think it's because I did something wrong...!

Chicken Jalfrezi
I chose this one because the ingredients were all ones I was familiar with and either had on hand, or could easily procure. When trying out a new cuisine, I think it's good to start with familiar ingredients that are put together in ways you're not used to. It's a good foot in the door. This was such a dish. This called for chicken thighs, which I love, but I suppose you could use boneless skinless chicken breasts if you really wanted to. It might take a bit longer for them to cook, though. The dish was surprisingly simple to make. Chopped onions and garlic in a pot, fry them in some oil, then add tumeric, salt, and chili powder. Then goes in the chicken to cook for a while, mixed with the onions. To that goes a ton of chopped tomatoes and their juices. Cover and cook for a while, though I took the lid off to let the liquid begin to evaporate. My tomatoes had a lot of liquid in them, and the idea of this sauce is to be sort of thick, so you need to let it evaporate as much as possible. To this goes the ginger, cilantro, cumin, and coriander. Mix it all well and continue to cook to let all the seasonings blend together. And that's it.

The flavor was really good! I think if I make this again, though, I will cut the amount of ginger at least in half. Fresh ginger is delicious, but in large quantities, it's actually quite hot and spicy. In small doses, it's good for soothing upset stomachs. In large quantities, it can give you heartburn...! I served this with the poori, but it would also be fabulous with rice pilaf.


As you can see, it's a bit monochromatic. If I'd had parsley, that would be a good garnish, or if you like cilantro, more of that sprinkled over it would be very pretty. The flavors, however, were anything but single-toned. The bread was crunchy and salty and the chicken was filled with delicious spices. I was really impressed with all of it. I definitely want to explore the cuisine more now! This is what I love about this blog project, and what I love about this country. All of these different countries are represented in our nation. Each country adds a patch to the quilt that is American cuisine. I don't like the idea of a "melting pot" as American food is often thought of. Though most cuisines do become Americanized, each one is still entirely distinct, and traceable back to its country of origin. I love exploring it all, and I continue to feel lucky to live in a country where it is all right at my fingertips. I can go anywhere in the world, and I never have to leave my kitchen to do it!

Sources:
Rebuilding Little Pakistan-1

Rebuilding Little Pakistan-2

Rebuilding Little Pakistan-3

Rebuilding Little Pakistan-4

Poori Recipe

Chicken Jalfrezi Recipe

City Pic

City Map

City Stats


Sunday, November 1, 2015

Dining-In: A Culinary Tour of America-Hallowell, Maine

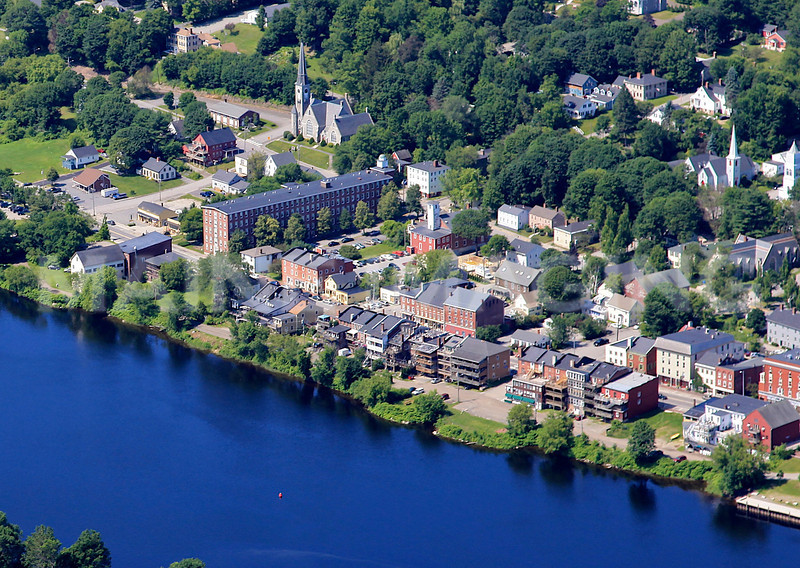
The Location: Hallowell, Maine
2013 population: 2,343 people; 94.6% white, 1.6% two or more races. Per capita income: $35,148.

Prior to the European invasion, the land around Hallowell was home to the Penobscot, or Panawahpskek, tribe. Hallowell was named for Benjamin Hallowell, a merchant from Boston. It was originally part of the city of Augusta, but it became its own town when Augusta broke off from it in 1797. The entire area was a part of the state of Massachusetts to begin with, but in 1820, Maine seceded from Massachusetts, and became its own state.

From 1815 to 1908, granite was the major industry for Hallowell. Ice was also a large part of their economy. Today, though, the city is known for its antique shops and pubs. For the most part, Hallowell has been a town relatively untouched by the major events of American history, though they did send many men to fight for the Union during the Civil War. The city today leans more liberal, in terms of politics, as it did then. Many people joined the war in order to help abolish slavery.

Why Hallowell? Because it's Halloween, of course! What a perfectly named city for this holiday!

The Food: A Duo of Desserts
I haven't done an all dessert post since Washington state's trio of apple desserts. Maine has a lot of seafood dishes it's known for, but as with last week with Maryland, there are so many kinds of seafood I don't eat that it wasn't very practical for me to feature them. This meant I had to get a bit more creative. With the fact that I would be doing this on Halloween, I decided to go in the dessert direction. Maine is also known for blueberries, and I opted for a recipe that heavily featured blueberries in their honor. Further research revealed a dish I have heard of, but never tried. I knew this was the time to try it!

First up is a recipe I found in my own collection. It comes from the Taste of Home magazine, unknown date.
Blueberry Oat Cake
2 eggs
2 cups buttermilk
1 cup packed brown sugar(I used 1/2 cup brown sugar and 1/2 cup unsweetened applesauce and I think it turned out just fine)
1/2 cup vegetable oil
2 cups flour
2 tsp. baking powder
1 tsp. baking soda
1 tsp. cinnamon
1/2 tsp. salt
2 cups quick-cooking oats
2 cups fresh or frozen blueberries, unthawed
1 cup chopped walnuts(I used pecans because they are naturally sweeter in taste than walnuts), optional
Powdered sugar

In a mixing bowl, beat the eggs, buttermilk, brown sugar(and applesauce, if using) and egg. Combine the flour, baking powder, baking soda, cinnamon and salt; add to batter. Beat on low speed for 2 minutes(or by hand, which is what I did). Fold in oats, blueberries and walnuts(or pecans), if desired.
Transfer to a greased and floured 10" fluted tube pan(Bundt cake pan). Bake at 375 degrees for 45-50 minutes or until a toothpick comes out clean.(Note, this cake is way too thick for a toothpick to do any good. I used a bamboo skewer since it was long enough to get to the bottom.) Cool for 10 minutes before removing from pan to a wire rack to cool completely. Dust with powdered sugar.
Makes 12-16 servings
This is what happens when you didn't see the part about flouring the cake pan until you just typed up this recipe 30 seconds ago, and try to remove it while it's still too hot. This was a literal hot mess, but it tasted good. I was able to dislodge the top half of the cake and sort of put it back together, but unfortunately it definitely crumbled when I cut pieces from it. Again, the flavor was fantastic and I'm sure if I'd floured the pan and had let it cool longer than the 10 minutes it called for, it would have done better. I have used my Bundt pan many times and have rarely had this bad of an issue.

Next up, a New England staple called Indian Pudding. I don't know about you, but I am not necessarily comfortable eating a dish with the word "Indian" in it, when it isn't actually Indian food. This dish has an interesting history. In England, it is made with wheat and is known as Hasty Pudding. You may have heard of this. It's pretty well-known, and even has its own club. When people started traveling to the New World, they discovered new ingredients, such as corn, that when dried and ground, was a grain that could be used in a variety of ways. The Europeans referred to it as "Indian meal," and from there comes the name of this dish.

I would argue that Indian Pudding is one of the first, if not the first Americanized recipe. Or to be even more historically-accurate, the first New Englandized recipe. America, of course, wouldn't be in existence for a little while longer. Taking a well-known recipe from England and substituting ingredients available in the New World, though in a very simple and humble dish, was the beginning of what would become American food culture.

If I was to rename this dish, I would propose calling it "Yankee Pudding," because it refers to the region in which it was invented, and acknowledges its American-ness. Though we were introduced to corn from the Native Americans, they never ate it in this form.

The recipe I used is from the internet, but I will type it out here, along with any changes or notes of my own.

Maine Indian Pudding
2 cups milk
1/4 cup cornmeal
1/2 cup milk, cold(Note, the website lists this as 1/4 cup, but the instructions say 1/2 cup. I used 1/2 cup, so I changed the quantity in this section to match because it was confusing otherwise.)
1/2 cup dark molasses, not blackstrap(I am not the biggest fan of molasses. I cut this down to 1/4 cup and did 1/4 cup of raisins to give it additional sweetness. I still found it to be overwhelmingly sweet and if I was to do this again, I would probably have cut it down to 1/8 cup, which is 2 Tablespoons of molasses and the rest raisins. With molasses, a little really does go a long way.)
1 tsp. salt(Because I did cut down on the amount of molasses, the salt came through a bit more than it should have. If you reduce the quantity of molasses, I would cut the amount of salt in half.)
1/4 cup sugar
1 tsp. cinnamon
4 Tbsp. butter
1 3/4 cups milk, cold

*Scald 2 cups of milk in a double boiler.
*Mix the cornmeal and 1/2 cup cold milk until smooth. Stir into the hot milk and cook over the hot water for 20 minutes, stirring frequently.(When you do this, you will be wondering what, if anything, is happening with your mixture. The milk will get frothy as you stir it but not much will change until about the last 5 minutes when it starts to thicken. Just keep faith in what you're doing and know that it will turn out ok in the end.)
*Add the molasses, salt, sugar, cinnamon, and butter; mix well.
*Pour into a buttered dish.
Pour the last 1 3/4 cups cold milk over the top of the pudding.
*Bake at 250 degrees for three hours(I started this about 4.5 hours before I wanted to serve it. The dish is based on something called Hasty Pudding, which is ironic, because it takes hours to prepare. Go figure!) Remove from oven and let sit for 30 minutes. Serve with ice cream or whipped cream, if desired.
Makes 4-6 servings.


As you can see, the cake was better-looking once I dug the top half out of the pan. It's just a facade though, it's definitely a chunky cake. The pudding is really interesting. The milk poured on the top sort of soaks into the pudding and also evaporates and creates a skin. Normally I don't like skin on pudding, but this was different. Because of the sugar and molasses, it was almost like the top of a burnt creme where you have to break through the caramelized sugar topping. It provided the majority of the texture. The rest of the pudding is very soft, but that gave you something to bite into and chew. The raisins also were really good in this. And not only is this something that doesn't call for a lot of cornmeal, which means your cornmeal goes a long way, it's also properly gluten free! So, all you gluten free eaters can partake of this and not worry about it! I cannot vouch for using an alternate non-dairy milk. It may or may not turn out the same. Try that out at your own risk, but do let me know if it works for you!


I really liked both of these desserts. Even though the pudding was a bit too molasses-ey for my tastes, it was still tasty. It was cool to use cornmeal in a completely different way too. I have used cornmeal a lot in this project. It's a New World ingredient after all, so it should feature highly in a project about American cuisine. For some reason, the pudding evoked images of the past. You can feel the history in it. The cake was delicious as well, but a much more straight-forward dessert. Both of these also make a lot. These would be good for groups. I had enough for tasting tonight, and to try tomorrow, and still had enough to share with my parents, my grandparents, and still have enough of the blueberry cake to take to work on Monday to share with my coworkers! You should definitely give these recipes a try!

Sources:
City Info

City Pic

City Map

Indian Pudding Recipe

Indian Pudding History

City History


Sunday, October 25, 2015

Dining-In: A Culinary Tour of America-Frederick, Maryland

  
The Location: Frederick, Maryland

2013 population: 66,893; 58.2% white, 14.9% Hispanic. Per capita income: $32,998.

Before the European invasion, the area around Frederick was used by tribes of the Iroquois nation as a passageway on their hunting travels. The city of Frederick was founded in 1745, as Frederick Town, by Daniel Dulary. It was inhabited by mostly German immigrants, including a large German Jewish community; so much so, that the town was entirely German-speaking until the first wave of Irish immigrants came and settled there in the mid 1840's. The Irish had left Ireland to escape the Great Famine, and brought with them the English language that would end up becoming the predominant language of the town. In time, Frederick would grow to become a religious, legal, economic, and mining center for the region. The Baltimore and Ohio(B&O) Railroad came to town in 1831. By the 1850's, Frederick was connected to St. Louis and Chicago, via the railroad.

During the Civil War, Maryland was in a unique position. It was a border state, lying on the Mason-Dixon line. It was a slave-owning state, and yet it did not secede the union. It fought for the Union, and would end up being the site of many a battle. Frederick itself housed several hospitals to care for the wounded, and was also a passageway for escaping slaves on their way north to freedom. After the war, Maryland imposed segregation in all public places. It would not be until 1921 that the first African American high school was established.

Firefly Fan Factoid: Those of you familiar with the tv show, Firefly, may find this interesting: In 1864, a Confederate General by the name of Jubal Early came to Frederick and demanded a ransom of $200,000 to be paid to him or he would burn the town down. Town officials raised the ransom by going to all the town's banks and getting them to contribute to it. Once the ransom had been paid, General Early honored the agreement, and left the town unharmed.

The Food: "Crab" Cakes and Old Bay Seasoned Pork Chops
The state of Maryland is known for a couple of specific foods: crab cakes, and Old Bay seasoning. There was really no way to avoid this if I wanted to do the state justice. Here's the problem though: I don't like crab. I never have. So, what was I to do? I had to honor the crab cake, but I wasn't about to eat it. And then I found it...A recipe that would end up being my salvation: a vegetarian crab cake. A zucchini cake, to be specific. The zucchini stands in for the crab, but is prepared in the exact same way. It was the perfect solution! The recipe also had Old Bay seasoning in it, so that was even better! But one cannot live on zucchini cakes alone, so enter, the pork chop recipe. It's marinated in Old Bay seasoning, so it would feature prominently. Perfect!

Old Bay seasoning has its start in the early 1900's, in Chesapeake Bay. It was created by a Jewish German immigrant named Gustav Brunn. Many seafood seasonings were created around that time, but Old Bay is the one that survived. It has become synonymous with the state of Maryland. There was no way I could not feature it in this week's meal. There was just one problem: I couldn't find any. I went to two grocery stores and couldn't find it in bulk format or canned. Seriously, how hard is it to find this stuff? It's usually everywhere, right? Apparently Seattle doesn't do Old Bay seasoning that much...Fortunately I had found a knock-off recipe online and could make it myself. According to what I read, the seasonings are all listed on the container, so it's not too hard to figure out how to make it for yourself. But there was another problem: It's nearly a two to one ratio of salt to celery seed. Now, as you know from this blog, I cannot stand the taste of celery. There was no way I could use it as it was written. I had to change it. But how? What to use instead of celery seed but would still be keeping with the idea of a seafood seasoning? I decided that even though it would change the flavor significantly, I would substitute dill for the celery seed. I adore dill and it's a natural pairing for seafood. I've never actually had Old Bay seasoning before, so I don't know what it should taste like. I realized I was probably bastardizing a time-honored, tried-and-true tradition, but too bad. I had to be able to stomach it, right?! So, I told my sister what I was doing and that I should call it New Bay seasoning and she suggested Elliot Bay seasoning since we're here in Seattle. So, Elliot Bay seasoning it is!!

Making a seasoning blend is super easy and usually is far less expensive than buying a jar of it. Because you control the spices, you control how hot or not it is, and how fresh the spices are. If you don't have one already, I highly recommend getting a small coffee grinder that you use only for grinding spices. It really is the best way to crush spices. But keep it just for spices, because the flavors would mix with the coffee if you used it for both.

Summer's "Elliot Bay" Seasoning:
 3 Tbsp. kosher salt
1 1/2 Tbsp. dill weed
1 1/4 tsp. dry mustard powder
1 tsp. crushed red pepper flakes(the original recipe says to grind these, but do so at your own risk. These are very spicy and if you inhale any of that dust, you will regret it. And also sneeze all over the place. I kept mine whole.)
1 tsp. freshly ground black pepper
1 tsp. ground bay leaves(Yes, ground bay leaves! A revelation to me, but you should smell them after they've been ground. It's wonderful!)
1 tsp. paprika
1 pinch each: ground cloves, ground allspice, ground ginger, ground cardamom, and ground cinnamon(Note, some recipes call for nutmeg too, so feel free to add a pinch of that as well, if you want. I did not.)

Mix everything together and keep in an air-tight container.
Any time you would use Old Bay seasoning, you can use this, if you'd like to try something different. It was ridiculously easy to make and should keep for quite a while. I think the next time I have salmon, I'll use this. I might even throw some in my tuna the next time I make it.

First up were the zucchini "crab" cakes. I found two recipes but chose the one that called for pan-frying instead of baking in the oven. I mean, if you're going to make crab cakes, even if it's just with zucchini, I wanted to do it right. You can bake these in the oven if you want, but I think pan-frying them is best. I made a half batch, so I will write it out here, but provide the link for the original in the sources section at the end.

Zucchini Cakes:
1 1/4 cups grated zucchini
1/2 egg, beaten
1 Tbsp. butter, melted
1/2 cup bread crumbs
1/8 cup(2 Tbsp.) minced onion
1/2 tsp. Old Bay seasoning
1/8 cup flour
Vegetable oil, for frying

In a large bowl, combine the zucchini, egg, and butter. Mix in the breadcrumbs, onion, and seasoning. Mix until well blended.
Using a 1/3 measuring cup, measure out cakes and pat together into a hockey puck-like shape. (Mine made 6.) Don't pack them together too much or the texture will be gross. Just enough to keep their shape.

Place flour on a plate or a bowl and dip cakes into it, coating both sides in flour. Gently tap the excess flour off the cakes.
Heat oil in a frying pan over medium heat. When hot, add cakes to the pan and fry until golden brown on both sides. You may have to turn a few times to make sure they're properly heated through. Mine didn't really get too greasy so I didn't need to drain them on paper towels. Keep an eye on the pan and add more oil as needed. The cakes absorbed a lot of oil as they fried.

Two of three of these would be a serving, depending on what else you're eating. If it's your main side, you might want to go with three. If you're having another starch with your entree, two would be good. I thought these were really good! They were nice and oniony and had a lovely texture. I think I would add more seasoning next time, because zucchini is rather bland and I didn't detect much of the seasoning, though I didn't need to add any salt or anything. I will see what they taste like reheated tonight for my dinner when I eat the leftovers.

Next up, was the entree. I chose a pork chop recipe because it was marinated in Old Bay seasoning and grilled. I have a grill pan, so I grilled mine on the stove, but if you have an outdoor grill, definitely use it. Mine ended up taking a while to cook all the way through and were still a bit on the medium-well side, so you might want to cut your pork chops in half so they're thinner before you marinate and grill them. I'd do that next time. Here's the recipe:

Chesapeake Bay Pork Chops:
1/2 cup vegetable oil
1/2 cup apple cider vinegar
1 Tbsp. Old Bay seasoning
2 cloves minced garlic(I actually missed this when I did the marinade, and left it out. This is what happens when you don't print the recipe from your computer and just scribble notes instead. Definitely add this.)
1 Tbsp. chopped fresh basil(I couldn't find those little packages of basil when I was shopping because I looked in the wrong spot. Who knew that fresh basil would be over with the garlic and tomatoes and not hanging over in the refrigerated section with all the other fresh herbs? So I opted for one of those tubes of pre-chopped basil instead. I don't use fresh basil often, so I think the tube might be a good way to go. You can just squeeze out however much you need.)
1 lime, juiced
Pepper, to taste
8 boneless pork chops, 1/2" thick(I used the whole marinade recipe but only did 2 pork chops. I didn't want to deal with cutting down the proportions because I was in a hurry, but feel free to cut down the marinade depending on how many chops you'll be grilling)

Combine the oil, vinegar, Old Bay seasoning, garlic, basil, lime juice, and pepper, in a gallon-size ziplock bag. Mix well and then add the pork chops. Seal the bag and place in the fridge to marinate for 4-6 hours. Turn over every couple hours to make sure it marinates evenly.
Heat the grill pan over medium heat. Oil the pan lightly. When heated, remove the pork chops from the marinade(discard marinade), pat the pork chops dry with a paper towel, and place in the grill pan. Grill 5-7 minutes per side until cooked through. The meat should be 145-150 degrees when finished.


The marinade on this was fantastic! Nice and tart from the lime and vinegar, and well seasoned. It was very moist as well, which can be something lacking in pork. I was really happy with this as well and have another pork chop for my dinner tonight. I am quite excited about this! I found that the two cakes and one chop wasn't quite enough for a full meal. Tonight I'll be adding a baked potato and I think that should be just about perfect.

If you are a fan of crab cakes or are a vegetarian who misses them, I highly recommend this recipe. It's a nice change from crab, and a good serving of vegetables. I don't know what you would use instead of the egg for the binder, but you could easily switch out the butter for olive oil and make them vegan. Not sure how to make them gluten-free, however. Unless you have a good brand of gluten-free breadcrumbs and flour that you like, then by all means, test it out!

Maryland was a state that started out as a very difficult state to find food to try, but ended up being a very delicious experience after all! I'm glad I keep researching!

Sources:
Pork Chop Recipe

Original Seasoning Recipe

Zucchini "Crab" Cake Recipe

City Pic

City Map

City Info

City History


Sunday, October 18, 2015

Dining-In: A Culinary Tour of America-Sheboygan, Wisconsin

 
The Location: Sheboygan, Wisconsin
2013 population: 48,725; 76.8% white, 10.1% Hispanic. Per capita income, $21,294.

Sheboygan was founded in 1846, though people had been coming to the area since the 1830's. Prior to American colonization, the region had been home to the Chippewa, Winnebago, Menominee, Ottawa, and Pottawatomie tribes. Sheboyan is thought to be a Chippewa word, referring to the passageway between the lakes, that was mangled over the years.

After the city of Sheboygan was founded, it became home to a large German immigrant population, though many Irish and Dutch immigrants settled there as well. During the 1970's, the city welcomed a large group of Hmong, or Laotian refugees, who relocated there.

Interesting Factoid: The United States's first Socialist party officeholders were Fred C. Haack and August L. Mohr. They were elected as Aldermen for the city of Sheboygan in 1898.

Another Interesting Factoid: Sheboygan is home to an annual bratwurst festival. This is appropriate given what I made for the meal...

Why Sheboygan? You are probably asking me this right about now. Well, for one, it's a fun word to say. But the real reason is that it was mentioned in one of my all-time favorite movies, and I'd never heard of it before then. It was a fun part of the movie, so I always associate the city with it.

Polka King of the Midwest Here is a link to the clip from the movie.(This blog program only lets me upload stuff from Youtube and this is not from there, hence the link only instead of the cool inserted video...!) If you cannot think of the movie based on what I named the link, I'll tell you what it is. It's from Home Alone. John Candy plays Gus Polinski, the "Polka King of the Midwest" and he and his band were very popular in Sheboygan. Do check it out if it's been a while since you've seen the movie.

I feel like I may have found my true home in the state of Wisconsin. Cheese, and German food. I mean, do you really need anything else? For those of you who drink, there is also copious amounts of beer to be had. I made a total of four recipes for this week's blog, and they all turned out to be pretty awesome. Cheese and German food is a heavenly combination. I chose to do this in October so I could count this as my Oktoberfest celebration. Wisconsin is the perfect state to feature for Oktoberfest. It did not disappoint.

The Food: Midwestern Oktoberfest


All of my recipes came from the internet, so I will post all the links in my sources section at the end of this post.

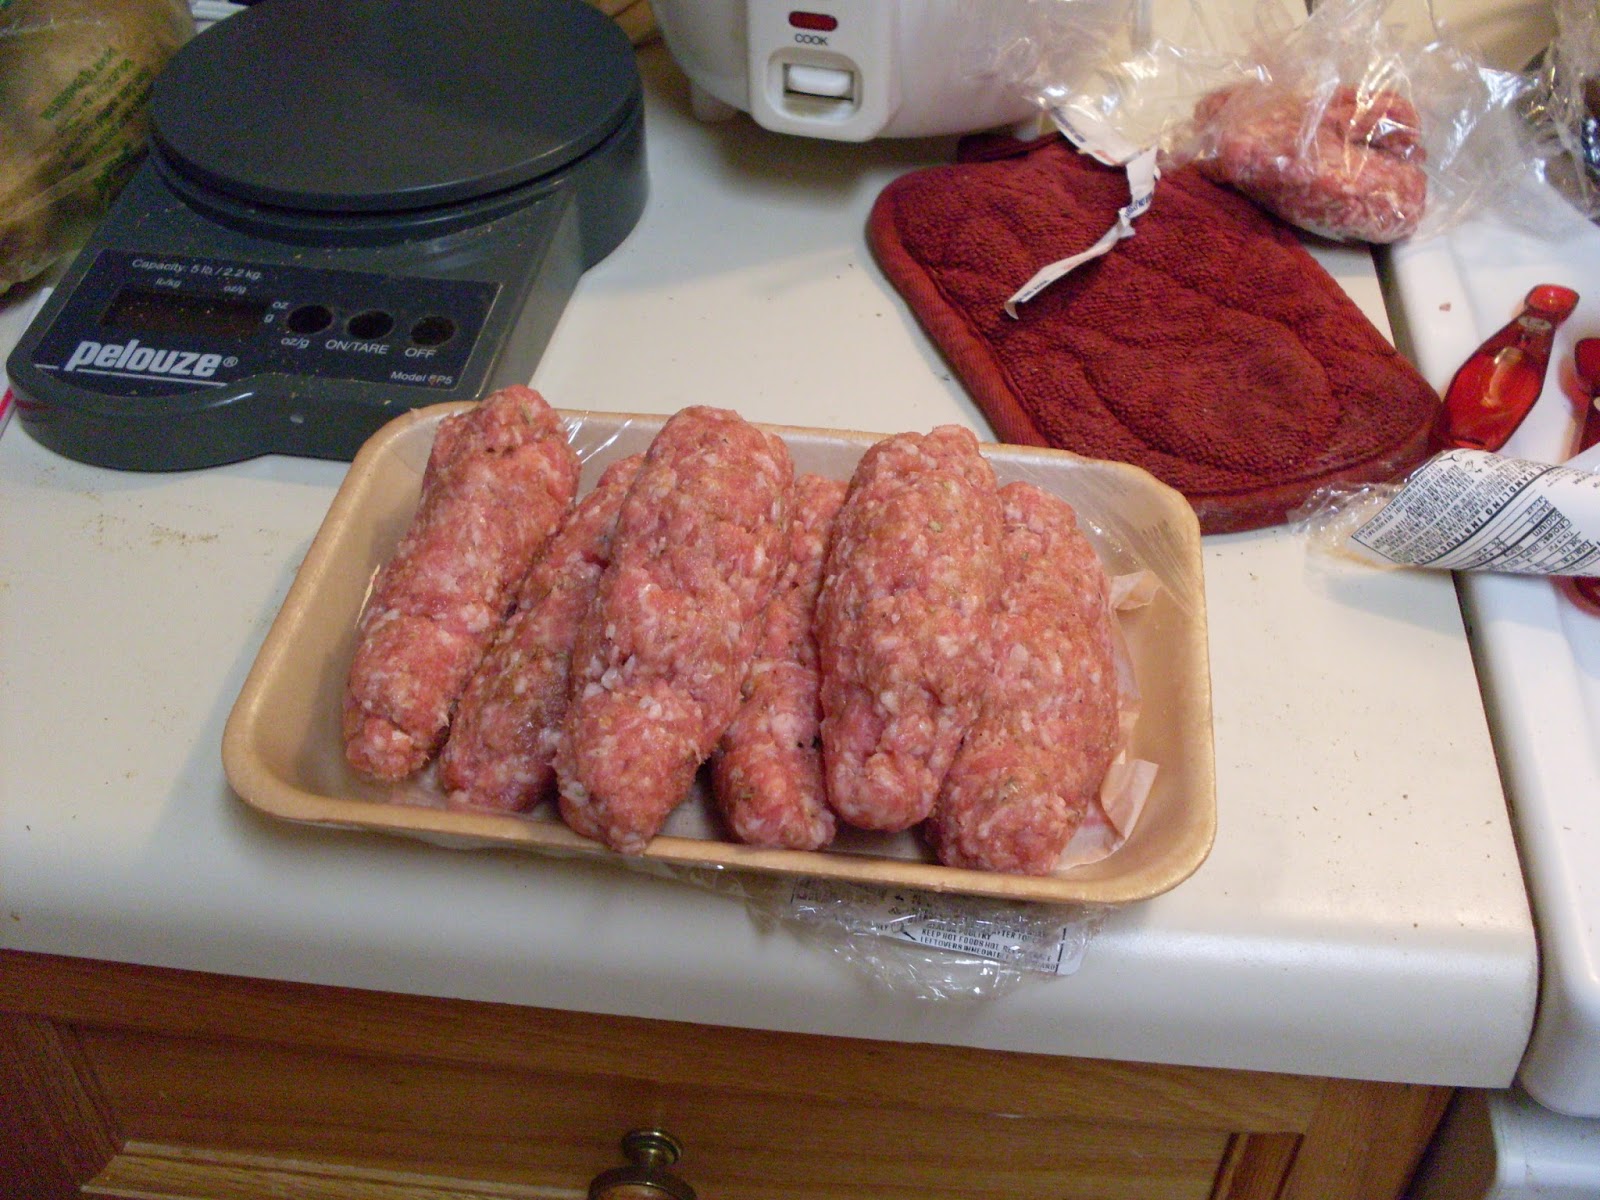
First up was bratwurst, which was to be the focal point of the meal. Now, there are some lovely bratwursts you can buy already made at the grocery store. The two recipes I made featuring bratwurst, call for commercially-prepared brats. But, I wanted to do something special. Anybody can buy brats, but not many can say they've made them by hand. Well, I am now one of the proud few, who can! I made homemade bratwursts a few weeks ago when I made the breakfast sausage to feature with my Johnny cakes for Rhode Island. I bought extra ground pork, made them, and froze them until yesterday. I didn't put them in casings because I don't have the equipment to do so, and also because buying an entire package of casings when you only need a few is wasteful and impractical. I shaped them into sausage shapes, and wrapped them in plastic wrap, then in foil. They held their shape very well.

Here is the ingredient list copied from the original site, but with my own instructions:

Bratwurst
5 lbs. ground pork, fine grind
4 tsp. sugar
1 Tbsp. ground coriander
1 Tbsp. ground sage
1 tsp. paprika
1 tsp. cayenne pepper
2 tsp. dried rosemary
1 Tbsp. dry mustard
1 tsp. pepper
1 tsp. nutmeg
5 tsp. salt

This is for 5 pounds of sausage. I cut it down to a fourth of the recipe, which made the seasonings easy to divide. So, 1.25lb. ground sausage and the adjusted seasonings. You can do this for however much you want. If you're a huge bratwurst fan and would like to keep them in your freezer for whenever you want them, make it all, or do it by half.
 Basically, place everything in a large bowl and mix really, really well. Then divide them up in the size you want, I went with about 3.5 ounces per sausage, and roll them into a log shape. Wrap each one individually in plastic wrap and foil, then freeze until ready to use. The flavor really is just like a commercially-prepared brat. The only difference, is it's not in a casing so you have to be a little more delicate with them. I think these would grill ok, but you can't really boil them in beer or anything that would require immersing it in liquid. You could attempt keeping it in the foil as you boil them, after removing the plastic and see if they keep their shape, but that would probably keep it from absorbing any flavor of the liquid. If you are a major eater of brats, you might go ahead and invest in the casings and equipment for stuffing them, but you'd have to figure that out on your own!
Now that I had my brats, what was I going to do with them? I've done brats and sauerkraut several times in my life. I love it, but it's not new. I want to feature things that are new to me on this blog, so I had to expand my repertoire of brat cookery. After researching more of the cuisine of Wisconsin, I came up with two soup recipes that would work really well. Since I couldn't decide which to do, I made both! Well, half recipes of both. The recipes called for more brats than I had, but I made it work and I don't think I missed the extra meat.

The first recipe was a brat and cheddar soup. Here is the recipe:
Brats and Beer Cheddar Chowder 
2 tablespoons butter or margarine 
1 medium onion, finely chopped 
1 medium carrot, coarsely shredded 
3 large shallots, chopped  (I actually forgot to get these at the store and think the soup would have been even better with them. Don't leave these out like I did!)
1 14 - ounce can vegetable broth or 1-3/4 cups vegetable stock (I used chicken stock. This isn't a vegetarian dish, why not use something with more flavor? Sorry veggie stock lovers...)
1/3 cup all-purpose flour 
1 cup whole milk, half-and-half or light cream (I used 2% milk and it was just fine)
1 teaspoon caraway seeds, crushed 
1/4 teaspoon ground black pepper 
10 ounces Wisconsin Aged Cheddar cheese or sharp cheddar cheese, shredded (I don't know if my cheese actually came from Wisconsin or not, but I pretended it did...)
4 cooked smoked bratwurst, knockwurst or Polish sausage (about 12 ounces total), halved lengthwise and sliced (I precooked my brats and just threw them in when it's called for.)
1 (12 oz.) can beer or 12-ounce bottle ale

In a large saucepan, heat the butter over medium heat. Add onion, carrot and shallots; reduce heat to medium low. Cook, stirring frequently, about 10 to 15 minutes or until the onion is very soft and golden. 
 
In a large screw-top jar, combine broth and flour. Cover and shake until combined and smooth. (I just used a bowl and a fork for this. I didn't have a screw-top jar on hand to use for this. You definitely have to stop and stir a few times to make sure the flour on the bottom and sides get properly incorporated, but it works just as well.) Stir into the onion mixture. Add the milk, caraway seeds and black pepper. Cook over medium heat, stirring frequently, about 5 minutes or until the mixture thickens. Gradually stir in the cheese; reduce heat to low. Cook, stirring frequently, until cheese melts, but do not boil. Stir in the bratwurst and beer. Cook, stirring frequently, until heated through. If you like, serve with rye bread. 
 
Makes 4 to 6 main-dish servings (7 cups).
 
This has a lovely, orange color, probably from the carrots because it was orange before I added the cheese. It has a strong beer flavor which blends well with the cheese. I did add some salt and pepper, but not much. I think I definitely missed the shallots. They tend to be slightly sweet, which would have balanced the bitterness of the beer more. This had a great texture, definitely lives up to the name "chowder".
 
The second soup recipe's formatting is such that I can't copy and paste it here. I will share the link in the sources section and you can get it from there. This one was brats, potatoes, and cabbage soup with Swiss cheese. The recipe calls for water and I found that it wasn't enough liquid. Before the step that calls for adding milk, I added 2 cups of chicken stock to the pot as well and that seemed to be just perfect for the amount of soup. I made a half recipe, though, so you might need up to 4 cups if you make a whole batch. I also added salt and pepper to this one, but not much. The Swiss cheese is a very subtle flavor, but it was delicious! I was very impressed with this one.
 
Neither soup was difficult to make, but it was a bit challenging to make two simultaneously. It was fun though! Both took about the same amount of prep and cooking time, so it was a good pairing. I would make both of these again.
 
To accompany the soups, I needed bread. And I found the greatest recipe ever. Again, the formatting is such that I can't copy and paste, but I'll provide the link. The concept is basically, savory monkey bread. For those of you who are unfamiliar with monkey bread, it's bread dough cut into small pieces that are then dipped in melted butter and rolled in a sugar-cinnamon mix. It's placed in a Bundt pan and baked until cooked through. This recipe was exactly that, but with cheese. My sister had a bag of Parker house rolls that she was not going to use because she hadn't realized at the time she bought it that it was the actual dough and not rolls. So I bought it off of her, thawed them out, and used it for this recipe. Each dough piece was rolled in melted butter, then in fresh, shredded Parmesan cheese. After filling the well-greased Bundt pan with half the bread, you put in a layer of shredded Provolone cheese. Then repeat with the rest of the dough, butter, Parmesan and Provolone. Let it rise in a warm place for an hour before baking at 375 degrees. Since my bread package only had 24 instead of 36 rolls like the recipe calls for, I cut the time down to 30 minutes and ended up baking for about 33 minutes total, but keep an eye out for it because it does get very browned on top. 
OMG, this is the greatest thing I have ever tasted. It's definitely going to end up in my top ten list of recipes I made for this project. It sticks to the bottom of the pan, so you really do want to make sure it's super well greased.
They don't really pull out of the pan, you have to cut them out, but then the two layers do pull apart from one another. I have never had Provolone and Parmesan together, but they work really well. Provolone melts really well, but is softer than the Parmesan, which tends to melt and get a bit hard and crunchy. I am going to try reheating these tonight with my leftover soup. It will definitely need to go in the oven rather than the microwave. That cheese won't work in the microwave.
Here is the meal in all of its glory. The cabbage and potato soup is in the back and the cheddar beer soup is in the front. The only thing I added after this picture, was a dill pickle, which I thought was perfect for the flavors of the night. I actually sat with both bowls in front of me and ate them simultaneously. I had one spoon in each hand and it was ridiculous. And also awesome. It's the perfect time of year for these recipes. They'd be way too heavy for spring or summer. If you like brats and cheese, you absolutely have to make these! You will not regret it!

Sources:
City History
County History

City Stats

City Map

City Pic

Bratwurst Recipe

Bratwurst, Beer, Cheddar Chowder Recipe

Bratwurst, Potato, Cabbage Soup Recipe

Wisconsin Cheese Pull-Apart Bread (Note: The picture on the recipe does not match the recipe, my photos are the accurate depiction of what this will look like when you make it.)


Sunday, October 11, 2015

Dining-In: A Culinary Tour of America-Hammond, Louisiana

The Location: Hammond, Louisiana

2013 population: 20,337; 47.3% African American, 46.6% white; per capita income, $21,097.

Hammond was named after its founder, Peter av Hammerdal, a Swedish immigrant who came to the region in 1818. Hammond, an escaped prisoner from Dartmoor Prison, used his savings to buy the land near New Orleans, and with the use of slave labor, established the space that would become the town. The city was built in 1830. Prior to the European colonization of the region, Louisiana was home to at least 34 Native American tribes, including the Tangipahoa, the Appalousa, and the Choctaw.

In 1854, the Great Northern Pacific Railroad came to the city, which turned Hammond into a major commercial center and travel destination. It became known as the "Strawberry Capital of America" because of the amount of berries that were shipped from there.

During the Civil War, Hammond was a center for shoe-making for the Confederate Army. During the Second World War, Hammond's airport was used as a detention center for German POWs.

Today, Hammond houses many warehouses for large store chains, such as Walmart. It is also home to the Tangipahoa African American Heritage Museum, which is a destination on the Louisiana African American Heritage Trail.

The Dish: Gumbo
Gumbo has a long history, and essays have actually been written about it. I won't go into too much detail or I would probably write for hours, but gumbo is the official state dish of Louisiana. This weekend, there is a large Gumbo festival in Bridge City, and that is why I am doing this now! Bridge City, however, doesn't have much history to it, so I chose Hammond instead. Why not New Orleans? Too done...I wanted to feature a place most people have never heard of.

Louisiana is a state rich in culinary choices. It was definitely a state where I had to pick and choose and narrow down what to make. Gumbo, jambalaya, muffaletta sandwiches, po'boys, the list goes on and on. Louisiana is a state the truly embodies the "melting pot" concept of America. The Native American tribes, the slaves, and the European immigrants all added their influence to the cuisine. The Cajuns, formerly known as the Acadians, were French immigrants from Canada who found themselves uninvited to live in Canada(It's a long story...). They traveled down the Mississippi River and settled in Louisiana, bringing their musical and culinary traditions with them. The Creoles, were French and Spanish Catholics who eventually intermixed with the slaves and Caribbean population to create a unique culture. The foods that came out of this meeting of cultures is also a blend.

Gumbo, which I settled on, is a cross of cultures in one dish. It is thickened with roux, a French concept, and traditionally seasoned with file(accent over the e, that I can't insert here,) which is a Native American spice. The "holy trinity," otherwise known as celery, onions, and bell peppers, is prevalent in Cajun cookery. Gumbo can be Creole, or Cajun, depending on what you thicken it with and what you put in it. My recipe, which came from my personal recipe files, is very basic, though it uses some ingredients I rarely use or have never used, so it was a fun one to try. It actually was a very fast-cooking gumbo as well. Traditionally, gumbo takes hours to make. I guess my recipe isn't traditional! But it was good. Here's the recipe:

Shrimp and Andouille Gumbo
1 large onion, chopped
1 large red bell pepper, chopped
1 large green bell pepper, chopped
1/2 tsp. dried oregano
1/2 tsp. dried thyme
1/2 tsp. salt
1/4 tsp. crushed red pepper flakes
1/4 tsp. pepper
1/4 cup olive oil(I used vegetable oil, and it was just fine.)
1/4 cup flour
2 (14.5oz) cans whole tomatoes in tomato juice(no salt added)
1/2 lb. Andouille sausage, sliced 1/4" thick(I used one sausage link, which was about half that amount. It is a very spicy sausage, so it's great to season the gumbo, but too spicy for me to eat.)
1 cup water
1 lb. large shrimp, shelled but with tails left on, and deveined(I had a 12 oz. package of shrimp and I think it was plenty.)
2 1/2 cups hot cooked white rice

1.) In medium-size bowl, combine onion, bell peppers, celery, garlic, oregano, thyme, salt, crushed red pepper, and pepper; set aside.

2.) In heavy 4 qt. saucepan, heat oil over medium heat. Add flour and cook, stirring constantly, until mixture is medium brown.(This takes time and confidence. You really do have to stir constantly, with a whisk, and it will start to smell like it's overcooking, but it isn't. Just keep at it until it's a nice deep brown color. Roux can be the color of coffee if you let it go long enough, so don't be afraid, just keep at it.)
 Add vegetable mixture and cook, stirring, until vegetables are coated with the flour mixture, about 5 minutes.
3.) Add tomatoes with juice, sausage, and water.(Now, it does not say either way, but I cooked my sausage first before adding it to the mixture. I wasn't sure if the gumbo would cook long enough to cook the sausage all the way through. You can make that decision for yourself and cook it first or not.) Cook, stirring occasionally to break up tomatoes, 10 minutes.
4.) Add shrimp to mixture in saucepan; heat to boiling. Cook until shrimp are cooked through, about 5 minutes.

5.) Divide rice among 6 individual soup plates. Spoon gumbo over rice, and serve.
Makes 6 servings(Because I used less sausage and shrimp, mine made closer to 4 servings.
I heated up some biscuits to go along with this, but I really wanted cornbread. I might get some today to eat with my leftovers. This was pretty tasty, but I suspect it'll be even better tonight when I reheat it. As with any soup/stew, it always tastes better the next day, right? This was pretty spicy! When I stopped eating the sausage, though, it got easier to eat. If you are a spice fan, you will love this, and might even want more spice. You could add hot sauce if you want, or more pepper flakes, but I thought it was just enough for me, even bordering on too much. The rice really does help cut the spice, because it spreads it out. I highly recommend serving it with rice. And I recommend watching The Princess and the Frog, like I did, because it's the perfect movie for gumbo. You could also watch The Divine Secrets of the Ya-Ya Sisterhood, which would also work very well.

There are so many foods from Louisiana and I want to try them all. Next year, when I finish this project and start some smaller projects, I think this state will warrant a closer look. It's just too good not to try it all!

Sources:
Gumbo History

More Gumbo History

City Pic

City Map

City History

City Info

Sunday, October 4, 2015

Dining-In: A Culinary Tour of America-Jamestown, North Dakota

 
The Location: Jamestown, North Dakota
2013 population: 15,440; 92.3% white, 2.4% Hispanic. Per capita income: $26,529.
Jamestown is the 9th largest city in North Dakota. It was built in 1872, just after the Northern Pacific Railroad added a  new section to the Northern Transcontinental line. The same year Jamestown was built, the US Army built Fort Seward nearby. Their sole purpose was to protect the area where the railroad crossed over the James River. The fort was decommissioned in 1877, but the city continued to thrive. The Roman Catholic Diocese was established in Jamestown on November 10, 1889.

Jamestown's economy is based on manufacturing, though they have several attractions for tourists as well. They have two golf courses, an arts center, and the Jamestown Resevoir and Jamestown Dam created artificial lakes that attract a lot of fishermen and women, as well as water sports enthusiasts. Jamestown has two claims to fame: It is the hometown of American author Louis L'Amour. There is a walking tour one can take to retrace his steps. Jamestown is also home to the World's Largest Buffalo Monument.

While researching cities in North Dakota, I came across this tourist trap attraction and knew this was the city I had to use. I am a sucker for this sort of thing. There's just something so awesome about these sorts of attractions. This part of North Dakota, of course, had been home to a lot of buffalo, and still is, so it's an appropriate tribute.

Along with buffalo, prior to American and European settlers claiming the land, this territory had been home to the Crow, Sioux, and Blackfeet tribes. They still have a presence in the state, though much smaller now.

The Food: Ovnsstekt Torsk Med Sitron(Lemon-Baked Cod), Lefse, and Rice Pudding
What in the world are those foods, you may be asking yourself. And what culture are they from? The answer to the culture: Norwegian. What are they? You'll find out! 

As of 2009, North Dakota's population is 30.8% Norwegian American. That makes North Dakota the state with the most Norwegian Americans in the entire nation, even more than Minnesota! Most Norwegian settlers came to the area between 1870 and 1920. They have a long and well-established history here. Because of this, and because of the fact that I can't bring myself to try buffalo, I had to try out some of the well-known Norwegian dishes I've never had before. 

Ovnsstekt Torsk Med Sitron(Lemon-Baked Cod):
Cod is a fish I tend to eat only in fish-and-chip form. I tried to get my hands on some of the fish native to North Dakota, like pike or walleye, but it's pretty much impossible to find here in Seattle. While researching Norwegian entrees, I came across this cod recipe and it was pretty different from how I've ever had it prepared before, so I chose it. The recipe is from the internet, so I will provide the link in the sources at the end of this post. I can't copy and paste it because the formatting is too different to deal with, but I'll talk you through what I did.

Basically, you need a quarter of a pound of cod per person, skin and bones removed. You mix lemon juice and melted butter and brush that over the fish. The breading is simply flour, salt, and pepper, and you dredge both sides of the fish in it. Place the fish in a baking pan and drizzle any remaining lemon-butter over it and top with paprika. Bake at 350 degrees for 25-30 minutes, or until cooked through and fish starts to pull apart. Serve with lemon slices.

This is an incredibly simple way to prepare fish. Because the cod is something I'm so used to in fish-and-chip form, it was odd to eat it this way. I think of the fish I've prepared so far this year, this was the "fishiest". It needed a lot of lemon, but the salt and pepper from the breading was definitely enough to season it. I can see now why people tend to eat this fish with vinegar or tartar sauce, it needs something equally strong to hold up against the flavor of the fish. It also smelled the "fishiest" too, but that's what scented candles are for, right?! I don't sound like I'm selling this to you very well, do I? Let's just say, if you are a cod fan, you'll love this recipe!


Lefse: Potato Flatbread
Lefse is basically a cross between a mashed potato pancake and a flour tortilla. Literally, that's how it's made, with mashed potatoes and flour, and rolled thin and fried like a flour tortilla. You are supposed to use a special rolling pin with little squares etched in it to get the texture of the lefse just right. And you're supposed to use a special stick for picking it up, carrying it to the griddle, and turning it. I had none of this, and they are very expensive to buy for just one time. I originally opted out of making lefse because of this and had chosen a different potato recipe to use, but I made a last-minute decision to make lefse anyway because the other recipe didn't appeal. Lefse is pretty much the most well-known recipe I can think of when it comes to Norwegian food and I am glad that I made it. I decided to try it out anyway, without any of the proper equipment, and it might be a travesty, but I'd do it anyway. Fortunately, I was struck with inspiration right as I was about to start rolling the lefse. I have a towel that has squares in it and with that and some masking tape, my rolling pin was transformed into a rudimentary lefse pin!
You have no idea how proud I was of this! If you have a towel like this, I recommend rigging something like this up instead of spending major dollars on a special pin, unless you make lefse a lot. Then the actual pin might be worth it. The main thing to keep in mind is because of how the towel is rolled over the pin, there's one part that sticks out, so you can't really roll it exactly as you would a rolling pin. You sort of have to roll it back and forth halfway. But it still works.

I also used the rolling pin to transport the dough from the board to the pan and I used a fish spatula to turn it. No special stick needed. I'm pretty proud of how these turned out, though I've never had lefse before, so I can't compare it to the authentic kind. My recipe comes from The Frugal Gourmet's cookbook called "The Frugal Gourmet on Our Immigrant Ancestors," and I will write out the recipe for you. I'll write it out as-is, but note that I made a half batch and it turned out just fine.

2 1/2 lb. russet potatoes, peeled and cut in half
2 Tbsp. butter, room temperature
1/4 cup milk
1 tsp. salt
2 cups all-purpose flour plus additional flour for rolling and dusting

Boil the potatoes until tender. Drain them well, return them to the pot, and stir over low heat, a few minutes, to dry the potatoes, being careful not to brown them.
Mash the potatoes, using a potato ricer(I don't have a ricer anymore and used a masher and it was fine), in a heavy-duty electric mixer bowl. Add the remaining ingredients, except for the flour for rolling and dusting, and mix well. Blend together to form a nonsticky dough. Knead and form into a smooth log. Divide it into 24 pieces. When you are ready to prepare the lefse, roll each into an 8"-10" circle. Turn the lefse as you roll it and keep it well coated with flour to prevent sticking. The dough is soft, but try to use as little flour as possible.
Preheat the electric griddle or frying pan to 375 degrees, or use a griddle or frying pan over medium heat. Lightly grease it with oil.
Shake excess flour off each circle of lefse and place it in the pan. It will start to bubble; cook until the bubbles are lightly browned, about 1 1/2 minutes. With a spatula, turn and cook the other side. Stack the lefse on a wire rack as they are cooked, or wrap them in foil and keep warm in a 200 degree oven.
They can be frozen and quickly reheated in the frying pan or on the griddle. Makes 24.

Once they were finished, I buttered one side and rolled them up. A couple I tried plain, and a couple I tried sprinkled lightly with sugar and cinnamon and then sprinkled with lemon juice before wrapping them up. I liked the sweetened ones better, I think. The lemon juice worked really well with the sugar and cinnamon and I highly recommend trying it that way! This was one of the most fun things I've made for this blog. I think it was because of the obstacles I had to overcome with the rolling pin. It's fun to come up with ways to make something happen without the proper equipment.

Rice Pudding:
This meal called for dessert, and rice pudding just seemed like the thing to make. I had made rice a couple days earlier and purposely made extra for this. I had a couple recipes, but I pretty much turned it into my own, so I'll just write it out. Sorry, this is one of those recipes without real measurements...

Cooked rice
Milk
Cinnamon
Nutmeg
Cardamom
Raisins
Dried sweetened cranberries
Vanilla extract
Almond extract
Orange blossom extract
Unsweetened applesauce
Zest of one lemon

Everything gets placed in a large saucepan and heated up. Use a spoon to break apart clumps of rice. Just cook the heck out of it and keep adding more milk as the rice thickens. You can add sugar if you want and you can season it however you like. I basically scrounged through my spice rack and baking shelf and threw in whatever sounded good.

I tried mine hot last night, but it makes a ton so I will try it out today cold. I am unsure how I feel about this one. I think the lemon zest was actually too much. I should have left that out. And possibly the applesauce. I think that sort of messed up the texture. I'm not used to eating sweet rice, except in sushi-format, and that's not sweet sweet, so this was something my taste buds were not used to. I think if I'd been raised on rice pudding, it would have been awesome, but for me, it'll take a few more tries before my taste buds and mouth get used to the taste and texture of it. I was shocked, though, at how simple it was to prepare this. It's a great way to use up leftover rice.


What stands out to me most about these foods, besides the fact that they were rather monochromatic, hence the green beans, was the simplicity of the ingredients. The lefse was complicated to prepare, but the rice pudding and fish were not. But all three recipes had a minimal amount of ingredients and that allowed the main ingredient in them to shine. It's like letting the food speak for itself, and truly honoring the ingredient for what it is. I don't know enough about Norwegian food to say if that's how all of their recipes are, or if I just lucked out with these three, but there was something very pure about this meal. Fish, potato, rice. Hearty and filling. No frills, just presented in a way that allows you to truly appreciate them. I really liked it! It makes me want to explore this culture and cuisine more.

Sources:
Baked Cod Recipe

City History

City Stats

City Map

Buffalo Statue Picture

City Pic

Native American History