Showing posts with label baking. Show all posts

Sunday, June 9, 2019

What's in Grandma's Recipe Tin?-Piña Colada Cheesecake

All right, so this week's recipe was a fun one! It presented quite a challenge to me, one I really enjoyed conquering! I chose this cheesecake recipe for a specific reason. One of my friends has some health issues that makes eating difficult, and this weekend is the Jewish holiday of Shavuot/Shavuos, the "dairy" holiday, as she explained it to me. She encouraged me to eat as much dairy as I possibly can this weekend in her stead, and I happily stepped up to the challenge! And as her grandmother passed away just a couple days ago, I thought if I could find a good recipe that fit the dairy bill, I could use my grandmother's recipe, to honor her grandmother's memory. So, I looked through the box and found one cheesecake recipe that has cream cheese, butter, and sour cream all in the ingredient list. That's quite a bit of dairy in one recipe, so I knew it was the perfect one to try out.

The recipe's original title is "O Grancho Cheese Cake" or at least that's what it looks like written on the card. There is no known source of this recipe written on the card, so I don't know if that's the name of the person who created the recipe or a company from long ago that created it, or what, but to me, it means nothing. And it tells me nothing about the cheesecake. I looked at the list of ingredients to see if anything stood out. Crushed pineapple in the batter, and coconut flakes in the crust. Bingo! Piña Colada Cheesecake, a much better and accurate name for this recipe.

As I said, this recipe presented me a few challenges. There were very little instructions on what to do to make the crust other than "mix and press in buttered spring-form pan," and that basically tells me nothing. I had to guess and hope for the best. Fortunately for me, it all worked out rather well! And as it turns out, you don't need to butter the pan. So, without further ado, let me share the recipe with you:

Piña Colada Cheesecake

16 oz. cream cheese
2 tsp. vanilla
1 1/4 cups sugar
3 eggs, beaten
3 cups sour cream*
1 can crushed pineapple** (reserve the pineapple juice)
Crust:
1 cup Graham cracker crumbs
1/2 cup slivered blanched almonds, toasted
1/2 cup coconut flakes
1/2 cup butter
1/2 cup sugar
1/2 tsp. almond extract

Mix the cream cheese, vanilla, and sugar well, until fluffy.
Add the beaten eggs, and blend well.
Add the sour cream and mix until completely blended.
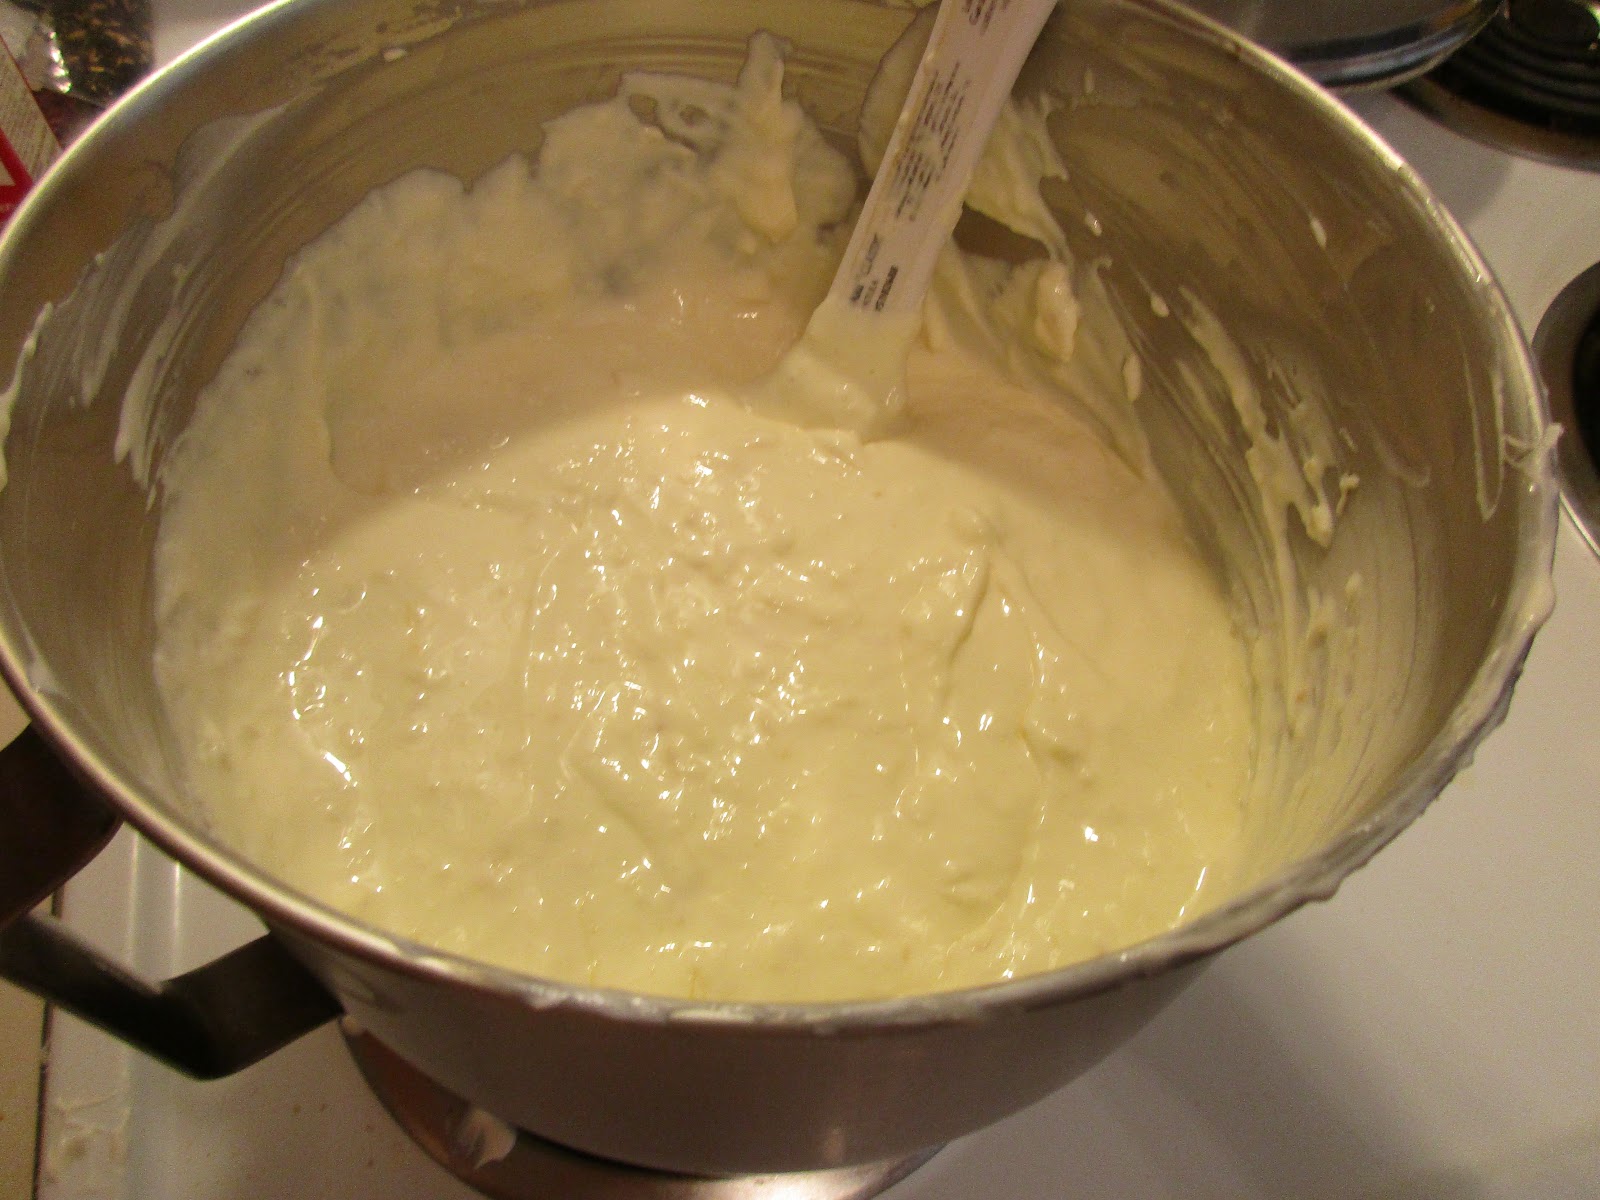
Fold in the well-drained pineapple, and set aside to pour into the crust.
To make the crust:
If you have whole graham crackers, use a gallon-size bag and a rolling pin or a food processor to grind them. I used a food processor for mine. When well-ground, place them in a bowl large enough to fit all the crust ingredients. Place the coconut flakes and toasted almonds in a food processor and process until they're the same size as the crushed graham crackers. Place them and the sugar in the bowl with the cracker crumbs and blend well.

Melt the butter and add the almond extract to it. Pour into the bowl and stir well to fully incorporate it with the crust ingredients.
Dump the crust ingredients into a springform pan and press into the bottom and up the sides. This makes enough to cover the sides nearly to the top. Try to make sure it's uniform, especially on the bottom.
Preheat the oven to 375 degrees. Bake the crust for two minutes to help it set. When that's done, remove it from the oven and pour the batter into the crust. It will nearly cover the sides of the crust.
Bake for 1 hour in the oven, before checking to see how set it is. You will definitely want a sheet pan under this on a lower rack, because butter will melt out of the bottom of the pan and you will regret the mess to clean up, if you don't.

After 1 hour, it may need a little more time to bake. Cheesecake baking is difficult in that it's really hard to tell if it's done, unless you have done this a lot. As I haven't baked a cheesecake in probably 15+ years, I was definitely rusty, and erred on the side of baking longer than it probably needed.
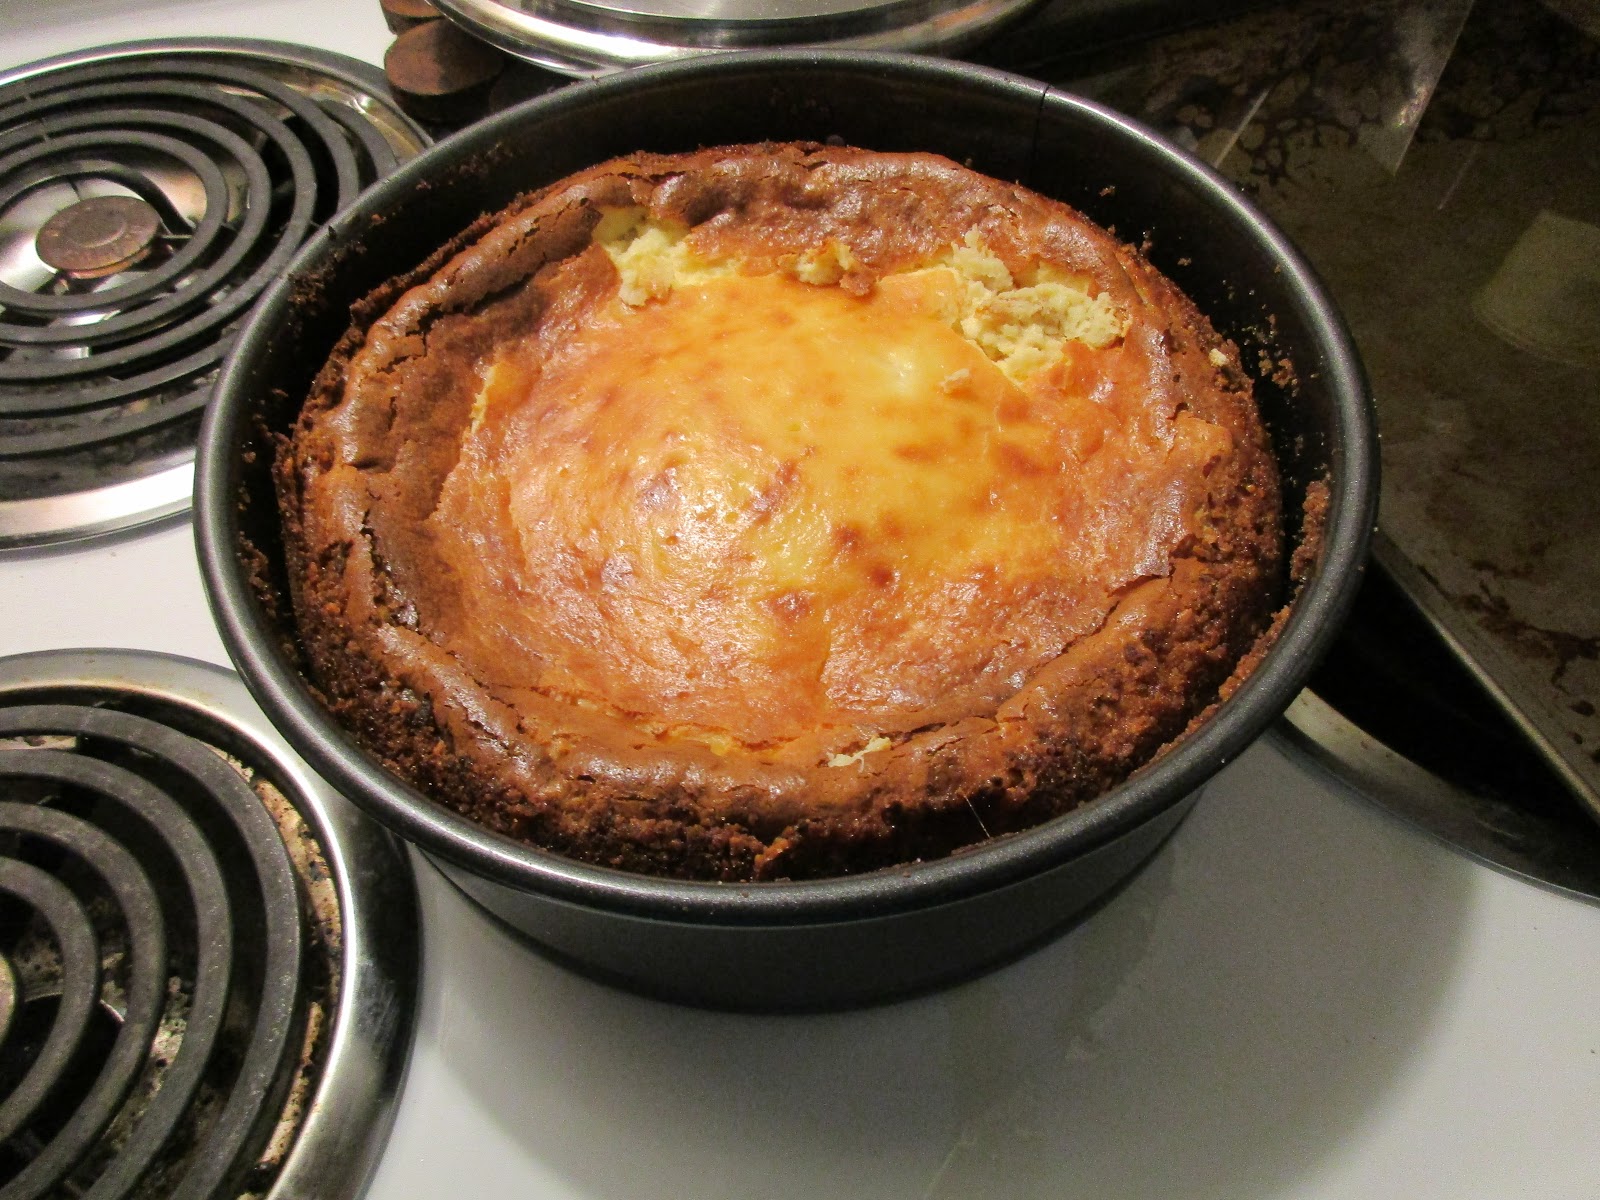
This was after an hour and 15 minutes, and just out of the oven.
This is after it fell. Cheesecakes fall, it's just what they do, don't worry when it happens to yours! It's browner on top than I would like, and cracked around the edge, but I would rather have a browner top than a raw center. Figuring out just the right time to bake comes with practice, and I need more of it, I think! I will admit, it's not the prettiest cheesecake I've ever made or seen, but it's the taste and texture that matters most. I was happy with the results, ultimately. When this is done, let it sit for a while to cool down a bit before placing it in the fridge to cool overnight.
The next day I took it out of the fridge and removed the side of the springform pan. It was time for a taste test.

I found it actually tasted better when it wasn't super cold, so I recommend letting it sit for a while and come closer to room temperature. The texture isn't perfect, and I can't tell if it's because of the pineapple, or over-baking, or a combo of both, but the flavor is pretty good. But it wasn't pineappley enough for my tastes. So, I thought and thought about it and the answer came to me: the leftover pineapple juice that I had saved from the crushed pineapple. I poured it into a pan and and slowly reduced it over medium heat until it was thick and syrupy. Can I just tell you how amazing it tastes poured over the cheesecake?! I poured the rest of it over the rest of the cheesecake and then for a bit of texture, I sprinkled the extra graham cracker crumbs on the top.
I left a little bit without graham crackers on top so that when I take it to work tomorrow, my coworkers can try it with or without if they like.

So, what did I learn from this baking experiment? I learned that I miss making cheesecake and I should probably do it more often to perfect the timing. I learned that even when a recipe doesn't have all the steps written out, if you have enough of a cooking/baking foundation, you can pretty much figure it out, even without them. I learned that pineapple in the cheesecake might make the texture taste a bit funny, but it still tastes great. And honestly, it's the pineapple syrup that takes it over the top. Do not miss this step. Don't be afraid to experiment. It didn't call for that at all, but it just "made" the dish!

This cheesecake is really rich, and the original recipe says it makes 12 servings. I didn't cut mine into 12 pieces, but feel like those are probably big slices and can probably be cut smaller to make more servings. There's a lot of sugar in this, so smaller pieces are probably the way to go!

Cheesecakes feel really fancy, but they aren't that hard to make. They are hard to gauge the doneness, however. That just takes time and practice. What better time to start practicing, than right now!

I don't know if this recipe is kosher or if my friend's grandmother would have enjoyed it. Some people really hate coconut! But I did take some time while making the cheesecake to think about the elders in our lives, and how it's good to listen to them and learn from them while we have them in our lives. This project is helping me to remember that. I would encourage all of us to listen to our elders, learn from them, learn their stories, while they're still here with us. Make sure to hug your grandparents while you still can!

Happy Baking!
-Foodie

*I actually measured the sour cream into cups, rather than used a pint and an 8oz. container of sour cream. This ended up using a few tablespoons more than those, so make sure you have plenty of sour cream on hand!
**The original recipe does't say what size of a can to use and I had every intention of buying an 8oz. can, but the store brand was all out of that size and there was no way I was paying the price of the name brand, so I ended up with a 19oz. can of the store brand, which was probably still cheaper than the smaller size of the name brand. I didn't use all of it, but as you'll see later, I did use all the juice from it, so I recommend the larger size can.


Sunday, May 19, 2019

What's in Grandma's Recipe Tin? -Oatmeal Cookies

Welcome to my newest food blog project! I have been trying to think of a good project idea for a while, but nothing really jumped out of me as a fun idea. My grandmother is currently preparing to move out of her apartment and bequeathed to me three large containers full of newspaper clippings and recipe cards that she had collected over the years, with the words "You'll probably throw them away, but if you wanted to look through them..." So I took them with me and spent an entire day looking through all of them. I narrowed it down to one tin-worth of recipe cards and newspaper clippings to try out, and was thinking of the best time to try them and it hit me: blog project! "What's in Grandma's Recipe Tin?" is the perfect title for this project.

The inaugural recipe for this project is Oatmeal Cookies.
Oatmeal cookies are delicious, but they're not that exciting. They're pretty basic. So why did I choose it this time? Because look at the recipe-there's no flour in the ingredient list. I thought at first that maybe it was a missed ingredient, but then I noticed there are no eggs in there either, another standard for most oatmeal cookie recipes. That made me start thinking it was written this way on purpose after all, and therefore, was much more interesting as a recipe. I mean, no flour, no eggs, how was this cookie supposed to hold its shape? How would the butter and sugar not just melt out of it, leaving a mess of caramel and oats on the sheet pan? I had to see how it would work out. And if it worked out, it's a viable gluten-free cookie recipe and for people who need that, what an exciting thought!

 
I made these Friday night and they weren't very hard to make. First step was mixing the oats with the brown sugar. I used old-fashioned oats, not the quick-cooking kind. 
  
After those were blended together, I added the butter, cut into cubes, and mixed it really well until it was blended.


(Sorry the font is different for this, the picture wouldn't let me add a space and freaked out and only let me add a caption instead...)
 
At this stage, it was almost like a shortbread dough in texture. It doesn't say to, but I refrigerated it at this point for a while to help it stay firm. A while later, I used a small cookie dough scoop to make uniform-size cookies. Some cookies need to be shaped delicately, but since these are so precarious, they actually do better by being rolled tightly into a ball. Don't be afraid to squeeze them into a ball, they'll retain a better shape when they bake.
The wet fork is really an important step because the dough would just crumble if you pressed it with a dry fork. The ones that were pressed down less held their shapes better. I recommend just a gentle pressing down, maybe to about 1/4" thick or so.
The ones with the browner edges were more delicate and crumbly, but the thicker ones held their shape better. Those ones were chewier. Both were delicious, but the crumbly ones are SUPER crumbly. Like, make sure to eat them over a plate or the sink or something cuz you'll end up with crumbs everywhere if you don't!
This recipe made about 5 dozen cookies with the size of the scoop I used. The texture held up the next day when I took them to my family gathering where my father proceeded to gobble them up and then commandeered the rest of the bag. Luckily I have another bag set aside to take to work tomorrow to share with my coworkers.

This was a simple cookie, a delicious gluten-free option for somebody who can't eat gluten and really misses traditional cookies. This was a great inaugural recipe for this project. I get to share them with my friends and family. And hopefully over the course of this project, I'll get to share a lot more delicious food with my friends and family, especially my grandmother, who will be reading along with the blog posts. Grandma, when you read this, know the recipe turned out great! Thank you for passing the recipes on to me!


Tuesday, March 20, 2018

Pi Day 2018

So, this year I planned ahead, picked out a recipe, and actually baked the pie the night before Pi Day so I'd be ready to eat pie on the actual holiday. I am very proud of myself! I chose a recipe card from my collection that doesn't have a source listed, so I have no clue where it came from, but it probably came from a magazine of some sort. Here is the recipe, along with my pictures and notes. Enjoy!

Marquis Old-Fashioned Cream Pie
Crust: 12 whole graham crackers, broken
2 Tbsp. sugar
6 Tbsp. butter, melted
Filling: 2/3 cup sugar
1/4 tsp. salt
1/4 cup cornstarch
2 1/2 cups cold milk
4 egg yolks
1 tsp. vanilla
1/4 tsp. nutmeg
1 Tbsp. butter
Fresh berries

1.) For Crust: Heat oven to 350 degrees. In a food processor, blend graham crackers and sugar until finely ground. (Note: I did this later in the evening and didn't want to deal with the noise, so I put the graham crackers in a gallon-size bag and crushed them with the bottom of a heavy cup and also a rolling pin and then I mixed in the sugar. It did just as good, although the crumbs were probably a little bigger than if you'd done it in a food processor. It held up just fine though.) Add butter and pulse until combined. (I dumped the crumbs in a bowl and just mixed the butter in with a fork) Reserve 1/4 cup crumb mixture for topping. Press remaining mixture into bottom and sides of a 9" pie pan. Bake until lightly browned, about 7 minutes. Cool while preparing filling.
This is post-baking.

2.) For Filling: In a 3qt. saucepan, whisk together sugar, salt, and cornstarch. Add milk and egg yolks and whisk to combine. Heat mixture over medium heat, whisking constantly, until mixture begins to bubble. Cook 1 minute longer.
(Note: This takes a lot of upper arm strength. It does take time for this to come to a boil and start to thicken, but stick with it, because it will work and it's worth it! Also, this will create a thick layer of froth while it's heating and you'll probably be concerned about it, but it will disappear when it thickens.)

Remove from heat and stir in vanilla, nutmeg, and butter; place over an ice bath to cool slightly before pouring into baked crust.
I thought the nutmeg was a little too strong, for my tastes. I would cut this 1/4 tsp. down to 1/8th next time. Nutmeg is a classic flavoring with dairy-based sauces, though, so don't skip it entirely!
This was my idea of an ice bath because I don't have ice cube trays in my apartment. It worked pretty well, actually. I recommend this method if you too, don't have ice cubes readily available!
This is the cooled filling after it's been whisked over the ice bath.
Here is the nearly finished product. Before being covered with plastic wrap.

Cover with plastic wrap and refrigerate until firm, 5 hours or overnight. Sprinkle with reserved graham cracker crumbs. Serve cold with berries.

Makes 6 servings (Note: The recipe says it makes 6 servings, but I think that's not accurate. I'd say 8 servings is correct because 6 pieces would be gigantic!)

I used a combo of blueberries and blackberries because that is what my store had on sale! Raspberries would be fantastic with this as well. Strawberries might work, but you'd need to cut them into smaller pieces. The top of the pie is slick so the berries might slide around a bit, but the graham crackers help keep them in place.
My piece!

I took the rest of this to work the next day and when I set it out on the counter on my morning break, it only took about 10 minutes for it to be devoured!

This was a fun experiment and I'm really glad it worked out so well. I usually don't have luck making homemade pudding-type foods, to the extent that I was actually banned by my parents at one point in time from trying anymore, when I still lived at home. I guess I was wasting too many ingredients! But nothing was wasted on this pie. If you're a cream/custard pie fan, this is the pie for you!

Happy Baking!


Sunday, December 4, 2016

Holiday Soiree: St. Nicholas Day


The Holiday: St. Nicholas Day(Countries all over the world)
St. Nicholas Day is celebrated on December 6th in western European countries and on December 19th in eastern European countries, but it is celebrated all over the world as well.

Santa Claus, the man, the myth, the legend, was actually, apparently, an ordinary man who did exist at one point in time. He was a Greek man, born in what is today known as Turkey. He lived in the 3rd century CE. He was orphaned at a young age, and raised in the Church by his uncle who was a bishop. He was said to have lived his life helping the poor and downtrodden. Over the years and centuries, several miracles were attributed to him. According to this, he was canonized well before the current practices for canonization were introduced. No actual date for his canonization is known, it seems as though, he just always has been a saint.

I know there is currently some "controversy" about a particular mall in America that has hired an African American man to portray Santa this year, and some people are even calling for a boycott. When I learn more about St. Nicholas, the more I am convinced that he probably wasn't white. A man of Greek heritage, raised in Turkey? He probably looked Middle Eastern more than anything. Although, I'd like to imagine he looked like this guy:
I think my point is, does it really matter what Santa Claus looks like, when we're supposed to follow his example to be kind to one another and to help each other out? Maybe Santa will bestow us all with open hearts and minds this year for Christmas, I think that's the gift the world truly needs right now!
 
The Food: Cookies 
I looked for meals to make, but nothing stood out to me. What I came across over and over again, however, is cookies! In many countries, St. Nicholas Day is the day children leave out cookies for Santa Claus, and the night he delivers presents. I'm not sure if they do this again on Christmas Eve, or not, but whatever you generally do for Christmas Eve, is fine to do for St. Nicholas Day! I picked out two recipes to try. One of them I loved, one of them, not so much. I will post the link to the recipe I didn't care for, so you can try it out for yourself if it interests you.

Pineapple Cookies
This is the recipe I didn't care for. There was nothing wrong with it, I just found it too sweet for my tastes. It sounds odd to describe something sweet as "bland," but this is how I found it. It was just sort of one-note. I don't know if I had cut down on the sugar if that would have helped, but it just didn't work for me.


I have a pineapple that I was trying use up. Between that and the pineapple macadamia nut bread I made on Friday(another fail, sadly,) I am having to conclude that baking with pineapple is just not meant to be for me. Cooking with pineapple might work for some things, but baking just doesn't seem to turn out right.

And now, for the one that did work! You know them, you love them! They're called Snowballs or Mexican Wedding Cookies or Russian Teacakes, or in this case, Hungarian Holiday Butter-Nut Cookies. It seems as if every nation claims ownership of these cookies, but they can't all have invented them. I did some research on these cookies, and the consensus is this: Nobody knows where these cookies originated, or when. So, call them what you will, just make sure you make them and eat them!

Hungarian Holiday Butter-Nut Cookies(source unknown)
1 cup butter, softened
1/2 cup sugar
1 tsp. vanilla
1/4 tsp. salt
1 egg yolk
2 1/4 cups flour
1 cup ground pecans(Actually ground, not chopped. I used a food processor to get it as finely ground as I could without it turning into nut butter.)
Powdered sugar

1.) In a large bowl with electric mixer, cream butter, sugar, vanilla, salt, and egg yolk until smooth.
2.) In medium bowl, combine flour and pecans.
Gradually beat into butter mixture. Wrap dough in plastic; refrigerate 1 hour or up to 2 days. (Please note that if a cookie recipe like this says to wrap and chill, it can also be frozen at this point. Just thaw it out when you're ready to finish the process. That's what I did with this. I made one dozen and froze the rest of the dough for Christmas.)
During this time, the flavors blend and develop, bringing out the butter flavor of the dough.
3.) Preheat oven to 350 degrees. Shape dough into 1" balls. Place cookies 1 1/2" apart on ungreased cookies sheets.
4.) Bake 12-15 minutes. Immediately place in a bowl with powdered sugar and roll cookies in it to coat thoroughly.
(I didn't take a picture of the finished product by itself, but if you scroll back up to the pictures of the pineapple cookies, the last picture has a shot with them in it.)
Makes about 4 dozen

I had leftover ground pecans and rather than use it for something else or forget I had it until it went bad and then composted it instead, I mixed it in with the powdered sugar that I rolled the cookies in. It gave it a darker color than the usual pure white, but it did make it taste extra pecan-y. I really liked it that way and so did my sister.

I don't know about you, but I think cookies is one of the best parts of Christmas. I usually do a few types, a blend of tried and true, and brand new. Sometimes they work out and sometimes they don't! But it's fun to try them out, regardless! Make sure to make some this year for Santa! He'll enjoy them for sure!

Until next week!


Sunday, October 16, 2016

Holiday Soiree: Pumpkin Extravaganza

Holiday Soiree: Pumpkin Extravaganza
So, like last week, there wasn't a specific holiday for this week either, but I decided to continue with the use of autumn and Halloween-themed ingredients. This week was pumpkin, in canned form. I looked through my recipes and found a really interesting recipe for pumpkin French toast that used canned pumpkin in the egg wash. It called for a hearty bread, and when I ran across another recipe for pumpkin egg bread, I knew I'd found what I needed. Pumpkin French toast made with pumpkin bread? That so needed to be a thing! This turned out to be a great meal, and none of it was very difficult to do.

The first recipe is for the bread. Most pumpkin breads are quick breads, meaning there is no yeast and it has more of a muffin-like texture. Think zuccchini bread, or banana bread. This recipe was more unusual in that it was a traditional bread, with yeast. It was quite like a Challah bread, but with the addition of canned pumpkin,which gave it an amazing color, and pumpkin pie spice, which added more flavor than the pumpkin actually did. It also called for bread flour which I have never worked with before. I'm glad I had a chance to try it out because I think it created a superior product. Here's the recipe:

Pumpkin Egg Bread
1pkg. active dry yeast
3 Tbsp. warm water (110-115 degrees)
1/2 cup canned pumpkin
1 egg
2 Tbsp. brown sugar
2 Tbsp. butter, softened
1 tsp. pumpkin pie spice
1/2 tsp. salt
2-2 1/2 cups bread flour
Egg Wash-
1 egg
1 tbsp. water

1.) In a bowl, dissolve yeast in warm water. In another bowl, combine pumpkin, egg, brown sugar, butter, pie spice, salt, the yeast mixture, and 1 cup flour; beat on medium speed until smooth. Stir in enough remaining flour to form a soft dough (dough will be sticky).
2.) Turn dough onto a floured surface; knead until smooth and elastic, about 6-8 minutes. Place in a greased bowl, turning once to grease the top. Cover with plastic wrap and let rise in a warm place until doubled, about 1 hour.
3.) Punch down dough. Turn onto a lightly floured surface; divide into thirds. Roll each into a 16" rope.
Place ropes on a greased baking sheet and braid. Pinch ends to seal; tuck under. Cover with a towel; let rise in a warm place until almost doubled, about 45 minutes. Preheat oven to 350 degrees.
4.) For egg wash, in a bowl, mix egg and water; brush over loaf. Bake 20-25 minutes or until golden brown. Remove from pan to a wire rack to cool.
Makes 1 loaf, 12 slices. 126 cal, 3g fat, 1g fiber per slice

As you can see, this bread looks really amazing when it's finished! It's very much like a Challah bread, but the color and flavor are different. It has an amazing flavor and texture and as far as bread goes, was pretty simple to make. The bread flour is the key. Bread flour has more gluten in it than regular flour, so it's really only suited for bread-making. It was tougher to knead because of the extra gluten, so don't worry if you are kneading it and wondering why it's taking a little extra strength to get it to work. And sorry to the gluten-intolerant folks out there, but this recipe isn't going to work for you...Though, if you are able to adapt it to gluten-free flours, please let me know, I'd love to her how it turns out!

The next recipe is for French toast that calls for a more heavy-duty bread than just regular bread. I thought the bread I made would work perfectly, and I was right! This is also a super easy recipe, and I actually have a source listed for this one. This is courtesy of this food blog. Since I have the link for it, I am not going to write it out here. I will share the pictures, though!

This is the egg batter once you've whisked it very well. The pumpkin takes a lot of whisking to break down and incorporate into the rest of the ingredients. It will look slightly like the filling for a pumpkin pie when it's mixed properly.
Here it is cooking on the stove. If you use white bread, it probably won't look quite so orange because the bread I used was orange to begin with.
The finished product! I served it with other breakfast foods for a delicious breakfast-for-dinner. The store had some awesome country-style bacon on sale. It looks very different from regular bacon and I highly recommend it! You could use syrup on this French toast, but I prefer a small sprinkling of powdered sugar on mine. It adds a touch of sweetness but doesn't drown out the flavors you worked so hard to create!

My sister ate this too and loved it. She doesn't normally like stuff like this, so that is saying something! I had a lot of fun making these two recipes and was really excited that they both turned out so successfully. I had enough bread and egg wash left over to make more for my lunch today too! And the rest of the bread will be used as regular toast. I haven't tried that yet, but I have the feeling it will make amazing toast!

Happy Baking!


Sunday, December 20, 2015

Dining-In: A Culinary Tour of America-Mankato, Minnesota

The Location: Mankato, Minnesota
2013 population: 40,641. 88.4% white, 3.7% African American. Per capita income: $24,330.

The region Mankato is part of was once home to different groups of Native Americans, and over time, when the East Coast began to be populated with more European Americans, the Native Americans were displaced and many ended up relocating in the Mankato area. European Americans also followed suit and began settling in the area in February of 1852.

Mankato as a city, was formed on May 11, 1858, by a man named Henry Jackson. Legend has it that the town was intended to be called Mahkato, the Dakota word for Greenish Blue Earth, but there was a clerical error, and it was entered as Mankato. The railroad came to Mankato in 1868, connecting it to the greater world and making it much easier to travel to and from.

"Fun" Fact: Mankato was the location of the largest mass execution in United States history. On December 26, 1862, the US Army executed 38 members of the Dakota tribe for their role in an uprising known as the Dakota War in 1862. 303 Native Americans had actually been sentenced to death, but President Lincoln pardoned all but 38.

You may be asking why I chose Mankato, out of all the cities in the state of Minnesota, why such a random, obscure town? Well, the answer is simple: Little House on the Prairie. Not the books, the tv series. Mankato was sort of the go-to town that the people on the show traveled to for trading and other business. And one of my rules in life is, if you can connect something to Little House on the Prairie, you do, no questions asked! And so, here we are!

The Food: Scandinavian Christmas
So, I have had a bad cold and was unable to do this blog project for two whole weeks. This set of food was actually scheduled for last week and I was going to take the food to a family gathering to share, but I was too sick to cook and too sick to attend the gathering. I was very sad to miss out, especially since one of the items was tied to a date. In the end though, I decided to do it this week instead and freeze the results to bring for Christmas Eve and Christmas Day.

Lussekatter-Lucia Buns
December 13th is St. Lucia Day, and though St. Lucia is a Catholic saint, she is highly celebrated in the mostly-Lutheran Scandinavian countries. If you have ever seen drawings or pictures of blonde girls with wreaths and lit candles in their hair, this is it. Traditionally, the eldest daughter in the family dons the wreath and candles and serves her family Lucia Buns, which are a saffron-flavored and -colored sweet roll.

I have had this recipe for Lussekatter for years. Every year around Halloween, I pull out my holiday recipes and decide what I'm going to make for the year, for Thanksgiving and Christmas. Every year I pull out the recipe and I say, "I'm gonna make these finally!" and every year, I don't, and then I put it back till next year, where the ritual is repeated. When I started this blog project, I thought this would be a great opportunity to finally make these. And in keeping with the tradition, it fought me every step of the way. First off was getting sick when I was supposed to make them. I wondered if I should forget it, yet again, and put the recipe away for another year. But then I decided that I am neither Scandinavian, Lutheran, nor Catholic, so what the heck did it matter if I did it on the proper day or not? So, I did it, a week late, but I did it! And then there was preparing to make it. When you bake, one of the most important things to do is get your mis en place, this is a French term that basically means "getting your sh-- together". You make sure you have all the stuff you need before you get too far into the process and find out something's missing and your project is ruined. I had just gotten back from the store with ingredients for my other recipe, yet did not look at the ingredients for this one. Of course, it turned out I didn't have enough yeast, so back to the store I went and bought yeast. Then I was able to get started!

Traditionally, these buns have saffron in them, but if you can't find it or afford it, you can use turmeric instead. This particular recipe does not have either in in, but as a nod to it, I added a pinch of turmeric to the egg wash I put on the tops before baking to turn it a bit yellowish. If I had thought of it ahead of time, I would have added it to the milk and let it color the entire dough itself, which is how it's supposed to be done.

Here is the recipe:
3/4 cup milk
2 pkg. dry yeast
1/2 cup lukewarm water
2/3 cup sugar
5 cups flour, sifted(I did not notice this part, I would definitely sift it)
1/2 cup softened butter
2 eggs
1 tsp. salt
1 tsp. ground cardamom
1/4 cup seedless raisins(You need two per roll, so a total of 64)
1 egg white, beaten slightly with 1 Tbsp. cold water(I used the whole egg after realizing it should be a yellow dough, I added a pinch of turmeric too. It worked pretty well, I think.)

Scald milk and cool to lukewarm. Add yeast to lukewarm water and mix until yeast is dissolved. Add milk, sugar; mix well.

Add two cups flour and beat until smooth. Add butter, egg, salt, and cardamom. Beat to well mixed. Gradually add in the remaining three cups of flour until well-incorporated. Turn out on a floured board. Knead to smooth and elastic. Place in bowl. Let rise until double in bulk. Punch down and repeat.(Note, I did not repeat, I went directly to the next step. I have never heard of a bread dough where you let it rise and punch it down two times before moving on to the formation and final rise step. You can try it and see what happens, but I can't vouch for it...)


Divide dough into 32 pieces. Roll each piece until about 16" long. Cut in half. Place two side-by-side and curl up ends. (As usual, I didn't actually really read the recipe as I went along and didn't do this. I rolled each piece out as much as I could and then rolled it up into a sort of S shape, making 32 rolls. This is possibly why they came out a bit on the dry side, because they were too small.) Place raisins in curl.

Cover-let rise until double. Brush with egg white and bake at 350 degrees for 11-12 minutes.


The cardamom flavor in these rolls is amazing! I really love the flavor of cardamom, it's a nice change from cinnamon. It's a prominent flavoring in Scandinavian cooking and baking. I like to think about the history of food and these buns are a good example. How do cardamom and saffron, spices from Asia or the Middle East, make their way to the northernmost parts of Europe? Why, the spice trade of course! You can see the geography and history sitting right there in the roll, and you can taste it as you eat it. Portable, edible history is always the best kind, I think.

The next recipe is a Christmas cookie recipe I have also had for a very long time but never tried. I decided it fit in very well with the buns and the theme of the blog meal. There is an icing for these cookies, but I did not make it yet. Since I froze the cookies to take to Christmas Eve and Day, I will make the icing fresh and put it on the thawed cookies. They were pretty awesome even without it, though!

Scandinavian Almond Bars-Source: Taste of Home Magazine

1 cup sugar
1/2 cup butter, softened
1 egg
1/2 tsp. almond extract(I have to thank the tall man at the grocery store for reaching to the very back of the top shelf for the almost extract, or I would have been stuck with the imitation stuff!)
1 3/4 cups flour
2 tsp. baking powder
1/4 tsp. salt
1 Tbsp. milk
1/2 cup sliced almonds, chopped(These are so thin you can actually crush them in your hand and not need a knife and cutting board to chop these up)
Icing:
1 cup powered sugar
1/4 tsp. almond extract
1-2 Tbsp. milk

In a mixing bowl, cream sugar and butter; beat in egg and extract. Combine dry ingredients; add to creamed mixture and mix well. (The recipe does not call for chilling the dough, but I do think this type of dough would benefit well from it. If I was to make this recipe again, I would chill the dough.)

Divide the dough into fourths; form into 12"x3" rectangles. Place 5" apart on greased baking sheets. Brush with milk; sprinkle with almonds.


Bake at 325 degrees for 18-20 minutes or until firm to the touch and edges are lightly browned. (I found 18 was too much and the first batch was a bit overdone. I did 15 minutes for the second batch and it turned out better. 14 would probably have been best.) Cool on pans for 5 minutes, then cut diagonally into 1" slices. (I found mine stuck to the pan, use a spatula and carefully remove each rectangle to a cutting board ASAP.) Remove to wire racks to cool completely. Combine icing ingredients; drizzle over bars.

Makes: About 4 dozen


These have a texture akin to biscotti, and I thought it could have stood to have a bit more almond flavor. Next time I would double the amount of extract I used to help bring that flavor out a bit more. I am also curious to see what the icing will do to the flavor. I am not generally an icing person, but it will add more almond flavor, so I'll try it out.

Though neither of these recipes turned out perfectly, I really had fun making them, and that's all that really matters. I would make them both again, with the small changes that I think would make them even better. If you are of Scandinavian descent or just enjoy the cuisine, I highly recommend both of these! You can have St. Lucia buns next December 13th!

Sources:
City Stats

City Info

City Map

City Pic