Sunday, November 27, 2022

The Twelve Weeks of Christmas: Week 9

The Twelve Weeks of Christmas: Week 9

Miracle on 34th Street

This week I made my recipes early so my family and I could try them out on Thanksgiving. It's the first time this season that I've been able to share these recipes with people for the first-tasting. I chose Miracle on 34th Street because it begins on Thanksgiving and has an important "meet cute" dealing with the Thanksgiving meal. I was unable to track down the scene online, but I immediately thought of it for this project!

I made three sides, two of which were from recipes to test, and one was my own take on something I tried a couple weeks ago. Luckily, they all turned out pretty good! My family enjoyed getting to try them all and even my sister, the picky eater, tried them all, even if she didn't eat a lot of it!

First up was this recipe that I made on Monday in my spare time while working from home. Cranberry sauce is a good recipe to make several days ahead and save you the time closer to Thanksgiving to work on the more complicated recipes. This was pretty simple to make.
Here are all the ingredients, minus the thickener, getting ready to cook on the stove!
Cranberries really are so pretty, aren't they? Here is the mixture, sugar melted, and the thickener added.
It takes a little time for it all to cook down just right, and to start thickening, but it will, just be patient!
Here it is, done, and just needing to sit for a bit to cool down.
And here it is, ready to be chilled in the fridge. You can see how much it thickens up and solidifies. This makes a LOT of cranberry sauce, so you could easily cut this recipe in half, if you wanted and still have plenty to use!

I found this to be very tasty, but a bit too sweet for my tastes. I would cut the amount of sugar in half next time and try it that way. You can always add more, but you can't take away. This was really easy to make, and if you've never made cranberry sauce from scratch, this is a great one to try.

Next up was a green bean casserole recipe. I have a few of these and thought this was a great time to try one out. I wasn't able to track down the source so I'll go ahead and type it out for you.

New Green Bean Casserole
3lb. green beans, trimmed and cut in half
4 large shallots, divided
1 Tbsp. olive oil
1 1/2 cups course fresh breadcrumbs
1 tsp. fresh thyme leaves, chopped
Salt/Pepper
3 cups milk
3 Tbsp. butter
1/4 cup flour
1/8 tsp. nutmeg
1/2 cup freshly grated Parmesan cheese

1.) Preheat oven to 350 degrees.
2.) Heat covered, 8 qt. saucepot of salted water to boiling on high. Add beans and cook, uncovered, 6 minutes or until bright green and just tender. Drain well and transfer to shallow 3-qt. glass or ceramic baking dish.
3.) Meanwhile, finely chop 2 shallots. Thinly slice remaining shallots; set aside. In 12" skillet, heat oil on medium until hot. Add chopped shallots and cook 4-7 minutes or until browned and tender, stirring occasionally. Add breadcrumbs and cook 2 minutes or until dry and golden, stirring. Transfer mixture to large bowl. Stir in the thyme, 1/4 tsp. salt, and 1/4 tsp. pepper.
4.) Microwave milk on High for 4 minutes or until milk is warm.
5.) Meanwhile, in same 12" skillet, melt butter on medium. Add sliced shallots and cook 5 minutes or until golden brown and tender, stirring occasionally. Add flour and cook 2 minutes, stirring. Gradually pour milk into flour mixture in slow, steady stream, stirring constantly; heat to boiling, stirring. Stir 2 minutes longer or until thickened(mixture should have the consistency of heavy cream.) Stir in nutmeg, 1/4 tsp. salt, and 1/4 tsp. pepper.
6.) Pour sauce over green beans; gently stir until green beans are evenly coated. Stir Parmesan cheese into bread crumb mixture; spread evenly over green bean mixture in casserole.
7.) Bake casserole 30 minutes or until breadcrumbs are golden brown and sauce is bubbling.
Makes 12 servings

I cut this recipe down to 1/3 because we were only 4 people and had no need of a full recipe. It worked just fine. I was going to prep some of this the day before but ended up doing all of it the day of and it worked out well. Sometimes if you prep green beans too soon, the ends can dry out.
Blanching the beans.
Half the shallot is chopped and the other half is sliced.
Sauteing the chopped shallots for the topping.
Added the breadcrumbs. I used panko for this.
In the same pan, I wiped out first, sauteing the sliced shallots in butter.
Cooked till golden and adding the flour to make the roux.
And slowly adding the milk to mix. I did it in bits and stirred as I went so the roux mixed in as I cooked.
All the milk is now mixed in.
And cooked until thickened.

Getting the rest of the casserole assembled. Mixing the sauce into the beans, getting the Parmesan ready to add to the breadcrumbs and sprinkle on top.
All mixed!

All topped and ready to bake!
And right out of the oven. I think it was too much topping for the amount of green beans so next time I'd use at least half of that.

This tasted really good, and I thought it was a nice take on the classic green bean casserole. It is mushroom-free for people who don't like mushrooms. The shallots are an inspired choice, as I think they are a highly underappreciated aromatic. Please use shallots more, if you're not too familiar with them. You won't be disappointed.

Last up was my own version of a recipe I tried a few weeks ago. It doesn't have a name, but it's mashed, roasted acorn squash.
So, cut open acorn squash and remove the seeds. This roasts on a sheet pan, so it's a pretty simple cooking process.
Here is the olive oil with salt, pepper, smoked paprika, granulated garlic, crushed rosemary, and dried thyme. I didn't measure anything, but I definitely should have doubled all the seasonings.
Spoon the oil over the squash and leave it upright on the sheetpan. Roast it in a 400 degree oven for about 45 minutes to an hour until softened.
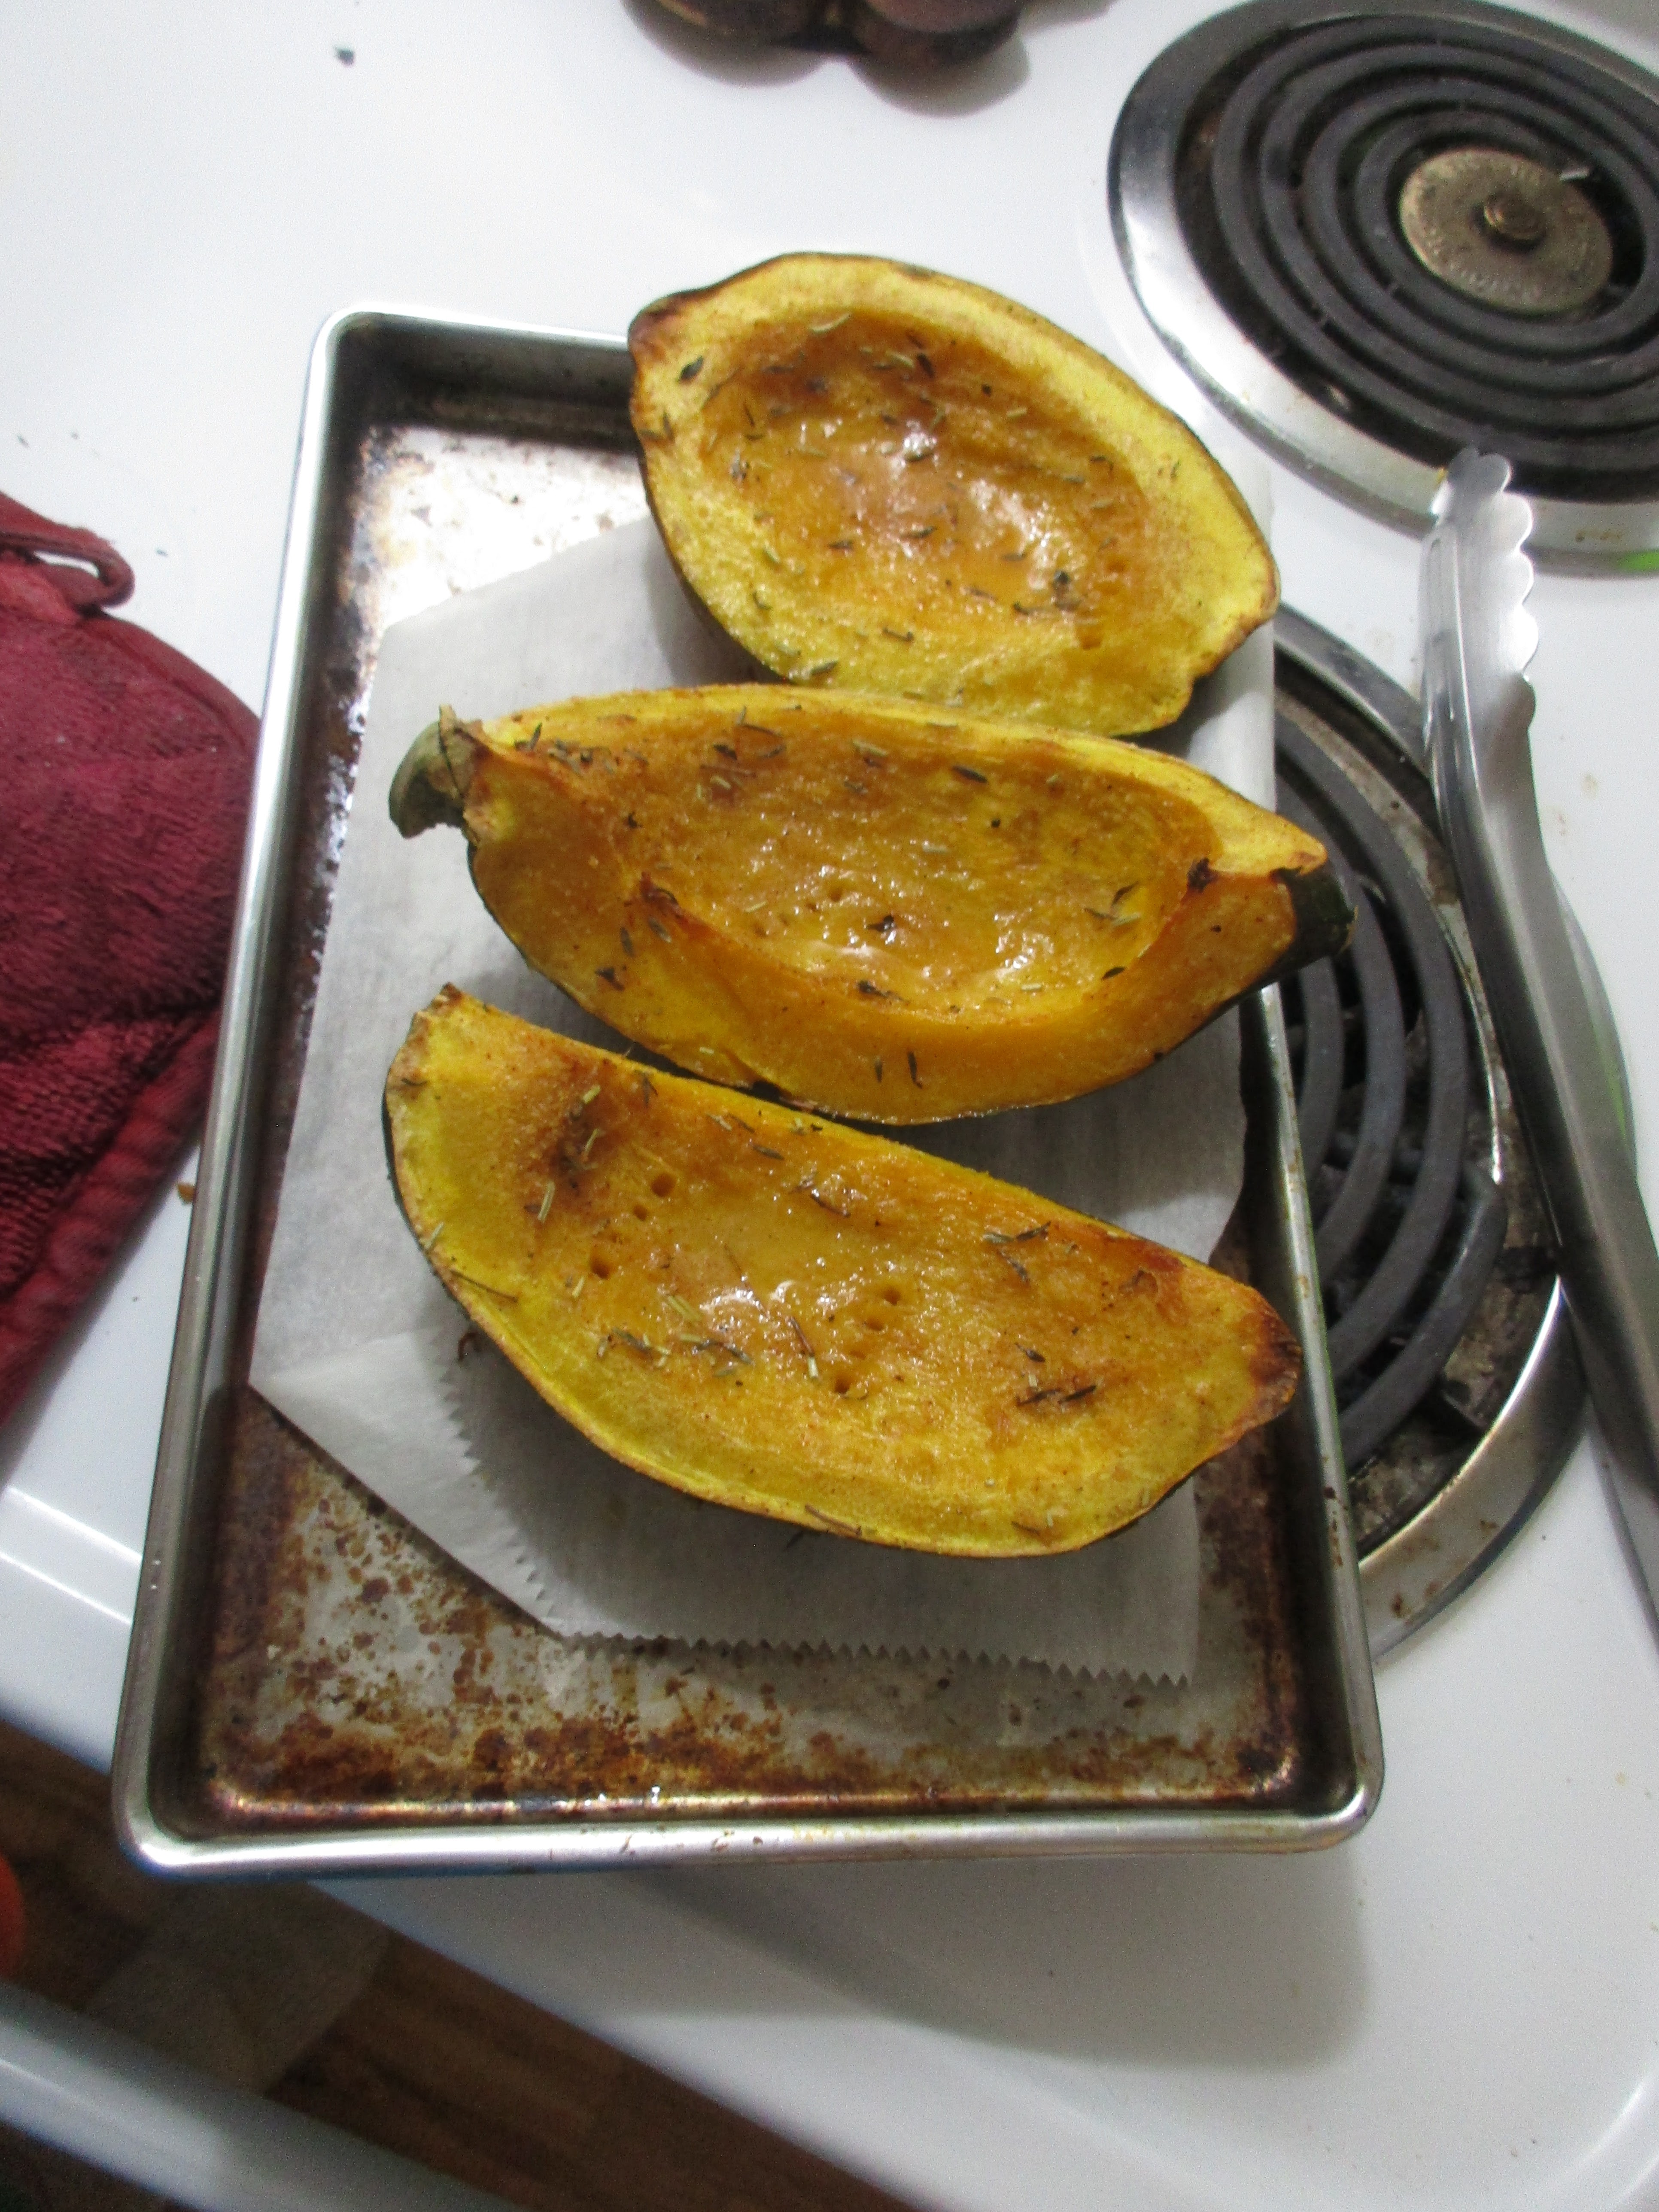
Here's the final product. Just scoop the flesh into a bowl and mix well. Top with crumbled feta cheese and toasted pine nuts. That's it, it's that easy! I thought this was great, but the seasoning didn't taste strong enough so I would definitely use a LOT. My whole family liked this one, so I could easily see it becoming part of the annual Thanksgiving dinner from now on.

So, all my recipes turned out great, and my family enjoyed them all! It was fun trying these out and this is one of my favorite parts of Thanksgiving, blending the tried-and-true with the brand-new. Definitely give these a try if you want to try something new next Thanksgiving!


Sunday, November 20, 2022

The 12 Weeks of Christmas: Movie Edition-Week 8

The 12 Weeks of Christmas: Movie Edition-Week 8

The Polar Express 

I thought I would write this up before I crash any harder. This week, featured not one, not two, but three hot cocoa recipes and I have to give them all a fair try to decide which were my favorites. That and the milkshake I had with lunch pretty much ensures an epic sugar crash I can feel coming. Time to chug lots of water and eat some peanut butter. Not sure if that helps clear out the sugar, but it can't hurt...

The Polar Express isn't a movie you think of for food, but it does have an epic song and dance scene devoted to hot chocolate. I don't eat chocolate, thanks to another epic sugar crash years ago, but I have been saving up white chocolate versions to try out and this was the chance!

I was surprised at how an idea of non-chocolate-based "cocoa" for lack of a better term, could come up with such different versions. Each has slightly different ingredients, and amounts of them, and turned out to look really different from each other.


First up, Snow Cocoa. This recipe is the only one that doesn't use white chocolate. It uses a lot of vanilla and sugar for its flavor. For an ingredient list that is so simple, this is a really tasty recipe. I found it a bit too sweet, so I would probably cut the amount in half. The vanilla really brings the flavor. I liked this one a lot. This recipe says it's from allrecipes.com, but when I looked it up, I wasn't able to find it, so I felt comfortable sharing it here.

Next up is the Spice White Chocolate, taken from a cookbook, so I can't share the recipe here. This one had white chocolate chips and milk, along with cinnamon and nutmeg. Cinnamon is a common flavoring in hot chocolate, specifically Mexican hot chocolate, but I've never had any with nutmeg before and it was a great edition! Nutmeg is a natural pairing with milk-based drinks and sauces, so I'm not surprised it worked so well. It just never occurred to me to try it, but I highly recommend it!


And last but not least, is the Trader Joe's recipe for coconut milk-based cocoa. This can be found on their website, too. This one ended up being my favorite of the three. It was delicate, the least sweet, but very flavorful. Vanilla and cinnamon are the main flavorings for this, and are very well-balanced. 

These are the ingredients for all three recipes, except the the jar of nutmeg, not in this shot.
I decided to make all three at the same time. Luckily I have multiple whisks so there was no flavor blending.
Here they are after stirring and heating through.

All of these recipes were super easy to make, and can be doubled or halved as needed. I would drink any of these again, but maybe not all at the same time! The next time you come in from the snow, you should definitely make one of these to warm up with!


Sunday, November 13, 2022

The 12 Weeks of Christmas: Movie Edition-Week 7

The 12 Weeks of Christmas: Movie Edition-Week 7

White Christmas


One of the iconic scenes and songs in the movie, White Christmas, talks about sandwiches and what kind of dreams one may have after eating them. I couldn't not use this as my food scene for this movie. I have several sandwich recipes and chose two I've had in my test pile for a long time and decided this was the time to try them out! 

First up, was this recipe: Black Pepper Molasses Pulled Chicken Sandwiches which is from Cooking Light, from 2009! I had used a rotisserie chicken for something last month and saved the dark meat for this recipe. I wrapped and froze it until now. It was just enough to make a half batch of this recipe.
I made this sauce when I got up this morning. It's very simple and uses ingredients most people have on hand, so it's a pretty convenient recipe!
This sauce is easy to cut in half.
Here it is, ready to go.
I put the chicken in it when it was done and left it in the fridge to marinate.
Cooking on the stove.
And post-shredding. It really couldn't be easier to make this.

My second recipe is old enough that I was unable to find the source online, so I will write it out.

Little Cuban Sandwiches

2 thin French bread loaves
1 Tbsp. Dijon mustard
1 Tbsp. mayonnaise
1/4 lb. thinly-sliced Swiss cheese
2 large dill pickles, thinly sliced lengthwise
1/4 lb. thinly-sliced baked ham
1 Tbsp. unsalted butter

1.) Split bread and spread with mustard and mayonnaise. Layer 2 halves with cheese, pickle, and ham; top with remaining halves.
2.) In a heavy skillet, heat 1/2 Tbsp. butter over medium heat. Cut one sandwich on an angle into 3 or 4 pieces to fit in pan. Place in pan, over with foil, and place a slightly smaller heavy skillet on top. Place a full tea kettle or other heavy object in the skillet to weight the sandwiches. Cook until bread is brown and crisp, about 3 minutes.
3.) Turn and cook the same way until crisp on the other side and cheese is melted, about 2 more minutes; wrap in foil to keep warm. Melt remaining butter; repeat process with remaining sandwich.
4.) Let cook for a minute or two before cutting diagonally into bite-size pieces.

The ingredient list is pretty simple for this one too.
I wasn't sure how the process would work, but I trusted it, and it paid off.
Sandwich, with the foil on top.
And the pan with the full kettle on top. It will take a while for you to find just the right angle for it not to fall over. Keep your hand on it until you do or it could end in a disaster.
Here it is after taking off the foil, just before turning it over. I added more butter to fry the other side before flipping.
Here is the flat side, fried, with the rounded side on the bottom now. This is an even trickier side to keep under control with the weights.
It doesn't take too long, weighing it down does help it cook faster. The cheese is very melty, as you can see.
I had to sort of put it back together because it slid apart a bit when it cooked. The pickles fell out but it was all easily fixed.


Here is the final product! The Cuban sandwich was really good. The weighing down really creates a different texture from a typical toasted/grilled sandwich. The bbq sandwich was pretty good too. I should have toasted the inside of the bun so it had a bit more texture. The sauce was mustardy, and I think by tomorrow it will be better because the flavors will have blended better.

Of the two, I definitely liked the Cuban sandwich better, but both were really easy to make. I might have to keep making my grilled sandwiches this way because it was truly a superior sandwich. All I know is, I'm going to be having sweet dreams tonight!!


Sunday, November 6, 2022

The 12 Weeks of Christmas: Movie Edition-Week 6

The 12 Weeks of Christmas: Movie Edition-Week 6

It's a Wonderful Life


I knew I wanted to feature this movie in this year's movie project, because you can't do Christmas movies without it, but there wasn't a lot of options to choose from for food. We never quite see what George and his dad are eating before the school dance, and we don't know what dessert Harry has on his head, either. I don't drink, so I couldn't focus on the alcoholic beverages mentioned. The roast chicken Mary makes in the fireplace was impossible to recreate. And the salt, bread, and wine aren't much to go on. But then I remembered it, one of the iconic lines from the film: "Say brainless, don't you know where coconuts come from?" I happen to love coconut, so I decided to make it the focal point for this week and it did not disappoint. If you are a coconut fan, this week is for you!

First up, though the second in order of what I made this week, was my entree: Brazilian Chicken With Coconut Milk. This was a recipe I've had for a while but have put off because I always get a little intimidated with peppers, but this turned out great!

The ingredient line-up.
The spice blend. This is a really good one!
I sliced two chicken breasts in half because they were really big. It allowed me to put more seasoning on all of it.
Here is the chicken post-browning.
And the aromatics ready to saute!
Post-saute!
And now for the tomatoes.
All cooked down.
It says light coconut milk but all I had was the full-fat kind. As long as you don't indulge too often, it's not too bad for you.
Cooking down a bit.
With the chicken added and sauce cooked down more. I added more of the spice blend to the sauce and a bit of salt just to get the seasoning right.
Here's the final product. This was amazing! It's not too spicy but you do hit little bits of spice from the seasoning and jalapeno and ginger. I think this is going to taste even better tomorrow once the flavors meld even further. 

I was really impressed with this. It looks so fancy but it was quite easy to make, actually. It's one I can see myself doing more often, but maybe with the lower-fat coconut milk from now on!

Next up, is dessert. I actually made this Friday night after work, before we lost power in the wind. I gave half of it to my parents, because there's no way my sister and I could eat an entire cake. Or should. And I have to say, even though my sister is a non-coconut person, she liked the cake and has had a few slices of it over the weekend! My parents approved of it as well.


I tried to find this on the Taste of Home website but had no luck. This is so old it's from the actual magazine I used to get way back in the day. It's from the Feb/March 2004 edition. Since the entree had coconut milk, it was only right that the dessert have actual coconut, and this does not disappoint!
Cranberries soaking in orange juice
They really do suck up all the juice! It makes them easier to chop when they're like this.
Here is the filling, ready to go.
And the batter, almost ready to go.
Here is the batter with the coconut flakes added. I used really fine flakes, unsweetened, so it just almost dissolved into the cake. I'm not a big fan of the large shred, sweetened kind.
Building up the layers...
And the final layer. Ready for baking!
I found it took around 70-75 minutes to bake this in my oven.
Out of the pan and dusted with powdered sugar.
 
And ready to serve! This was good like this the first night but it started drying out by the second day and I found cool whip helped after that. 

This weekend was a celebration of coconut! I'm really happy that both the recipes were successful because I love coconut and wanted these to be winners! The cake is very autumnal, perfect for this time of year. The chicken you could do all year round, if you wanted.

I highly recommend these recipes, and I think George Bailey would enjoy being able to imagine far off places if he'd eaten these too!