Sunday, March 28, 2021

The Baker's Dozen: Carrot Zucchini Spice Muffins


The Baker's Dozen: Carrot Zucchini Spice Muffins

I am happy to report that today's baking was yet another success! This project is winding down, and I want to keep up the wins till the end, if possible! I used this recipe, and was really happy with the results. Muffins are always so easy to make that I got them done first thing this morning when I got up. And they don't seem to create too much mess either, which is also really nice!

My set-up picture with all the ingredients. Except I'm actually missing the white sugar and the end of a bag of pecans that I ended throwing in there too.
Here we have the wet ingredients all mixed together.
 
And all the dried ingredients mixed together.
Here we have the grated carrots and zucchini added to the wet mixture. I used the regular size grater holes and did not peel the carrots first. I just didn't see the point of peeling them. Rumor has it all the nutrients are in the skin anyway, so there you go. Now this is a healthy recipe!
All the ingredients mixed together. It's a really thick batter and by rights should have made more than 12, but I crammed them all in to the one set because that's what the recipe said to do.
You can see how full they are. The batter is really dense and bakes basically like a mini carrot cake. I had to bake it at least 10 minutes longer than it says to on the recipe.

Here is the final product. It was really good! Super easy. Slightly healthy because you also use some applesauce so there's not at much sugar as there could be. It isn't overly sweet, which I always appreciate.

If you like carrot cake or zucchini bread, you will like this recipe. I will be sharing some of these with my parents and coworkers this week! Since we're no longer in the office on the same days, for stuff that will freeze, I can leave some in the freezer for them to take out when they come in. Not all the stuff I've made has frozen well, so I'm excited to be able to share this with them!


Sunday, March 21, 2021

The Baker's Dozen: Cinnamon Babka


The Baker's Dozen: Cinnamon Babka

Finally, after two weeks of fails, I had a huge win with this one! I'm so happy and excited with how this turned out. A good friend has been trying to convince me forever to try making babka, but the timing has never been quite right, until now. I didn't have a recipe in my files to try, so I found this one online to try. Traditionally, babka is made with chocolate, and it's super rich. Since I can no longer eat chocolate, that wasn't an option. When I saw this cinnamon version, though, I knew it was the one for me! Check out my baking adventure today!

I was so excited to get this recipe going that I forgot to do my traditional ingredients shot to start with. Here we have the yeast-sugar-water mixture. This about the frothiest I've ever seen my yeast get before, so I knew that was a great sign that the bread would rise the way it needed to.
I actually followed the recipe and let my mixer do all the kneading. This after 5 minutes of kneading. The dough is silky soft and has some give to it, but holds together. When you first start, it looks really gummy and seems like you did something wrong, but just let the mixer work its magic and it'll be just fine! One small change I made from the recipe's instructions was adding the vanilla when I added the other liquid ingredients. It made no sense to add it to the dry ingredients because it wouldn't blend properly.
Here we have the vanilla-sugar syrup, the filling, and the risen dough. I have never gotten my dough to rise this much, and I was so excited!
I used a scale to measure the three pieces of dough to make sure they were as close as possible to the same size. I tried to get this as rectangular as possible, but dough sometimes has a mind of its own. It rolls out really nicely and holds its shape. So often when you roll out dough is just bounces right back and it's so irritating. I really loved how this just stayed put.
The filling has been applied, and now it's being rolled up. The dough is really soft, but it's very workable too. 

All rolled up, and the ends cut off. Save the ends, I was able to make a little babka roll with them. You don't want to waste any of this!
Cutting it in half down the middle. Use a big knife for this part.
Twining the pieces. This part is a bit precarious to pick it up and place it in the prepared loaf pan. It's a bit heavy in the middle and the filling can drip out a bit. Just scoop up anything that falls out and put it back in.
I only have two loaf pans, so the third one was going to have to be free-formed on a pan. It looked so pretty in a round that I just left it that way. I contemplated stuffing the end pieces in the center but thought it wouldn't look as nice, so I just shaped those into a little mini roll.
Here they are after their second rise, just before going into the oven.

Halfway through the baking, pre-glazing with the syrup.

And post-glaze. And just a side note, I really like that my oven is wide enough to fit all of those next to each other on one shelf!
Finished round loaf, post second glazing.
And the same for the loaves.
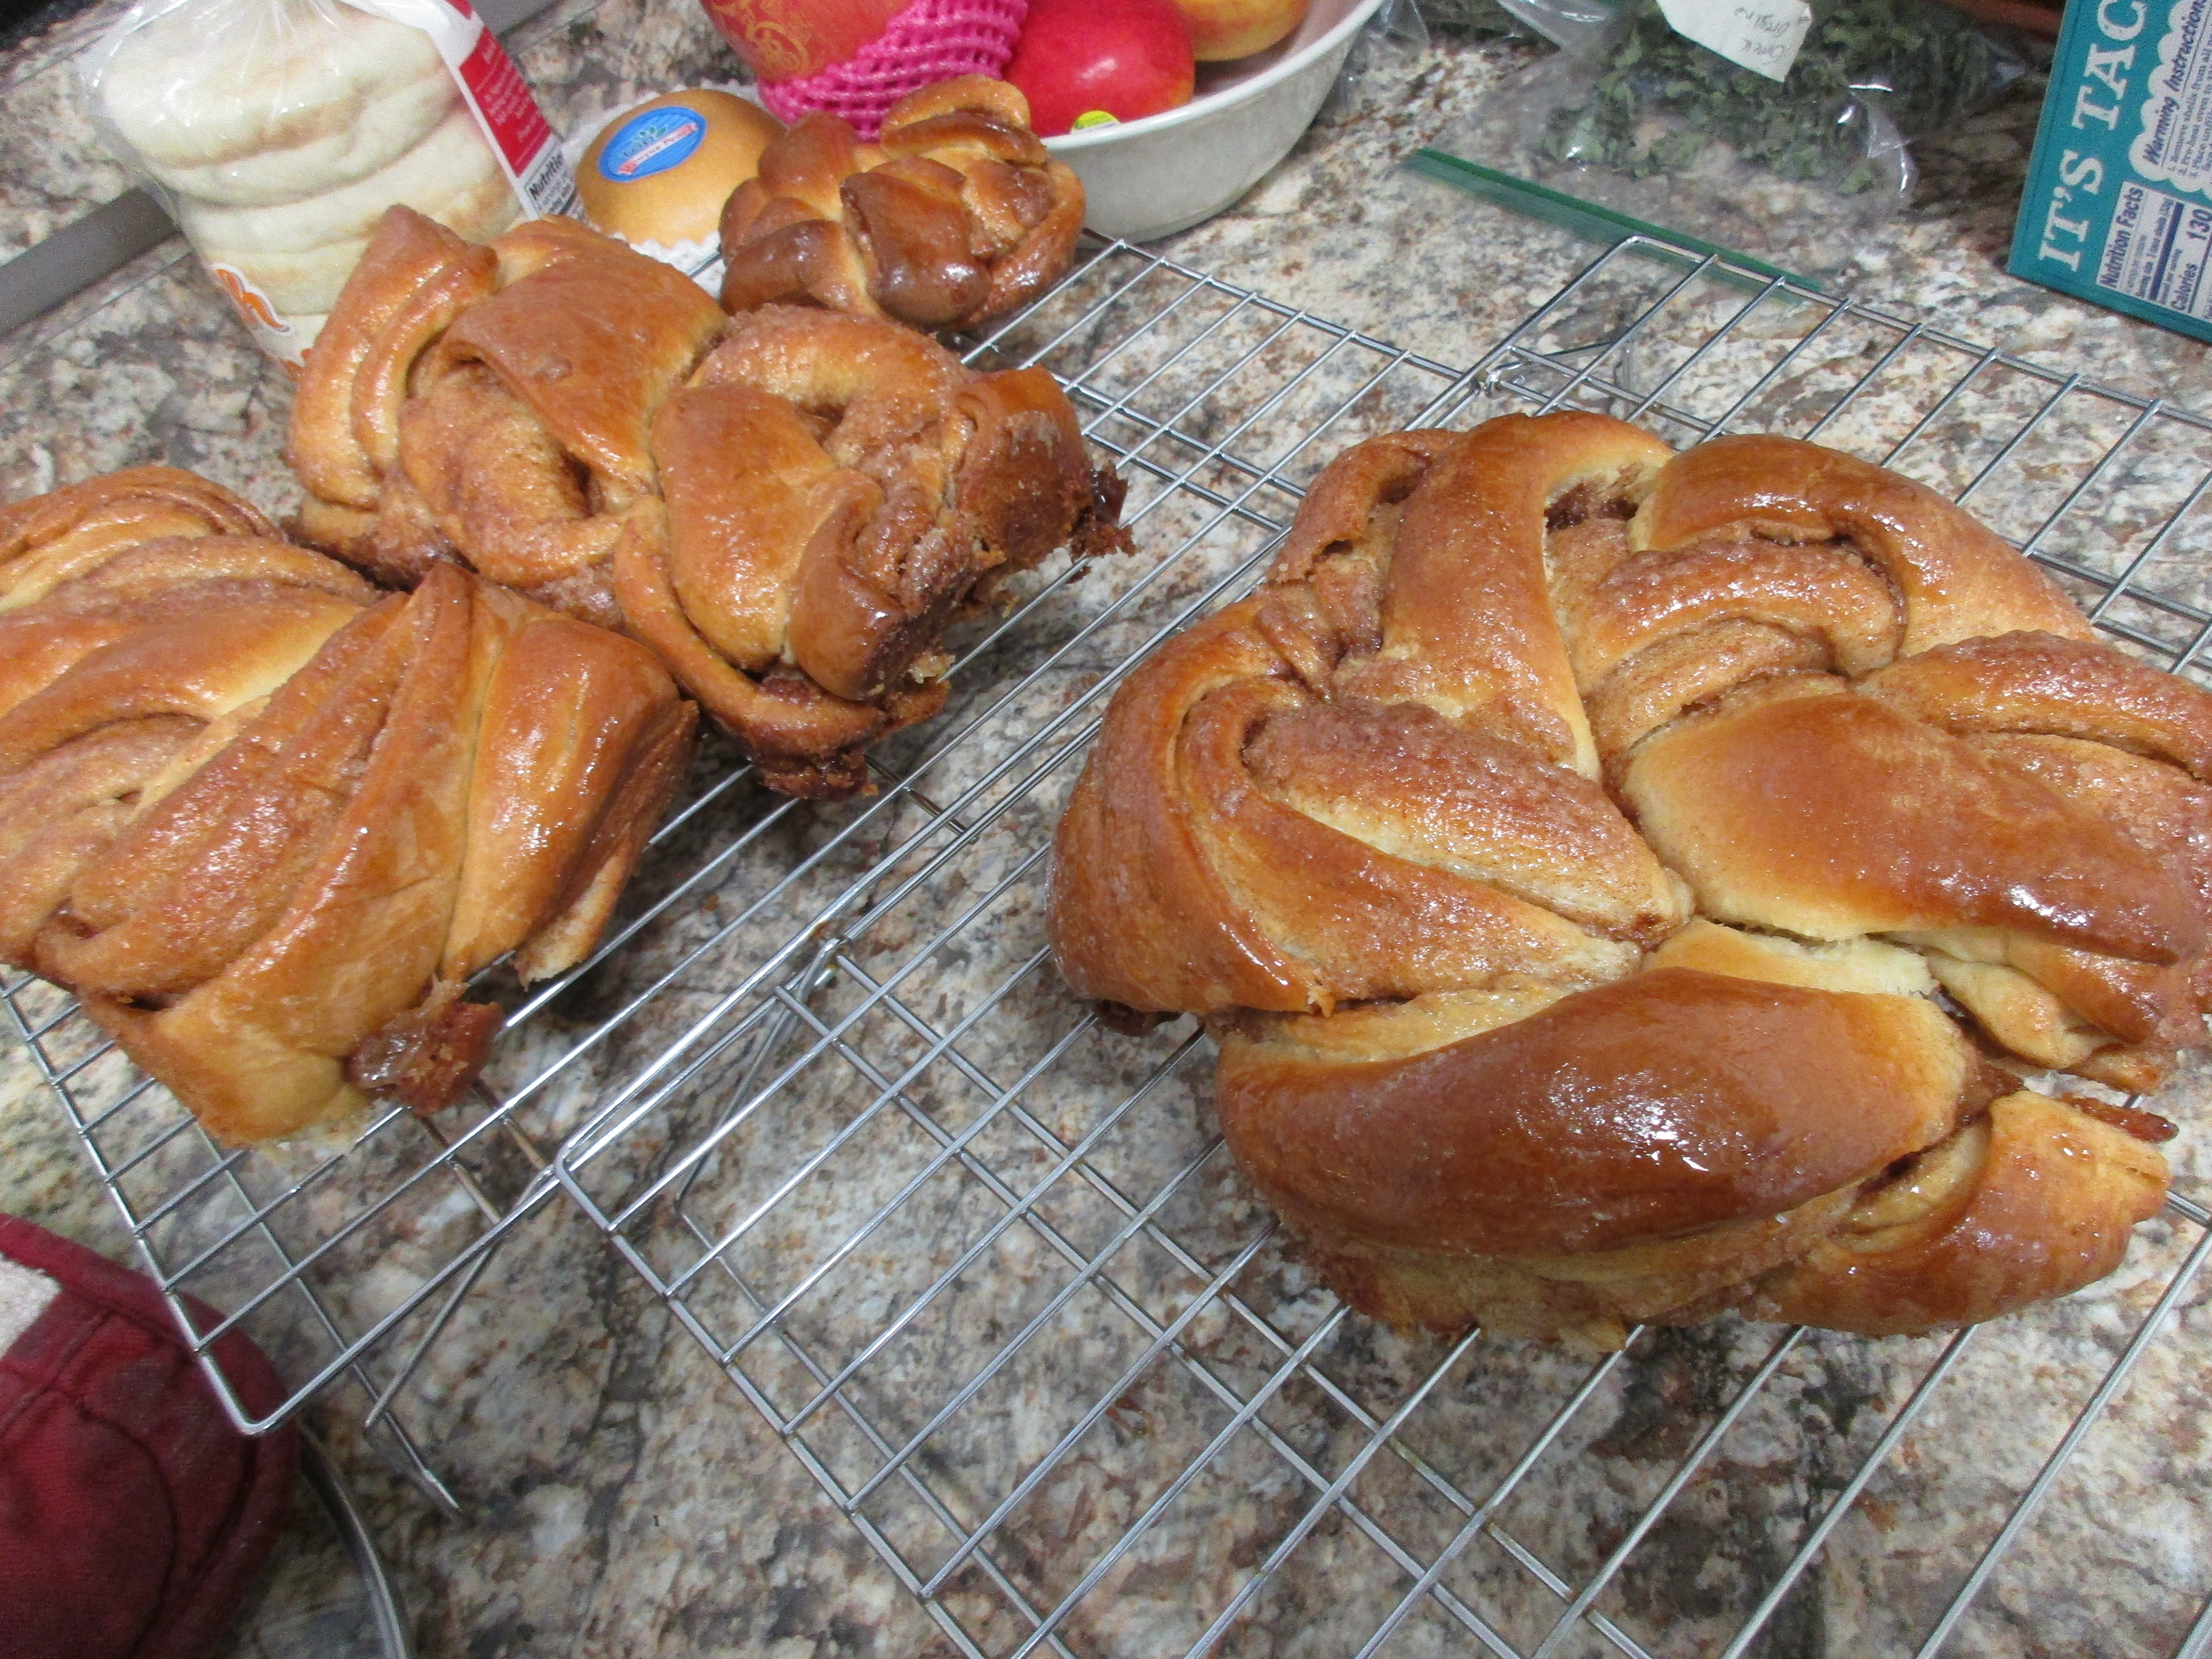
Here they are out of or off their pans and cooling off.
And of course I had to try it out! Look at that, it's incredible! The texture is so soft!

In spite of all the sugar in the different parts of the recipe, it's not overly sweet, which is nice. This is so amazing, you guys! I wrapped up the two loaves and plan to give one of them to my parents and one of them to my coworker, but my sister and I will be eating the round loaves!

This bread was not very hard to make. It was time-consuming, but letting the mixer do all the kneading saved me a lot of energy. This is a really great comfort food. If you're feeling down, this will help cheer you up. for sure! I'm really glad I finally followed my friend's advice and tried this out. The syrup made enough for a second batch so I might need to make another batch before it gets too hot to use the oven later in the spring!


Sunday, March 14, 2021

The Baker's Dozen: Irish Soda Bread


 The Baker's Dozen: Irish Soda Bread

Sadly, this was another fail. It's been a really long time since I've made or had soda bread. Is it supposed to be so dry you almost choke on it unless it's smothered in an unhealthy amount of butter? And is it supposed to be as hard as a brick? If so, it was a smashing success. I'm not going to share the recipe, because it didn't work out well. I thought it would be fun to make it this week since St. Patrick's Day is this week. I don't really celebrate the holiday, but it felt like the right time to make it. I'll have to keep trying out recipes, surely a good one exists, somewhere...Anyway, here's the pictures of how it went.

The obligatory ingredient shot. I went with actual buttermilk this time instead of making my own. Because soda break relies on the chemical reaction between the baking soda and the buttermilk, I wanted the real thing.
Here is all the dry ingredients blended together, pre-butter.
And post-butter. I used a pastry cutter, but it's not really a lot of butter for the whole recipe.
This is how it looks after mixing the buttermilk in. It was pretty dry still. I think it could have used maybe another 1/2 cup to blend a little better.
This was after a lot of blending and kneading. It's possible because it was on the dry side and took so much work to make it usable, that it got overmixed, which led to some of the dryness and hardness issues.
I still managed to get it into a round(ish) loaf.
And the x scored on the top. It took nearly twice as long for this bread to bake as it called for. That didn't help either. I covered it with foil and at one point had to cut it in half just to see if it was baked through, even though I didn't want to. It still wasn't so I had to keep baking the two halves for a while longer.

Here is the very dry final product. The flavor isn't too bad. It's a bit on the sweet side, but not overly so. There's brown sugar in it, but not too much.

So, I now have two weeks in a row of fails! I have three weeks left of this project, so I hope I can get some more wins by the end!!

Sunday, March 7, 2021

The Baker's Dozen: Montreal Bagels


The Baker's Dozen: Montreal Bagels

I had high hopes for these. I bought expensive ingredients for them. Sadly, none of that mattered, because this was a fail. I am pretty sure it's the recipe that was wrong, because I've made bagels before, and they turned out fine.

Montreal bagels are like regular bagels, except they are sweeter. There is honey in the dough, and in the water bath. I have never had one before, and was looking forward to this one! I won't share the recipe, since it's faulty, but I'll go ahead and share my pictures of what I made.

As you can see, the ingredient list is pretty sparse. The recipe yields 18 bagels, and I did not need that much, so I cut the recipe in half. All the ingredient amounts were conducive to this, so that wasn't the problem.

This is the same brand of honey I used to make last year's baklava. It's a different flavor, but it's really good! This came from the honey shop at the Pike Place Market. It's costly, but it's supporting a small local business, and the products are amazing! I never really liked honey until I tried this brand and now I'm wondering if it's just because I've never actually had good honey before. That stuff in the bear-shaped bottle is just not that good!
Here is the liquid mixture with the honey, yeast, egg, salt, water, and sugar. The water is warm a helps the honey melt into it, but I did have to stir it for a couple minutes to get it to fully incorporate.
This is how it looks after I added the flour. It looks pretty dry, but it worked out fine.
Here's what it looks like after it is kneaded. I didn't have to add any extra liquid or flour.

The recipe said to only let it rise 20 minutes, which is nothing, so I let it rise for over an hour. It still didn't rise too much, but it got some rising in it.

Here are the formed bagels. They really mean it when they tell you to pinch and roll the ends together. Most of mine came apart in the boiling process.
They sink to the bottom, and like gnocchi or ravioli, they will float to the top.
When they float, you flip them over and boil for another minute. They are hot and slimy at this point and I dropped a few and they broke apart. Most of the others came apart at the ends on their own. I dipped them in poppy seeds.
Here's what they look like going into the oven...

And what they look like coming out...The one on the right is the under side. As you can see, they are totally burned. I should have put them on parchment paper, but I suspect they still would have burned. The recipe said to bake at 450 degrees for 25 minutes. This is only after 20 minutes. The sugar content just made it get too brown too quickly, and then stuck to the bottom and burned.

The tops are actually ok, flavor and texture-wise. I think if I had it to do over again, I would lower the temperature and bake them on parchment paper. I don't know, though, I might leave this one to the professionals next time and just buy one at a bakery the next time I want to try these again! Oh well, they can't all be winners. I just wish it was the weeks that I wasn't using super expensive ingredients!!