Showing posts with label cheese. Show all posts

Sunday, January 24, 2016

Dining-In: A Culinary Tour of America-New Haven, Connecticut

The Location: New Haven, Connecticut
2013 population: 130,660; 33.1% African American, 32.0% white. Per capita income: $22,714

The city was founded in 1638 by Puritans. New Haven's claim to fame is being the home of Yale University. It is the basis of the city's economy, and is its biggest employer. New Haven was Connecticut's co-capital from 1701 to 1783, before power was transferred entirely to Hartford. New Haven is said to be the cultural capital of the state.

Prior to the European Invasion, New Haven was home to the Quinnipiac Native American tribe. They were corn farmers and fishers. The Dutch were the first Europeans to settle in the area, followed by the Puritans from England. Rather than being slaughtered or displaced, however, the Quinnipiac sold their land to the settlers in return for protection from a nearby rival tribe.

The Collegiate School moved from Old Saybrook to New Haven in 1718. It was renamed Yale University after Elihu Yale, a merchant in the British East India Company who made a large donation to the school.

New Haven was one of the first cities to embrace the anti-slavery movement in the 1830's. During the Civil War, New Haven sold a lot of goods to the war effort, but didn't engage in any battles of their own. After the war ended, it became home to many Italian and Jewish immigrants.

After the two world wars, New Haven became a victim of urban decay, as more residents left the city to move to the suburbs. In the last few decades, though, it has begun to be built up once again.

The Food: Connecticut Not-Beef Supper and Connecticut Apple Brownies
Connecticut was one of the most difficult states to find recipes that I was willing to try. One of their most famous recipes is clam pizza with white sauce. That was a "no" for me...So I had to keep looking, and finally, after days of searching, I came across these two recipes. They sounded simple enough, yet tasty, so I went with them. They did not disappoint.

Connecticut-Not Beef Supper:

This is actually called Connecticut Beef Supper, but as I do not eat beef, I had to change it up a bit. I think it turned out really well and my sister actually ate some and loved it. That really says something for how good it is. I will rewrite the recipe as I did it and include the link to the original in the sources section.

2 Tbsp. cooking oil of choice
2 lb. cubed pork roast
1 onion, sliced 
1 cup water 
2 large potatoes, peeled and sliced 
1 can cream of mushroom soup
1 cup sour cream 
1 1/4 cup milk 
1 tsp. salt 
1/4 tsp. pepper 
1 cup cheese, grated 
Bread crumbs(optional)

Heat oil in large skillet. Brown meat and onions. Add water and heat until boiling. Cover and simmer 20 minutes. Pour meat into 13" x 9" ungreased dish. If there is a lot of liquid left in the pan, drain it out, you don't want this in the dish. Put potato slices on top.In a large bowl, stir soup, sour cream, milk, salt and pepper together. Pour over potatoes. Bake at 350 degrees, uncovered, for 1 1/2 hours. For last half hour, sprinkle with cheese and bread crumbs, if using, over the top and return to the oven.

This was really delicious and comforting on a winter night. I highly recommend this if you are looking for comfort food, but something a little different from what you usually go for. And if you have leftover liquid from simmering the meat, don't throw it away. Skim off the fat and freeze the liquid for something else. My sister and I discussed making a stew and that liquid would be perfect for it.

It's hard to go wrong with cheesy, creamy potatoes, and you throw the meat in it and you have a one bowl dinner. Those in my family are well aware of a dish called Patio Potatoes that is a staple for our Christmas Eve dinners. This dinner is much along those lines, but it's a little more dairy-friendly. I am looking forward to trying this reheated tonight for dinner!

Connecticut Apple Brownies:

1/2 cup butter
1/2 cup sugar
1/2 cup unsweetened applesauce
1 egg
2 cups apples, peeled, cored and thinly sliced (I used Honeycrisp)
1/2 cup chopped pecans
1 cup all-purpose flour
1/4 tsp. salt
1/2 tsp. baking powder
1/2 tsp. baking soda
1 tsp. cinnamon

Combine sugar, applesauce, butter, and eggs. In a small bowl, mix the dry ingredients together. Add them to the butter mixture, and mix well. Stir in apples and nuts. Spoon into greased 9" square pan (or double recipe for 9 x 13 inch pan). Bake at 350 degrees for 30 to 40 minutes.

Mine only needed 30 minutes. I made them in the morning to take with me to a tea party and they ended up being very popular! Calling them a brownie is a bit of a misnomer, because as you can see, there is no chocolate anywhere in the recipe. But, the texture is very much like a brownie. Maybe Apple Blondie would be a better name for them. By cutting out half the sugar and replacing it with the applesauce, it is healthier, but you don't notice it. The apples are sweet and the applesauce fits right into the recipe.

Both of these recipes were fantastic! I had to work so hard to find them in the first place that I am very glad they turned out so well. You definitely need to try these out. You will not regret it!

Sources:
City Map

City Pic

City Info

City Stats

Connecticut Beef Supper Recipe

Connecticut Apple Brownies Recipe

Sunday, January 10, 2016

Dining-In: A Culinary Tour of America-Elizabeth Town, North Carolina

 
The Location: Elizabeth Town, North Carolina
2013 population: 18,266. 55.9% African American, 37.0% white. Per capita income: $18,024.

Nicknamed, the "Harbor of Hospitality," the city was founded in 1794. It was originally a mercantile hub, but segued into a commercial and industrial center. It was originally named Redding, but since there was another town nearby with the same name, it was renamed in 1801. Two different theories exist about the name: Either it was named after Queen Elizabeth I, who had funded the colonization of the Virginia and Carolina coasts 200 years previously, or it was named after Elizabeth Tooley, a local tavern owner who donated a lot of her own land to the city.

Elizabeth Town is positioned on the Pasquotenk River, and the nearby Dismal Swamp Canal would help improve the town's financial success. In 1827, the custom house, or the government building where trade paperwork was filled out and filed, for all of Camden County, was moved to Elizabeth Town. This increased business and tolls being paid to the city.

The Confederacy had a fleet stationed in the city during the Civil War. After a brief battle in the city on February 10, 1862, the city was taken over by the Union. Guerilla warriors for the Confederacy would continue to attack Union forces, though unsuccessfully, for the remainder of the war.

After the Civil War, the railroad would alter Elizabeth Town's importance as an industrial center. With transportation moving to the railroad, it left the city less relevant than it had been, but it would be revived during the Second World War. It was made into a center for textiles, aeronautics, and shipbuilding. It would also bring commerce back to the area, due to the increase in population. Today, the city still has a strong economy, with government and agriculture-based industries.

The Food: Vinegar and Mustard BBQ Sauce and Pimento Cheese
The South has a wide variety of dishes to choose from. I have tried to spread them out over the course of this project, and not overdo certain best-known items. Barbeque is one of them. I have done one other state: Texas, and knew I was going to do this one, since the sauces are so vastly different, but I did not want to overdue it. So, two states out of fifty got barbeque, and I think that's fair, even though it's known all over the country.

This ended up being an interesting meal. The items I thought I would like, I ended up not liking, and the item I thought I wasn't going to like, ended up being really delicious! North Carolina has two very unique barbeque sauce traditions that I had never tried before. Vinegar-based sauce and mustard-based sauce are dueling sauces that, depending on where you're from in the state, you are very passionate about. I decided that since they were both simple sauces, I would try them both. I purchased a pork roast and roasted it very simply in the oven with salt and pepper. This way I had a neutral base for each sauce.

The vinegar sauce was basically what it sounds like: cider and white vinegar with Tabasco, sugar, and chili pepper flakes. I made it a couple hours before using it, so I thought it would marinate and become very flavorful. Unfortunately, it basically just tasted like vinegar. Maybe I should have heated it up to help the flavors blend better, but I feel like I shouldn't have had to. Pork with vinegar doesn't taste very good, so this wasn't a win, in my opinion. I will share the link to the recipe in the sources section for anybody interested in trying it out, but I'm not going to type out the recipe here.


The other sauce was a yellow mustard-based sauce. My taste for mustard has begun to expand over the years, so I thought I might be ready for this one. It turns out, I am not. This one just tasted like mustard and vinegar and I did not end up eating it either. It also ended up being a sort of unappealing brown color too, so that didn't help. Again, I'll provide the link, but I'm not going to write out the recipe. It turns out, I'm definitely a traditional tomato sauce-based bbq sauce person. It's what I grew up eating, it's what my palate is used to. It's just what I think is the tastiest. But at least I know now what the other kinds taste like. Barbeque fans are very passionate and particular about what they like and don't like in a sauce.


And now, for the recipe that I was assuming I would detest, and did because it is such a Southern staple: Pimento Cheese. Anything with the word pimento in it is generally something I try to avoid. If you are unaware of what pimento is, think of the red bits inside a green olive. It is a roasted red bell pepper that usually comes in a jar. I cannot stand the taste. So, when I decided to try it out anyway, the first thing I chose to do was to roast my own red bell pepper. I have no idea what a jar of the already roasted stuff costs, but I imagine it's probably more than the cost of buying your own bell pepper and throwing it in the oven. It is the easiest thing in the world to roast a bell pepper and I cannot recommend that over the jarred stuff highly enough. If you have never roasted a bell pepper before, here's the process: Wash the bell pepper and place it on an ungreased sheet pan. Put that into a 400 degree oven. It will start to blacken on the outside and sometimes it will pop and make noises, but don't be worried, it's just releasing the air from the inside of the pepper. Occasionally, turn the bell pepper so that the underside gets a chance to blacken. After about a half hour, remove it from the oven, place it in a mixing bowl, and cover it with plastic wrap to allow the heat to steam the skin off the pepper. When it's cooled down enough, remove it carefully from the mixing bowl(it will generate a lot of juice from the pepper. You can decide if you want or need to use this for whatever you are using it for. I drained mine off except for a very small amount.) onto a cutting board and pull out the stem and peel off the skin. This will allow you to start ripping apart the sides and carefully unfolding it. You will want to remove all the seeds. From there you do whatever you need to with it. Cut it into thin strips, or what I did was dice it very small. One average bell pepper will yield a little over 1/4 cup of roasted, minced pepper.

Fancy Pimento Cheese

20 ounces sharp Cheddar cheese
1/2 cup minced fresh chives
1/2 cup minced roasted red pepper
4 ounces cream cheese, softened
1/4 cup dill pickle juice
1/2 cup mayonnaise
1 tablespoon hot pepper sauce (I used Tabasco)
1 pinch ground black pepper

Using the smallest holes of a box grater, grate half the Cheddar cheese. Grate the remaining Cheddar cheese on the next larger size holes.
Stir together the Cheddar cheese, chives, roasted red pepper, cream cheese, pickle juice, mayonnaise, hot pepper sauce, and black pepper in a bowl until evenly combined.

I have seen pictures of other pimento cheese recipes over the years, and the ingredients are all blended together. The cheese must be heated up or something, but this wasn't like that. It does feel a little odd to scoop up and spread wet cheese shreds onto a piece of bread and eating it, but it was worth working through the weirdness! One ingredient stood out to me as very unique: the pickle juice. What a brilliant idea for flavoring food! And it turns out it was great in this recipe. I served this spread out on slices of French bread and it was really good! I made a half recipe, as you see above, the recipe is enormous! A half recipe still filled that entire container and I will be sharing it with my coworkers tomorrow.

So, my dinner didn't turn out as I had planned, but that's ok. That's what is fun about this blog project. Not everything is going to turn out how you want it to. Some things will taste amazing and some will taste awful. You never quite know what you will get. And just because you didn't like something, doesn't mean something went wrong in the cooking process. Sometimes it just means you don't care for the flavor, or your palate is not adjusted for it yet. If only I knew somebody from North Carolina who would have tried the recipes and let me know if I did them right or not!! Oh well, it was still a fun experiment!

Sources:
Pimento Cheese Recipe

Vinegar-based BBQ Sauce

Mustard-based BBQ Sauce

City Map

City Pic

City Stats

City History

Sunday, November 22, 2015

Dining-In: A Culinary Tour of America-Cuba, Kansas

 The Location: Cuba, Kansas
2013 population: 149; 96.8% white, 1.9% two or more races; per capita income: $19,062

Cuba was founded in 1868 by Southerners after the Civil War. It was named after the country in which one of the travelers had spent time and grown to love. In the 1870's, Czech immigrants settled there. In 1884, the town moved from its original location to a location closer to the newly-built railroad. It has since moved one more time to its present day location. The Czechs left a rich cultural heritage behind and today, the city proudly boasts this cultural contribution to America.

Cuba doesn't appear to have a terribly thrilling past, but what I find interesting about it is, it seems to be the perfect example of small-town America. Kansas is in the center of our country, and was once a hub of farming communities. Today, though, big agriculture business has wiped out most of these small towns, making them truly a dying breed. As young people leave in search of more interesting activities or to increase their chances of financial success, and as the older folks who stayed behind begin to die off, these towns are dwindling. Some might think that we should be allowed to die out and move on with the future, but I think it's really quite sad. Some of these towns at least, should be preserved. For so long, states like Kansas were responsible for feeding this nation, and it was the toil and sweat of hardworking people who fed us. I'd say it's time we gave back to them. Perhaps, like the Czech immigrants who came to Cuba so long ago and infused the town with their culture, it's time for a new group of people to come and help Cuba to thrive again. New blood, as it were. I can think of one particular group of people in desperate need of a place to live right now, but that's a topic for my other blog...

The Food: Klobasnek and Kolache
Kolache is a Czech food, and Klobasnek is an American invention that is a savory take on the Kolache. Though the Klobasnek hails from Texas, I am using it for the state of Kansas because I wanted to focus on Czech food and wanted a savory item to balance out the sweetness of the Kolache. Kolache are a cross between a cookie and a bread. Its bread dough that is rolled thin and filled with some type of sweet filling and then baked. They come out of the oven looking a bit like a cookie, but still have a bread-like texture. Klobasnek are sausage and cheese rolls made with a savory Kolache dough. The recipes I used came from the internet and are so long that I won't put them here. I will include the links in the sources section and write up my experience in making them.

I made both recipes concurrently, so I will write up the experience all in one section, rather than one recipe at a time. First up was the Kolache-or, the trouble-maker dough.

So, this was a trouble maker from start to finish. First off was the adventure of buying poppy seeds for one of the fillings. I made three fillings for these: a poppy seed, an apricot, and a blueberry filling. I have never cooked with poppy seeds before, but have seen them used in a lot of Eastern European baking that I knew I wanted to try it out. I went to Fred Meyer and luckily they had poppy seeds in their bulk spice section, so I got a small bag, about one cup worth. Now, these run a little expensive, about $13 a pound, which makes sense because poppy seeds are so light. I bought a few other items at the store and when the checker told me the amount right as I ran my credit card through, I knew $41 was way too much for the poppy seeds, the lemon, the orange, and the croissant I had purchased. It was too late though, the transaction had gone through. I thought maybe they were more expensive than I had though, maybe I'd misread the label. I looked at the receipt though, and noticed they'd come in as nearly three pounds of poppy seeds! There was no way that small bag was three pounds. Luckily the customer service area was empty and the woman there was very nice. She reweighed the bag, which actually came in at a third of a pound, and discounted me the $32 overcharge! Easy peasy, and then I was on my way.

Fast forward to the afternoon when I'm finally going to start these blog items, to about 3:30pm. You know, there's a reason people make bread earlier in the day, but I thought, how bad can it be? This is plenty of time! Wrong! I did not pull the last set of Kolache out of the oven till about 9:30pm last night...The moral of that story is, you don't have to get up at 2 in the morning maybe, but do start a bit earlier in the day than I did. You'll thank yourself later.

So, first off, the yeast wouldn't dissolve in the milk. I think I let the milk that I heated cool off too much because I was afraid it was too hot. So, I pour most of the milk, minus the chunks of yeast, back in the pan and heat it up again. Then I put it in the bowl with the yeast and it still won't melt! I have never had this happen before. It wasn't expired yeast, I checked the date. I finally used my fingers(with gloves on) to sort of mash the yeast into the milk and force it to dissolve. Fun, fun, fun!

After that time, I went about the recipe exactly as it was written. I had set the stick of butter on the stove to soften. It was perfectly soft and ready to use. The only problem? I forgot to put it in the dough! So, I am kneading this dough that is stiff as heck and would only let about half the flour absorb into it. I finally gave up trying, greased the bowl, covered it, and moved it to the stove to let it get warm for the first rise, and see the stick of butter sitting there! What do I do to fix this? I was pretty sure that leaving it out with be an absolute disaster, so I had to figure out a way to get that butter into an already-formed dough. I was not about to start over, so I took the bowl back to the counter, unwrapped the butter and smashed it into the dough. Literally. And then I kneaded it as best I could, while sort of tearing the dough from the inside and letting the butter incorporate all the way into the center. I didn't want it to turn out like a croissant dough, where the butter layers remain distinct from the dough. I just worked and reworked it, while adding more flour to absorb the extra fat. Finally, it looked halfway decent, but I'm afraid it never quite recovered. That plus the earlier yeast issue meant that I could never get it to rise quite as much as I had hoped it would.

While that dough was rising, I started on the Klobasnek dough, or, the well-behaved dough. This dough was a dream, and everything the Kolache dough was not. It rose easily and fully and was soft and easy to handle.

While both doughs were rising, I worked on the three fillings for the Kolache. I made half batches of what the recipe calls for and ended up with extras for the poppy seed and the apricot fillings. The blueberry filling was just enough. I recommend making quarter batches for the apricot and poppy seed fillings, unless you plan on using it for all the Kolache. For all of the fillings, I replaced the sugar with an equal amount of unsweetened applesauce and I think all of them turned out just fine. You would never know unless I told you. The blueberry filling was very straight forward and cooked up very nicely. The poppy seed filling was interesting because I had to grind the seeds up first, using my spice grinder. Did you know that poppy seeds are filled with oil? I did not, and found this out when I ground them up and they started clumping together. The oil has a very distinct smell and scent, one that I am sure most of us are unfamiliar with, since most of us only eat them on our everything bagels or mixed into muffins. The apricot filling was boiled for a while and then I used my hand-held blender to puree it into a sauce.

In this picture, you can see all the fillings, and the doughs while they rise. The blueberry is on the left, and the poppy seed filling is on the right. The Kolache dough is in the metal bowl, and the Klobasnek dough is in the blue bowl. You can clearly see the difference in how they are rising.

For the Klobasnek dough, you mix a few of the dough ingredients first and let it sit for a half hour before adding the next set of ingredients and letting it sit for it's first rise. After that first rise, I punched it down and divided it up into 8 equal pieces. You roll them or stretch them out into small rounds, like little pizza doughs, then place a Tablespoon or two of shredded cheddar cheese in the center. Top that with a piece of sausage. I had Polish sausages that are basically in the shape of hotdogs, so I thawed two of them and cut them up into quarters, once lengthwise, and once widthwise so there would be a good amount of sausage in each one. Then you roll them up, pinch the edges to seal them, and set them on a greased sheet pan to rise the second time.

I managed to stick all of them on one sheet pan. The sides on some of them did end up touching some of the others, but it all baked up just fine.

For the Kolache dough, after its first rise, I punched it down and kneaded it some more, while adding more flour, because of all the mishaps it had had, it was still a little greasy. It looked much better after adding more flour. This dough is divided in half and each half is rolled out as thinly as you can get. Then you use a cookie cutter, or I used a glass, and cut out rounds. It's supposed to make 24, and mine might have if it had cooperated better, but mine only made 21, and the last few times of rerolling it were really difficult. The dough did not want to stretch out anymore, so some of them were pretty sad-looking. Those rounds were placed on greased baking sheets and set aside for their second rise. I did seven on each pan and did not want to dirty yet a fourth pan, so I only put two sets on the pans first and let the last set sit on the counter to rise.

After their second rise, I used my hands to press down the center of each Kolache and make a space for the filling to go. I made 7 of each flavor, putting the filling in before you bake, so that it all bakes together.

I didn't follow the egg glaze or the posipka recipes for these exactly, but made it work for what I had on hand. The Klobasnek dough called for two egg yolks, so I had two egg whites left over, so I threw some milk into them and mixed them and used that as the glaze and I think it worked just fine. And my sister had some sugar and cinnamon mixed for toast, so I just sprinkled some of that on over the glaze and it was perfect.

After the Klobasnek had finished their second rise, I finally was able to bake them, while working on the Kolache. Before you put the Klobasnek in the oven, you brush them in melted butter. When they're done and you've taken them out of the oven, you brush them in more melted butter while they're still hot.


OMG, these things were fantastic! The bread dough was the softest I think I've ever had in my life and the cheese and sausage were ridiculous. I ate two of them last night! I ate them while I was baking the Kolache, which I did one batch at a time, rather than trying to use two racks and hoping the bottom one didn't burn. They each took 12 minutes to bake and turned out amazing! I liked the blueberry and apricot ones the best. I didn't care for the flavor of the poppy seed filling. It was just too strong of a floral flavor for me. Since I don't have any experience with this filling, I have no basis of comparison, so I don't know if it's supposed to be that way, or if I did something wrong. Maybe if I had been raised with that flavor, I would like it more. But I am very excited that I tried it out and got to see just how that filling is made! I had no idea they grind up the seeds.

So that's all of it, in its glory, about six hours after I started...My feet and back were so sore and then I still had to deal with packaging it all up for people! Many of the Kolache were placed on a plate and I froze them to take to my family's Thanksgiving dinner this week, so they will get a chance to taste them all! Some are being shared with my parents today and some will go to work tomorrow for a few people to try them out, but the rest of the Klobasnek are mine!! I froze them so I can have them whenever I want!

During the last part of this, I of course had to watch The Wizard of Oz. I mean, Toto and Dorothy might not have been in Kansas anymore, but that's where I was visiting, and so it was a must.

This was quite an adventure, trying to make two completely different bread-dough based items at the same time. I have never tried that before, and I have never started it so late in the day before, either. I would highly recommend starting a bit earlier in the day for these, especially if you are making both. They were both fantastic, though, so if you feel confident in your bread-making skills, and have never made these before, you really ought to try them out. You'll come away from it asking yourself where these have been your whole life!

Sources:
Klobasnek Recipe

Kolache Recipe

Cuba City Website

City Map

City Pic

City Info1

City Info2

City Stats


Sunday, October 18, 2015

Dining-In: A Culinary Tour of America-Sheboygan, Wisconsin

 
The Location: Sheboygan, Wisconsin
2013 population: 48,725; 76.8% white, 10.1% Hispanic. Per capita income, $21,294.

Sheboygan was founded in 1846, though people had been coming to the area since the 1830's. Prior to American colonization, the region had been home to the Chippewa, Winnebago, Menominee, Ottawa, and Pottawatomie tribes. Sheboyan is thought to be a Chippewa word, referring to the passageway between the lakes, that was mangled over the years.

After the city of Sheboygan was founded, it became home to a large German immigrant population, though many Irish and Dutch immigrants settled there as well. During the 1970's, the city welcomed a large group of Hmong, or Laotian refugees, who relocated there.

Interesting Factoid: The United States's first Socialist party officeholders were Fred C. Haack and August L. Mohr. They were elected as Aldermen for the city of Sheboygan in 1898.

Another Interesting Factoid: Sheboygan is home to an annual bratwurst festival. This is appropriate given what I made for the meal...

Why Sheboygan? You are probably asking me this right about now. Well, for one, it's a fun word to say. But the real reason is that it was mentioned in one of my all-time favorite movies, and I'd never heard of it before then. It was a fun part of the movie, so I always associate the city with it.

Polka King of the Midwest Here is a link to the clip from the movie.(This blog program only lets me upload stuff from Youtube and this is not from there, hence the link only instead of the cool inserted video...!) If you cannot think of the movie based on what I named the link, I'll tell you what it is. It's from Home Alone. John Candy plays Gus Polinski, the "Polka King of the Midwest" and he and his band were very popular in Sheboygan. Do check it out if it's been a while since you've seen the movie.

I feel like I may have found my true home in the state of Wisconsin. Cheese, and German food. I mean, do you really need anything else? For those of you who drink, there is also copious amounts of beer to be had. I made a total of four recipes for this week's blog, and they all turned out to be pretty awesome. Cheese and German food is a heavenly combination. I chose to do this in October so I could count this as my Oktoberfest celebration. Wisconsin is the perfect state to feature for Oktoberfest. It did not disappoint.

The Food: Midwestern Oktoberfest


All of my recipes came from the internet, so I will post all the links in my sources section at the end of this post.

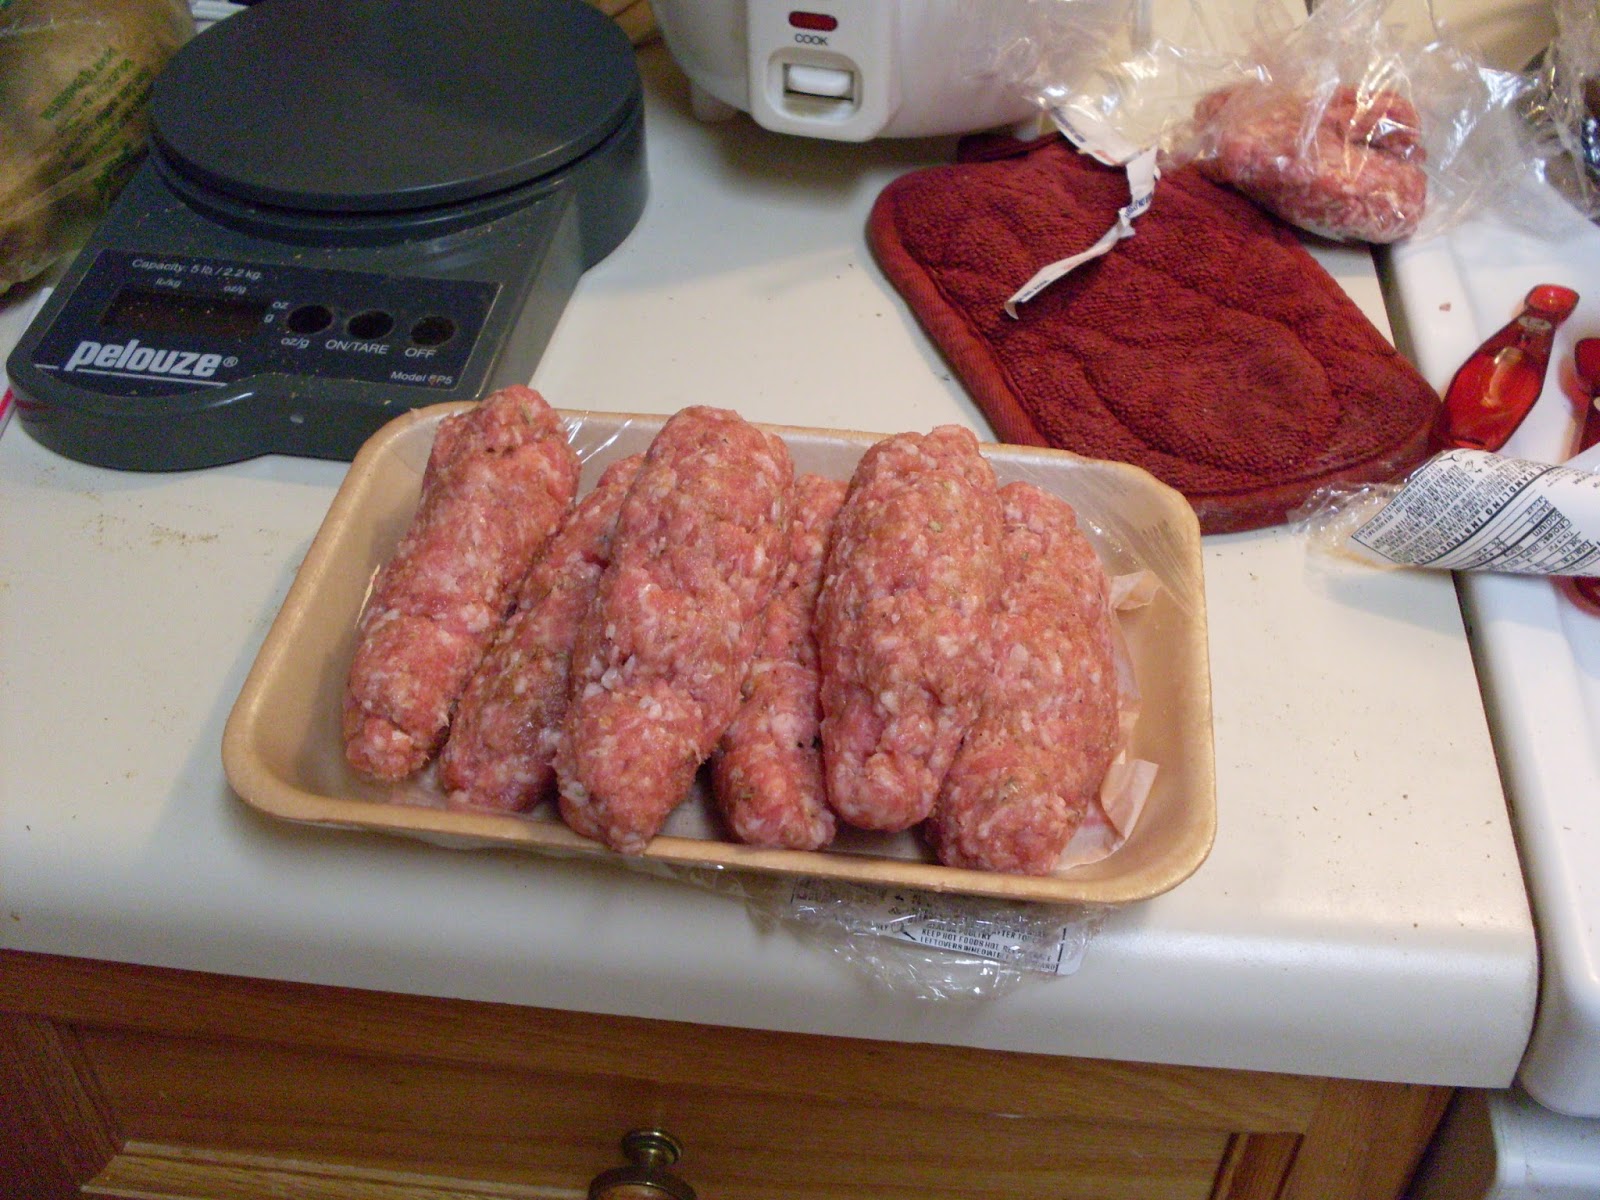
First up was bratwurst, which was to be the focal point of the meal. Now, there are some lovely bratwursts you can buy already made at the grocery store. The two recipes I made featuring bratwurst, call for commercially-prepared brats. But, I wanted to do something special. Anybody can buy brats, but not many can say they've made them by hand. Well, I am now one of the proud few, who can! I made homemade bratwursts a few weeks ago when I made the breakfast sausage to feature with my Johnny cakes for Rhode Island. I bought extra ground pork, made them, and froze them until yesterday. I didn't put them in casings because I don't have the equipment to do so, and also because buying an entire package of casings when you only need a few is wasteful and impractical. I shaped them into sausage shapes, and wrapped them in plastic wrap, then in foil. They held their shape very well.

Here is the ingredient list copied from the original site, but with my own instructions:

Bratwurst
5 lbs. ground pork, fine grind
4 tsp. sugar
1 Tbsp. ground coriander
1 Tbsp. ground sage
1 tsp. paprika
1 tsp. cayenne pepper
2 tsp. dried rosemary
1 Tbsp. dry mustard
1 tsp. pepper
1 tsp. nutmeg
5 tsp. salt

This is for 5 pounds of sausage. I cut it down to a fourth of the recipe, which made the seasonings easy to divide. So, 1.25lb. ground sausage and the adjusted seasonings. You can do this for however much you want. If you're a huge bratwurst fan and would like to keep them in your freezer for whenever you want them, make it all, or do it by half.
 Basically, place everything in a large bowl and mix really, really well. Then divide them up in the size you want, I went with about 3.5 ounces per sausage, and roll them into a log shape. Wrap each one individually in plastic wrap and foil, then freeze until ready to use. The flavor really is just like a commercially-prepared brat. The only difference, is it's not in a casing so you have to be a little more delicate with them. I think these would grill ok, but you can't really boil them in beer or anything that would require immersing it in liquid. You could attempt keeping it in the foil as you boil them, after removing the plastic and see if they keep their shape, but that would probably keep it from absorbing any flavor of the liquid. If you are a major eater of brats, you might go ahead and invest in the casings and equipment for stuffing them, but you'd have to figure that out on your own!
Now that I had my brats, what was I going to do with them? I've done brats and sauerkraut several times in my life. I love it, but it's not new. I want to feature things that are new to me on this blog, so I had to expand my repertoire of brat cookery. After researching more of the cuisine of Wisconsin, I came up with two soup recipes that would work really well. Since I couldn't decide which to do, I made both! Well, half recipes of both. The recipes called for more brats than I had, but I made it work and I don't think I missed the extra meat.

The first recipe was a brat and cheddar soup. Here is the recipe:
Brats and Beer Cheddar Chowder 
2 tablespoons butter or margarine 
1 medium onion, finely chopped 
1 medium carrot, coarsely shredded 
3 large shallots, chopped  (I actually forgot to get these at the store and think the soup would have been even better with them. Don't leave these out like I did!)
1 14 - ounce can vegetable broth or 1-3/4 cups vegetable stock (I used chicken stock. This isn't a vegetarian dish, why not use something with more flavor? Sorry veggie stock lovers...)
1/3 cup all-purpose flour 
1 cup whole milk, half-and-half or light cream (I used 2% milk and it was just fine)
1 teaspoon caraway seeds, crushed 
1/4 teaspoon ground black pepper 
10 ounces Wisconsin Aged Cheddar cheese or sharp cheddar cheese, shredded (I don't know if my cheese actually came from Wisconsin or not, but I pretended it did...)
4 cooked smoked bratwurst, knockwurst or Polish sausage (about 12 ounces total), halved lengthwise and sliced (I precooked my brats and just threw them in when it's called for.)
1 (12 oz.) can beer or 12-ounce bottle ale

In a large saucepan, heat the butter over medium heat. Add onion, carrot and shallots; reduce heat to medium low. Cook, stirring frequently, about 10 to 15 minutes or until the onion is very soft and golden. 
 
In a large screw-top jar, combine broth and flour. Cover and shake until combined and smooth. (I just used a bowl and a fork for this. I didn't have a screw-top jar on hand to use for this. You definitely have to stop and stir a few times to make sure the flour on the bottom and sides get properly incorporated, but it works just as well.) Stir into the onion mixture. Add the milk, caraway seeds and black pepper. Cook over medium heat, stirring frequently, about 5 minutes or until the mixture thickens. Gradually stir in the cheese; reduce heat to low. Cook, stirring frequently, until cheese melts, but do not boil. Stir in the bratwurst and beer. Cook, stirring frequently, until heated through. If you like, serve with rye bread. 
 
Makes 4 to 6 main-dish servings (7 cups).
 
This has a lovely, orange color, probably from the carrots because it was orange before I added the cheese. It has a strong beer flavor which blends well with the cheese. I did add some salt and pepper, but not much. I think I definitely missed the shallots. They tend to be slightly sweet, which would have balanced the bitterness of the beer more. This had a great texture, definitely lives up to the name "chowder".
 
The second soup recipe's formatting is such that I can't copy and paste it here. I will share the link in the sources section and you can get it from there. This one was brats, potatoes, and cabbage soup with Swiss cheese. The recipe calls for water and I found that it wasn't enough liquid. Before the step that calls for adding milk, I added 2 cups of chicken stock to the pot as well and that seemed to be just perfect for the amount of soup. I made a half recipe, though, so you might need up to 4 cups if you make a whole batch. I also added salt and pepper to this one, but not much. The Swiss cheese is a very subtle flavor, but it was delicious! I was very impressed with this one.
 
Neither soup was difficult to make, but it was a bit challenging to make two simultaneously. It was fun though! Both took about the same amount of prep and cooking time, so it was a good pairing. I would make both of these again.
 
To accompany the soups, I needed bread. And I found the greatest recipe ever. Again, the formatting is such that I can't copy and paste, but I'll provide the link. The concept is basically, savory monkey bread. For those of you who are unfamiliar with monkey bread, it's bread dough cut into small pieces that are then dipped in melted butter and rolled in a sugar-cinnamon mix. It's placed in a Bundt pan and baked until cooked through. This recipe was exactly that, but with cheese. My sister had a bag of Parker house rolls that she was not going to use because she hadn't realized at the time she bought it that it was the actual dough and not rolls. So I bought it off of her, thawed them out, and used it for this recipe. Each dough piece was rolled in melted butter, then in fresh, shredded Parmesan cheese. After filling the well-greased Bundt pan with half the bread, you put in a layer of shredded Provolone cheese. Then repeat with the rest of the dough, butter, Parmesan and Provolone. Let it rise in a warm place for an hour before baking at 375 degrees. Since my bread package only had 24 instead of 36 rolls like the recipe calls for, I cut the time down to 30 minutes and ended up baking for about 33 minutes total, but keep an eye out for it because it does get very browned on top. 
OMG, this is the greatest thing I have ever tasted. It's definitely going to end up in my top ten list of recipes I made for this project. It sticks to the bottom of the pan, so you really do want to make sure it's super well greased.
They don't really pull out of the pan, you have to cut them out, but then the two layers do pull apart from one another. I have never had Provolone and Parmesan together, but they work really well. Provolone melts really well, but is softer than the Parmesan, which tends to melt and get a bit hard and crunchy. I am going to try reheating these tonight with my leftover soup. It will definitely need to go in the oven rather than the microwave. That cheese won't work in the microwave.
Here is the meal in all of its glory. The cabbage and potato soup is in the back and the cheddar beer soup is in the front. The only thing I added after this picture, was a dill pickle, which I thought was perfect for the flavors of the night. I actually sat with both bowls in front of me and ate them simultaneously. I had one spoon in each hand and it was ridiculous. And also awesome. It's the perfect time of year for these recipes. They'd be way too heavy for spring or summer. If you like brats and cheese, you absolutely have to make these! You will not regret it!

Sources:
City History

County History

City Stats

City Map

City Pic

Bratwurst Recipe

Bratwurst, Beer, Cheddar Chowder Recipe

Bratwurst, Potato, Cabbage Soup Recipe

Wisconsin Cheese Pull-Apart Bread (Note: The picture on the recipe does not match the recipe, my photos are the accurate depiction of what this will look like when you make it.)


Sunday, May 17, 2015

Dining-In: A Culinary Tour of America-Clinton, Mississippi


The Location: Clinton, Mississippi

According to the 2013 census, there are 25,305 people living here. 60.1% are white and 33.9% are African American. The per capita income as of 2012 is $26,098. 9.1% live below the poverty line.

Clinton was founded in 1823 as Mount Salus, which means "Mountain of Health". The oldest college in the state of Mississippi was founded in Clinton in 1826.

In 1875, after the Civil War, there was what is now known as the "Clinton Riots". The history online is very biased, but from what I can tell, there was a group of white citizens who were unhappy with the state's governor, who they felt didn't support or look out for their interests enough. They felt overlooked and threatened in the Reconstructionist Era. During a political rally, in which many African American citizens who supported the governor were in attendance, the group of white citizens attacked the African Americans, and continued in a series of attacks throughout the town over the next several days. Many lives were lost. I will provide the links to the information I found, but if you read it, you'll have to read into it what probably really happened.

During the second World War, Clinton became home to a German POW camp that held about three thousand soldiers. Most came from the North Africa battlefield. It is their prison labor that helped build a replica of the Mississippi River Basin that the US Army Corps of Engineers used to help prevent floods in the area. The prisoners also picked cotton and planted trees during their stay. They lived there within all the statues and rules of the Geneva Convention.

The Food: Sweet potato soup and Cheese crackers

Sweet potatoes bring about $79 million to the state's economy. Mississippi is the second largest producer of the tuber in the nation. It's the food that immediately comes to mind when I think of the South, particularly the Deep South. Cheese straws are another food prominent in Southern states. I don't have the proper equipment to make cheese straws. You need one of those tubes you use to make spritz cookies, so I found a recipe for crackers that pretty much had the same flavor but were a different shape. Both recipes are recipe cards from my collection and I don't have the original sources.

Cheese Cracker Delights


What a delight these were. I have never made crackers in my entire life before. I mean, why would you? They're affordable and already made at the store. Boy were these worth it. I think they tasted just like Cheez-its. The cheese is harder to mix into the flour than you might think. You'll need to use your hands and mix it manually after a while. The dough is essentially a savory shortbread, and the texture tasted like it as well. I highly recommend this one.

Ingredients:
8 oz. sharp cheddar cheese, shredded
1/2 cup butter
1 1/2 cups flour
1/4-1/2 tsp. salt (I used a scant 1/2 tsp.)
1/4 tsp. cayenne pepper (I used a very scant 1/4 tsp. It was just a hint of spice without being overwhelming.)

In a large mixing bowl, combine shredded cheese and butter; bring to room temperature(about one hour).

Beat with an electric mixer until well combined. Stir in flour, salt, and pepper. Divide the dough in half. Shape dough into two 7" logs. Wrap and chill logs for at least one hour.

Preheat oven to 350 degrees. With a knife, slice the cheese logs to 1/4"-thick slices. Place slices on ungreased baking sheets. Bake for 15 minutes.

Makes about 4 1/2 dozen. Per cracker: 44 cal, 3 g fat

I noticed that these crackers made crackling sounds when they cooled off. Maybe that's where the word "cracker" comes from? If I was to make these again, I would try using reduced fat cheese. I wanted to try it the way the recipe called for originally, but I don't see why reduced fat cheese wouldn't work just as well. Actually I absolutely do see why it might not work, but I want to try it anyway!

Potato-Yam Soup with Bacon and Spinach

I don't like sweet potatoes, in general, because they're usually prepared with too many sweet ingredients for my tastes. Marshmallows, pineapple, brown sugar, it's all too much. Even before I cut sugar out of my diet, I never liked it. It's tough finding savory applications for sweet potatoes that don't lean towards sweet. This soup was perfection. It was savory and delicious and really not that hard to make. The ingredients might not be the most "Southern", but it has sweet potato in it and that was good enough for me!

6 slices applewood-smoked bacon (about 6 oz.), cut crosswise into 1/2" pieces (I diced mine into smaller pieces because I didn't read that note about size and it still worked out fine. I find it easier to cut bacon when it's frozen or half frozen. If you've never tried it, you should. It will make your life so much better.)
1 onion, chopped
2 cloves garlic, pressed
1/4 tsp. dried thyme
1(14.5oz) can diced tomatoes in juice
1(10oz) yam, peeled, quartered lengthwise, cut crosswise into 1/3" slices
2 medium(10oz) Yukon gold potatoes, peeled, quartered lengthwise, cut crosswise into 1/3" slices

2 medium(10oz) New potatoes, peeled, quartered lengthwise, cut crosswise into 1/3" slices
4-5 cups chicken broth
1(5-6oz) pkg baby spinach, stemmed


Saute bacon in large pot over medium heat until crisp. Transfer to paper towels to drain. Add onion to drippings in pot(I drained all but about one tsp. of the fat and it was just enough.); increase heat to medium-high and saute until beginning to brown, about 7 minutes. Add garlic and thyme; stir 1 minute. Add tomatoes with juice. Stir until almost all the liquid evaporates, about 2 minutes. Add all potatoes; stir to coat. Add 4 cups broth; bring to boil. Reduce heat to medium-low, cover with lid slightly ajar.

Simmer until potatoes are tender, stirring occasionally, 10-12 minutes. Add spinach and bacon; stir until spinach wilts, about 1 minute, adding broth by 1/2 cupfuls if too thick. Season with salt and pepper.

Makes 4-6 servings. 319 cal, 15g fat, 5 g fiber

I would suspect that there's actually a little less fat than the recipe says because I drained more of the bacon grease off than it called for. That's really the only source of fat in the entire recipe. I added about two extra cups of broth to reach that consistency for a total of 6 cups broth. I didn't add all the bacon back in, but used some to sprinkle on the top to look pretty. I did not season with salt and pepper and found it completely flavorful. Don't waste salt on it, the bacon seasons it enough.

Both of these recipes were fantastic and I'd absolutely eat them again. Now I can see why sweet potatoes and cheese straws are so popular in the South. I just wish I'd started making them sooner!

Sources:

Sweet potato info

City pic

City map

City website

POW history

Clinton riot history

City stats

Clinton riot (Note, this particular site was so biased that I actually felt uncomfortable reading it. It was a good source of information, however, once you ignore the extreme bias, which is why I used it and am including it here.)


Sunday, March 29, 2015

Dining In-A Culinary Tour of America: St. Louis, Missouri


The City: St. Louis, Missouri
This stop marks two milestones for me: The first is that we are officially 1/5 of the way through the states of this country. That's pretty exciting to me! The second is that we are in a city that was featured in the most famous road trip movie in American history-National Lampoon's Vacation. The first, the original, and the best. You might recall Clark Griswold pointing out the world-famous St. Louis Arch to his family as they drove over the "Mighty Mississip" and then claim that they had no time to actually go to it. Then they got lost in the city in a hilarious, if racist sequence featuring the dangers of inner cities...If you have not seen this movie, do yourself a favor and watch it.


St. Louis was founded in 1763, and was a slave state. It has a long and complicated history, much too long to get into here, but I will focus on a few points of interest.

Prior to the European invasion, the region all along the Mississippi River was home to the Osage and numerous other tribes. They lived there for at least 700 years, during which time they created mounds of earth for various reasons. These reasons included ceremonial rites, burial mounds, and commemorative purposes. The majority of these mounds, sadly, were razed when Europeans began to settle the area and needed the space for their own needs. Several mounds still exist, however, and you are able to see them if you travel to the area.

A couple of interesting factoids about the city: It is the home to the country's first gas station, and not surprisingly, also the location of the very first car accident.

The current population, as of the 2010 census, is 319,294 people. 49.2% are African American, and 43.9% are white. This isn't the first time I have visited a city where white people are the minority, however this is the first large city I have visited where this was the case.

There is too much history to get into here, but there is one moment I would like to highlight. As a history major who focused on food and its role in history, the 1904 World's Fair marks an important time in American food history. It introduced a number of foods now considered to be standard American fare, to the nation. These foods include: hot dogs, hamburgers, ice cream cones, banana splits, iced tea, Dr Pepper, cotton candy and peanut butter*. Most of these foods existed in some form in other countries or areas of the United States already, but the World's Fair popularized them across the country. Imagine our nation now if the hamburger had never been introduced. No Burger King, no McDonald's...Some of you would love that idea, I know, but it has shaped our nation's history, whether or not you like the food. Roadside restaurants began popping up around the same time as highways were being built and people began to take long car rides on vacation or to get away for a few hours. The foods at those restaurants all had their beginning at the 1904 World's Fair.

The World's Fair is also the subject of one of my favorite musicals of all-time: Meet Me in St. Louis, starring Judy Garland.


This movie introduced one of the most famous Christmas songs ever, Have Yourself A Merry Little Christmas. Again, if you have never seen it, do yourself a favor and watch it. It's such a sweet movie.

The Food: Gerber Sandwich and Toasted Ravioli

You're probably asking why I chose these foods over the foods I've just waxed poetic about from the World's Fair. Well, the answer is simple, I've never had a Gerber Sandwich or toasted ravioli before, but I've had all the foods from the fair. I am trying to feature items that are new to me, or at least items I have never made for myself before. These are currently very popular foods that define St. Louis culture today, and for good reason--they're super delish.

I have links I will post for both recipes but as they are both so simple I will write out what I did for them here as well.


Toasted Ravioli:
-Your favorite brand of frozen ravioli, thawed(I used Rising Moon Organics brand and selected their vegan spinach and soy cheese flavor. I have eaten this brand before and highly recommend it to any vegan/vegetarians or lactose intolerant people who miss being able to eat ravioli. Be sure to look at the package carefully though, as they also have non-vegan ravioli as well.)
-Italian seasoned breadcrumbs(I used Trader Joe's brand since they have no corn syrup in theirs, and added my own Italian seasoning, as well as salt and pepper to flavor it)
-milk
-1 egg
-oil for frying
-Spaghetti sauce of choice(I used my sister's that was sitting in the fridge. Nobody tell her...)
-Parmesan cheese for sprinkling on top

Combine the milk and the egg in a small bowl, whisking until well mixed. Pour the breadcrumbs onto a plate. Dip the ravioli one by one into the milk and then place in the breadcrumbs and carefully cover both sides with the breadcrumbs. Place onto another plate and let sit for 15 minutes or so to let the breadcrumbs adhere to the pasta really well.

Using a saute pan, heat oil over medium-high heat and carefully place the ravioli in the pan. Pan-fry both sides until nicely toasted brown. Do not worry about the pasta not being cooked in water first. The heat from the frying will cook it through as well as heat the filling. When they are done, remove from the pan and drain on a paper towel for a minute. Serve them on a plate with the sauce on the side and a sprinkling of cheese on top.

This was really amazing. So simple really, but unlike any other ravioli I've ever had before. These could be used as an appetizer if you wanted, but it could also be a meal.

Gerber Sandwich:
Made famous by Ruma's Deli in the city, this open-faced sandwich feels almost like eating a French bread pizza, minus the tomato sauce. It is traditionally made with something called "provel" cheese, but I don't have access to that here, so I made an approximate substitute that was recommended, of one part white cheddar, one part Swiss, and two parts provolone. I diced all of these up and mixed it together and sprinkled it on top. Here is how I made it:
-1 small loaf of French bread(my store sells individually-sized French breads so I just used one of these) split down the middle and laid out flat
-butter
-garlic powder
-deli ham slices
-cheese, as described above

Spread both halves of the bread with butter and sprinkle with garlic powder.(None of the recipes I found specified what kind of garlic, so I went with garlic powder. I was concerned that fresh garlic might not cook through fast enough and I don't like raw garlic, though I found I didn't really taste the flavor of the powdered kind. Granulated might have worked better, though fresh probably would have cooked through so I might try that next time.)

Layer the ham slices on top of it and then top with the cheese. Place them on a sheet pan(I actually did everything on the sheet pan to start with and found it was easier that way) and cook in a 400 degree oven for about 15 minutes until the cheese it melted and starting to brown on top.

This was pretty tasty, though like I said, the garlic didn't really come through. It was also really hot and the roof of my mouth is still burned the next day. I would recommend letting this sit for a while before eating it. The flavor of the cheese combination was pretty tasty, though the cheddar was drowned out by the provolone and Swiss.


Both of these recipes were really easy to make. There was nothing out of the ordinary about the actual ingredients, it's all pretty simple stuff. But putting it together in that way was so unique to me that it really stood out as a special treat. I highly recommend both of these, but if I had to choose one over the other, it would be the ravioli. They were just fantastic!

Sources:
Map

City Pic

Movie Clip

Worlds Fair Food info*List of food is a direct quote taken from here

More World's Fair info

City History

Toasted Ravioli recipe

Gerber Sandwich recipe

Provel Cheese info


Sunday, March 8, 2015

Dining-In: A Culinary Tour of America-Lititz, Pennsylvania


The City: Lititz, Pennsylvania

Lititz was founded in 1756 by the Moravian church, but the area had been home to the Susquehannock tribe, prior to the European invasion. The town, actually a borough, is located about eight miles north of Lancaster County, famously known for their Amish population. The town of Lititz was named after a castle in Bohemia, and for the first century of its existence, only Moravians were allowed to live there. After that, others were allowed to live there, however, you had to be a Moravian in order to own a home. That lasted until just prior to the Civil War. In 2013, the town was named "America's Coolest Small Town" in an online survey conducted by Budget Travel.


According to the 2000 census, there are approximately 9029 people who live in Lititz. It is made up of about 97.23% white people, and 4.1% of the total population live below the poverty line.

Why did I choose Lititz? Well, one very good reason: It is the home of the oldest pretzel company in the United States. The Julius Sturgis Pretzel Company was founded in 1861. When you think of foods from Pennsylvania, or at least when I think of foods from Pennsylvania, I think of two things: Philly Cheesesteaks, and Pretzels. Since I don't eat beef and am lactose intolerant, the cheesesteaks don't really appeal to me. But I love pretzels...And I've never made them from scratch before, so I thought that would be a fun challenge, and it proved to be so.

The Food: Soft Pretzels and Potato-Cheddar Soup

The month of March doesn't have as many built-in holidays like February, so there will be more random foods and places to visit that don't necessarily tie in with anything. This is one of them. It is possible that my mind went to Pennsylvania due to a recent twitter discussion with Kam Chancellor of the Seattle Seahawks who was at the time, in a layover in Philadelphia. Long story short, I might have gotten the idea of Philly Cheesesteaks on my mind and from there, the leap to pretzels. I have never made soft pretzels before and found the idea intimidating, so I'd never attempted it. I mean, how do you do the twisting? And I know there's some sort of water bath involved. And how do they get so brown on the outside? It all seemed really complex to me, so I stayed away from them. I really should have tried these sooner, because they were fantastic. The recipe I used is from the Sunset series of cookbooks, the one entitled, "Breads". It was originally published in 1963, but the version I have is from the 1989 printing. I will type it out, along with my own notes, but I claim no ownership of the recipe. Since they include notes in brackets, I will distinguish mine by bolding them.

German Soft Pretzels
1 pkg. active dry yeast
1 cup warm water (about 110 degrees)
2 1/2-3 cups all-purpose flour
2 Tbsp. salad oil(I used canola)
1 Tbsp. sugar
6 Tbsp baking soda in 6 cups water
Coarse salt(I used Kosher)

In a bowl, dissolve yeast in water. Add 1 1/2 cups of the flour, the oil, and sugar. Beat for about 3 minutes to make a smooth batter.(I did this by hand and found it didn't really take 3 minutes. Just use a fork at this point and you'll be fine.) Gradually stir in enough remaining flour (about 1 cup; I added 1/2 cup at a time and didn't really pay attention to how much. I just stopped when it was no longer terribly sticky) to form a soft dough. Turn out onto a floured board and knead until smooth and satiny (about 5 minutes), adding flour as needed to prevent sticking. Place dough in a greased bowl; turn over to grease top. Cover and let rise in a warm place until doubled (about 1 hour.)(The best place I have found to let dough rise, is the back burner of my stove. One of the burners has a pipe from the oven that opens onto the stove and the heat comes out of it. If you turn the oven to "warm" it will have just enough heat to make the dough rise perfectly.)

Punch dough down, turn out onto floured surface, and divide into 12 pieces. Shape each into a smooth ball by gently kneading.(I actually didn't do this part and found it worked just as well. It'll save you a few minutes.) Then roll each into a smooth rope about 18 inches long, and twist into a pretzel shape.(I thought this would be very difficult, but it really was pretty simple. The book includes a picture on the other page, of a person twisting a pretzel, that I can't include here, but if you can't recall what that looks like, pull up a youtube video, or google an image, and you'll be able to figure it out pretty easily.) Place slightly apart on a greased baking sheet(at least 12 by 15 inches), turning loose ends underneath. Let rise, uncovered, until puffy (about 25 minutes).(I put the plastic wrap from the first rise over them and the dough did stick a bit, so it probably is best to leave it off, or grease the plastic wrap first.)

Meanwhile, in a 3-quart stainless steel or enameled pan (don't use aluminum) (I used my Revereware pan as it is all I had. I don't know what metal it is. I don't know what will happen if you use aluminum, but I found they turned out just fine in my pan.) bring soda-water mixture to boiling; adjust heat to keep water boiling gently. With a slotted spatula, lower one pretzel at a time into pan. Let simmer for 10 seconds on each side, then lift from water, drain briefly on spatula, and return to baking sheet. Let dry briefly, then sprinkle with coarse salt and let stand, uncovered, until all have been simmered.(I tried using a metal fish spatula but this didn't work as well as I'd expected. I ended up using a traditional pancake turner after that and it worked better. The pretzels are difficult to work with, though. The dough is very tender and the water only par-boils it briefly. When you lift it up, you are lifting up a heavy, soggy dough blob that looks sort of like a train-wreck. You will be thinking that you've made a terrible mistake somewhere along the way, but all you did was follow the instructions. This is ok, just be gentle and accept that some of the pretzels will tear at certain points in the process. It will be ok, trust me. But this step, after they've boiled, you will probably feel slightly disappointed that the beautifully-shaped pretzels you worked really hard to make look perfect, now look like bloated, blobby hot messes.)

Bake in a preheated 425 degree oven for 12-15 minutes or until golden brown. (I did mine all in one time, so I rotated the pans halfway through the baking time. If you do this, you will notice that the oven is very steamy when you open it and that the pretzels almost seem like they're burning. This is normal, I think. It must have to do with the soda-water bath. Also, I did 7 and 7 for mine and they were perfect with that amount of time, in my opinion.) Transfer to racks; serve warm with butter or mustard. Or let cool completely, wrap airtight and freeze. To reheat, place frozen pretzels on ungreased baking sheets and bake in a preheated 400 degree oven for about 10 minutes or until hot. Makes 1 dozen pretezels.
The blobby mess appears to resolve itself in the baking process. The soda-water bath smooths out the surface as the pretzels bake so they look much more normal when they're done. The problem I ran into, was getting them off the pan. I ended up losing most of the bottoms because they stuck so badly to the pan. I think the soda-water bath also makes them stick really badly to the pan. I think what I would do differently is one of two or possibly both things: 1-Put them on newly greased pans instead of back onto their original pan after I boil them. 2-Put them on parchment paper or 3-Put them on greased parchment paper. Between any of those things, this might be resolved without losing the bottoms of the pretzels. Seriously, I thought I was going to break the spatula in my attempts to get them off. The flavor, however, is exactly like a store-bought pretzel. It's the soda-water bath that gives it that pretzel taste. And have you ever noticed that sensation on your tongue when you touch it to the surface of a pretzel? That's the soda-water. If you don't know what I mean, try that out the next time you eat a soft pretzel. You can also try it with hard pretzels but those are so salt-covered that it's difficult to find enough surface area to test it out on. It's hard to describe, so just test it out for yourself and you'll know what I mean! Also, when you make these by hand, you control how much salt goes onto them. I am not a salt fan, so I kept it to a very minimal amount, and with kosher salt, you have smaller pieces than the kind you get from the store or the mall. I thought it was just perfect.

Now, what to serve with soft pretzels? My mind turned to cheese sauce. It's a traditional pairing. However, I also wanted a meal, and that is not a meal. So, I chose cheese...soup! Yes, I've stated that I am lactose intolerant, but there are varying levels of this issue, and most cheeses I can actually eat because they age long enough for the lactose to burn off. I picked one of my own recipe cards to try, and I don't know the source of it, but I will write it out here for you to try, along with my notes.

Slow-Cooker Potato-Cheese Soup
2 lb. potatoes, peeled and cubed(Russet potatoes)
1 medium onion, chopped
5 cups chicken broth(I used vegetable broth because I had most of a container left over from my last blog and needed to use it up. I think it was just fine in this.)
Salt/pepper
1 cup low-fat milk
1 cup shredded cheddar cheese

Place potatoes, onion, chicken broth and salt and pepper to taste in a slow cooker. Cook for 6 hours on a low heat setting (or 3 hours on high), until potatoes are tender. (I did about 4 hours on low, then I got paranoid that the potatoes weren't really cooking enough even though I never tested them, and turned it to high for the last 2 hours. It turned out just perfect this way.)
Ladle half the mixture into a food processor or blender and puree until smooth. Pour pureed mixture into a large pot over medium-low heat and add the unpureed half. (I have a hand-held blender, which I highly recommend. I poured the unblended half into the large pan and pureed it right there before pouring in the unpureed half. This saves some cleaning up afterwards.) Stir in milk. When the soup begins to simmer, turn heat to low(do not let boil). Adjust seasonings. Sprinkle with cheese and serve.(I mixed the cheese into the soup and let it melt and mix into the rest of the flavors. I did put a bit of cheese on the top just to make it look pretty.)
4 Servings
The cheese flavor was actually pretty mellow, so if you want more of a cheesy flavor, you'll need to add more than the recommended amount. I thought it was pretty tasty as it was, though. That and the pretzels made a filling dinner for me that I would easily make again. I can't vouch for using other sorts of milk, but I would assume soy or rice milk would work just as well. Probably not coconut milk, though, because of the flavors it would add. Unless you wanted to add some curry spice to the soup and take it in a whole different direction. That would probably be quite tasty, actually.

The most important lesson I have learned so far in this blog project, is that many of the things we buy from the store are actually not that difficult to make by hand. They often taste better, have better texture, and better-quality ingredients. They just don't necessarily last as long which is probably because they're not full of chemicals and preservatives. When this project is over, I will seriously have to rethink what I make for myself vs. what I buy from the store. 

Sources:


Sunset Breads Cookbook --I'm pretty sure I got my copy at a thrift store which always seem to have a large and steady supply of the books from this series. They have some good stuff in them, so I would highly recommend looking around for them.