Sunday, March 8, 2015

Dining-In: A Culinary Tour of America-Lititz, Pennsylvania


The City: Lititz, Pennsylvania

Lititz was founded in 1756 by the Moravian church, but the area had been home to the Susquehannock tribe, prior to the European invasion. The town, actually a borough, is located about eight miles north of Lancaster County, famously known for their Amish population. The town of Lititz was named after a castle in Bohemia, and for the first century of its existence, only Moravians were allowed to live there. After that, others were allowed to live there, however, you had to be a Moravian in order to own a home. That lasted until just prior to the Civil War. In 2013, the town was named "America's Coolest Small Town" in an online survey conducted by Budget Travel.


According to the 2000 census, there are approximately 9029 people who live in Lititz. It is made up of about 97.23% white people, and 4.1% of the total population live below the poverty line.

Why did I choose Lititz? Well, one very good reason: It is the home of the oldest pretzel company in the United States. The Julius Sturgis Pretzel Company was founded in 1861. When you think of foods from Pennsylvania, or at least when I think of foods from Pennsylvania, I think of two things: Philly Cheesesteaks, and Pretzels. Since I don't eat beef and am lactose intolerant, the cheesesteaks don't really appeal to me. But I love pretzels...And I've never made them from scratch before, so I thought that would be a fun challenge, and it proved to be so.

The Food: Soft Pretzels and Potato-Cheddar Soup

The month of March doesn't have as many built-in holidays like February, so there will be more random foods and places to visit that don't necessarily tie in with anything. This is one of them. It is possible that my mind went to Pennsylvania due to a recent twitter discussion with Kam Chancellor of the Seattle Seahawks who was at the time, in a layover in Philadelphia. Long story short, I might have gotten the idea of Philly Cheesesteaks on my mind and from there, the leap to pretzels. I have never made soft pretzels before and found the idea intimidating, so I'd never attempted it. I mean, how do you do the twisting? And I know there's some sort of water bath involved. And how do they get so brown on the outside? It all seemed really complex to me, so I stayed away from them. I really should have tried these sooner, because they were fantastic. The recipe I used is from the Sunset series of cookbooks, the one entitled, "Breads". It was originally published in 1963, but the version I have is from the 1989 printing. I will type it out, along with my own notes, but I claim no ownership of the recipe. Since they include notes in brackets, I will distinguish mine by bolding them.

German Soft Pretzels
1 pkg. active dry yeast
1 cup warm water (about 110 degrees)
2 1/2-3 cups all-purpose flour
2 Tbsp. salad oil(I used canola)
1 Tbsp. sugar
6 Tbsp baking soda in 6 cups water
Coarse salt(I used Kosher)

In a bowl, dissolve yeast in water. Add 1 1/2 cups of the flour, the oil, and sugar. Beat for about 3 minutes to make a smooth batter.(I did this by hand and found it didn't really take 3 minutes. Just use a fork at this point and you'll be fine.) Gradually stir in enough remaining flour (about 1 cup; I added 1/2 cup at a time and didn't really pay attention to how much. I just stopped when it was no longer terribly sticky) to form a soft dough. Turn out onto a floured board and knead until smooth and satiny (about 5 minutes), adding flour as needed to prevent sticking. Place dough in a greased bowl; turn over to grease top. Cover and let rise in a warm place until doubled (about 1 hour.)(The best place I have found to let dough rise, is the back burner of my stove. One of the burners has a pipe from the oven that opens onto the stove and the heat comes out of it. If you turn the oven to "warm" it will have just enough heat to make the dough rise perfectly.)

Punch dough down, turn out onto floured surface, and divide into 12 pieces. Shape each into a smooth ball by gently kneading.(I actually didn't do this part and found it worked just as well. It'll save you a few minutes.) Then roll each into a smooth rope about 18 inches long, and twist into a pretzel shape.(I thought this would be very difficult, but it really was pretty simple. The book includes a picture on the other page, of a person twisting a pretzel, that I can't include here, but if you can't recall what that looks like, pull up a youtube video, or google an image, and you'll be able to figure it out pretty easily.) Place slightly apart on a greased baking sheet(at least 12 by 15 inches), turning loose ends underneath. Let rise, uncovered, until puffy (about 25 minutes).(I put the plastic wrap from the first rise over them and the dough did stick a bit, so it probably is best to leave it off, or grease the plastic wrap first.)

Meanwhile, in a 3-quart stainless steel or enameled pan (don't use aluminum) (I used my Revereware pan as it is all I had. I don't know what metal it is. I don't know what will happen if you use aluminum, but I found they turned out just fine in my pan.) bring soda-water mixture to boiling; adjust heat to keep water boiling gently. With a slotted spatula, lower one pretzel at a time into pan. Let simmer for 10 seconds on each side, then lift from water, drain briefly on spatula, and return to baking sheet. Let dry briefly, then sprinkle with coarse salt and let stand, uncovered, until all have been simmered.(I tried using a metal fish spatula but this didn't work as well as I'd expected. I ended up using a traditional pancake turner after that and it worked better. The pretzels are difficult to work with, though. The dough is very tender and the water only par-boils it briefly. When you lift it up, you are lifting up a heavy, soggy dough blob that looks sort of like a train-wreck. You will be thinking that you've made a terrible mistake somewhere along the way, but all you did was follow the instructions. This is ok, just be gentle and accept that some of the pretzels will tear at certain points in the process. It will be ok, trust me. But this step, after they've boiled, you will probably feel slightly disappointed that the beautifully-shaped pretzels you worked really hard to make look perfect, now look like bloated, blobby hot messes.)

Bake in a preheated 425 degree oven for 12-15 minutes or until golden brown. (I did mine all in one time, so I rotated the pans halfway through the baking time. If you do this, you will notice that the oven is very steamy when you open it and that the pretzels almost seem like they're burning. This is normal, I think. It must have to do with the soda-water bath. Also, I did 7 and 7 for mine and they were perfect with that amount of time, in my opinion.) Transfer to racks; serve warm with butter or mustard. Or let cool completely, wrap airtight and freeze. To reheat, place frozen pretzels on ungreased baking sheets and bake in a preheated 400 degree oven for about 10 minutes or until hot. Makes 1 dozen pretezels.
The blobby mess appears to resolve itself in the baking process. The soda-water bath smooths out the surface as the pretzels bake so they look much more normal when they're done. The problem I ran into, was getting them off the pan. I ended up losing most of the bottoms because they stuck so badly to the pan. I think the soda-water bath also makes them stick really badly to the pan. I think what I would do differently is one of two or possibly both things: 1-Put them on newly greased pans instead of back onto their original pan after I boil them. 2-Put them on parchment paper or 3-Put them on greased parchment paper. Between any of those things, this might be resolved without losing the bottoms of the pretzels. Seriously, I thought I was going to break the spatula in my attempts to get them off. The flavor, however, is exactly like a store-bought pretzel. It's the soda-water bath that gives it that pretzel taste. And have you ever noticed that sensation on your tongue when you touch it to the surface of a pretzel? That's the soda-water. If you don't know what I mean, try that out the next time you eat a soft pretzel. You can also try it with hard pretzels but those are so salt-covered that it's difficult to find enough surface area to test it out on. It's hard to describe, so just test it out for yourself and you'll know what I mean! Also, when you make these by hand, you control how much salt goes onto them. I am not a salt fan, so I kept it to a very minimal amount, and with kosher salt, you have smaller pieces than the kind you get from the store or the mall. I thought it was just perfect.

Now, what to serve with soft pretzels? My mind turned to cheese sauce. It's a traditional pairing. However, I also wanted a meal, and that is not a meal. So, I chose cheese...soup! Yes, I've stated that I am lactose intolerant, but there are varying levels of this issue, and most cheeses I can actually eat because they age long enough for the lactose to burn off. I picked one of my own recipe cards to try, and I don't know the source of it, but I will write it out here for you to try, along with my notes.

Slow-Cooker Potato-Cheese Soup
2 lb. potatoes, peeled and cubed(Russet potatoes)
1 medium onion, chopped
5 cups chicken broth(I used vegetable broth because I had most of a container left over from my last blog and needed to use it up. I think it was just fine in this.)
Salt/pepper
1 cup low-fat milk
1 cup shredded cheddar cheese

Place potatoes, onion, chicken broth and salt and pepper to taste in a slow cooker. Cook for 6 hours on a low heat setting (or 3 hours on high), until potatoes are tender. (I did about 4 hours on low, then I got paranoid that the potatoes weren't really cooking enough even though I never tested them, and turned it to high for the last 2 hours. It turned out just perfect this way.)
Ladle half the mixture into a food processor or blender and puree until smooth. Pour pureed mixture into a large pot over medium-low heat and add the unpureed half. (I have a hand-held blender, which I highly recommend. I poured the unblended half into the large pan and pureed it right there before pouring in the unpureed half. This saves some cleaning up afterwards.) Stir in milk. When the soup begins to simmer, turn heat to low(do not let boil). Adjust seasonings. Sprinkle with cheese and serve.(I mixed the cheese into the soup and let it melt and mix into the rest of the flavors. I did put a bit of cheese on the top just to make it look pretty.)
4 Servings
The cheese flavor was actually pretty mellow, so if you want more of a cheesy flavor, you'll need to add more than the recommended amount. I thought it was pretty tasty as it was, though. That and the pretzels made a filling dinner for me that I would easily make again. I can't vouch for using other sorts of milk, but I would assume soy or rice milk would work just as well. Probably not coconut milk, though, because of the flavors it would add. Unless you wanted to add some curry spice to the soup and take it in a whole different direction. That would probably be quite tasty, actually.

The most important lesson I have learned so far in this blog project, is that many of the things we buy from the store are actually not that difficult to make by hand. They often taste better, have better texture, and better-quality ingredients. They just don't necessarily last as long which is probably because they're not full of chemicals and preservatives. When this project is over, I will seriously have to rethink what I make for myself vs. what I buy from the store. 

Sources:


Sunset Breads Cookbook --I'm pretty sure I got my copy at a thrift store which always seem to have a large and steady supply of the books from this series. They have some good stuff in them, so I would highly recommend looking around for them.


Tuesday, February 24, 2015

Crock-Pot Kraut Dinner

I have a handful of Crock-Pot recipes I kept from last year's daily calendar and am slowly trying them out. This one turned out to amazingly delicious. I did take pictures but won't post them because, sauerkraut, cabbage, and brats aren't the most photogenic of foods, regardless of their flavor. Here is the recipe, with all the changes that I made to it:

Old-Fashioned Sauerkraut
4 slices bacon
1/2 small green cabbage, cored and shredded
1 can sauerkraut, undrained
4-5 bratwursts(I used chicken brats)
1/2 cup chopped onion
1 Tbsp. butter
3/4 cup white wine(you could definitely use beer if you had any, but I had white wine that needed to used up and it turned out really good)
Pepper, to taste

1.) Place the cabbage in the crock-pot. It will come up nearly to the top. Place the can of sauerkraut, including the juice, over it. Then add the brats, onions, butter, and pepper to taste.

2.) Cook the bacon over medium heat in a frying pan until crisp.When the bacon is cool enough to handle, crumble it and place on top of the other ingredients in the pot. Then pour the bacon fat over that. Deglaze the frying pan with the wine and gently scrape off all the bacon bits from the pan and when the alcohol has burned off from the wine, pour it over the top of the food in the pot. Place the lid on the pot and turn on high. It will take at least 4.5-5 hours, and you will need to take the lid off once in a while and gently stir everything around as the cabbage begins to cook down.

This will make 4-5 servings and is good served with roasted potatoes or buttered noodles. I was really pleased with how delicious this was. It reheats well. I froze two portions so I can see if it thaws well. Not sure if it will, but I'm sure it'll still be tasty.

Saturday, February 21, 2015

Dining In-A Culinary Tour of America: Monterey Park, California


The City: Monterey Park
Why Monterey Park, you might ask. I chose this city because it is one of the smaller cities in California with the highest percentage of Asian/Asian Americans in their community. One of my only rules about this series is that I cannot choose a city I have been to before. Being that it is the Lunar New Year celebration right now, I wanted to feature that in this week's blog post. Since I have been to San Francisco, which might be the obvious choice for California and Lunar New Year, I had to get creative in where I chose to "visit". Other cities around the nation that have large Asian and Asian American populations are already slated for posts later on in the year for other events I want to feature in this series.

The population of Monterey Park, as of 2013, was 61,085. Of that total, 62.9% of the people are Asian or Asian American. 47.7% of those people are Chinese or Chinese Americans. The next greatest percentage of the total population is 30.3% being Hispanic. The East Los Angeles College, located nearby, is the city's largest employer.

Monterey Park is 10 miles east of Los Angeles, in southern California. It was founded on May 29, 1916. By the 1920's, Asian farmers began to come to the area to work and live. Over the years, attempts were made to limit the amount of Asian people moving to the area, but none of them were successful. In the 1970's and 1980's, the city council tried to pass "English only" ordinances two different times, and both attempts failed. In 1985, they successfully passed an ordinance that forced all business within the city to display English language signage on their signs. By 1990, the city became the first in the continental United States to have a population with an Asian/Asian American majority. There is a large Taiwanese community there and the city is even known as "Little Taipei". 

The Dish: Chop Suey and fried rice

Why Chop Suey, you might ask. Well, for one thing, I've never had it before. I've never made it before. For another, I am intrigued by its history. Nobody actually knows the true origin of this dish. In case you did not know, this dish, along with the fortune cookie, are actually American dishes. They are not Chinese at all. So why do it for Lunar New Year? Because America is about blending things together. People from other nations come here and they bring their own culinary traditions with them and from there they are altered to fit the tastes of their local communities. These Americanized dishes are a success story. They show how we all fit in together and work together and come together, particularly at the dinner table. I think it's beautiful and worthy of celebrating. That's the entire point of this blog series. 

Legend has it that chop suey, which basically means a hodge-podge of leftover vegetables and meat, stir-fried and served with a sauce, was created at a restaurant in Chinatown in San Francisco in the late 1800's. It was a great way to use up all of one's inventory and pass it off as authentic to unsuspecting American tourists. It became a great hit. But another legend says that it was created at a hotel for a Chinese diplomat who had come to visit. The chef invented the meal in hopes of appealing to both Chinese and American taste preferences. Some say that it really was invented in China and the name has been changed over the years. Nobody truly knows, and that's what makes it fascinating.

The dish itself is rather uneventful. I found a good recipe online to base mine off of but I changed a lot about it. The biggest alteration I made was to veganize it. It called for pork tenderloin, but that can be so expensive and also depending on how it's prepared, the flavor can get lost. Since this was going to have a lot of other flavors vying for attention, I didn't want to spend all that money on something that would be drowned out in the end. I am not a tofu fan, so I chose tempeh, which is a fermented soy bean product that has a nice firmness to it that tofu doesn't have. I got the kind that is marinated in a soy/ginger sauce and it turned out to be pretty good. I used vegetable broth instead of chicken and oyster mushroom sauce instead of oyster sauce, which I can't bring myself to eat. I already had the mushroom sauce on-hand. As for the vegetables, the biggest one I swapped out was the celery. Celery is a big component of chop suey(probably because it's cheap), but I cannot stand celery. I put in carrot slices instead and I think it was fine. I left out the green bell pepper since I'm not a huge fan of those either. (The name of this blog is "Persnickety" and now you are learning why...!) I used baby bok choy, cremini mushrooms, snow peas, onion, green onions, a can of water chestnuts, a can of bamboo shoots, which for some reason do not smell good at all, and canned bean sprouts. Yes, canned bean sprouts...We now live in a world where I cannot get fresh bean sprouts from a grocery store because everybody is afraid of getting sick from them. I cannot even begin to express my outrage and dismay over this. Do you know the horror of using bean sprouts from a can? Probably not...But I do, and it is not ok.

To accompany the chop suey, I made homemade fried rice. I have made this in the past, though I have usually used one of those mixes from the store for the flavoring and I think this recipe was good and easy enough that I would never need one of those mixes again. Actually I'm a bit ashamed to admit to having used a mix at all now that I know how simple it truly is. I kept this one vegetarian too, though I included the scrambled egg, so it depends on your definition of "vegetarian" if you consider it to be truly so or not. The biggest alteration I made was to switch out the frozen peas for snow peas that I trimmed and sliced thinly. I have never liked frozen peas and knew I'd just pick them out if I used them. I love snow peas and thought they would work just a well, and they did. They gave it a little added crunch which was very nice. I used reduced sodium soy sauce and found it needed a lot more than the one teaspoon the recipe called for.

The actual assembly of the food was pretty simple, though it took a bit of time to stir-fry each item individually and take it out of the pan before moving onto the next. The biggest time consumer was the prep work. It took nearly an hour and a half to prep everything for both dishes. The above picture, from end to end, is all the food that went into the meal. At the bottom are the eggs and veggies for the rice. Next to that is the veggies for the chop suey. The smaller bowls are the bean sprouts, water chestnuts and bamboo shoots, the sauces, and the sliced tempeh that was later marinated. And at the far end is the pre-cooked rice I made earlier this afternoon. I portioned it out and spread it flat on a sheet pan that I put in the fridge to cool down properly. I can see now why Chinese food at restaurants is so expensive. It's a very labor-intensive cuisine. They definitely earn whatever profit margin the dishes are set to.

I'm not sure I would ever make chop suey again or even order it in a restaurant when there are other more interesting dishes out there, but it was a lot of fun to make and enjoy today. It was a good way to celebrate the Lunar New Year, in my opinion. The holiday is becoming more and more popular in America, and will probably evolve and change into something unique in time, just like dishes I made tonight did, once upon a time.

Gung Hay Fat Choy/Gong Xi Fa Cai!

Sources:

Map 


Sunday, February 15, 2015

Dining In-A Culinary Tour of America: Valentine, Nebraska

The City: Valentine, Nebraska, aka, "America's Heart City"
According to the 2010 census, the population of this town is 2,737. Of this total, 86.3% is white and 9.1% is Native American. As of the 2000 census, the per capita income was $22.715, and 6.4% live below the poverty line.

Valentine, just north of the Niobrara River, was founded in 1883 when the Sioux City and Pacific Railroad came through that part of the country. As we saw last week in Pocatello, Idaho, railroads were a big factor in when and where cities in this country were established.

The city was named after Congressman E.K. Valentine, who won an election just prior to the city's founding. During its first few years, the population tripled, which brought with it a huge increase in violent crime. Eventually, a "no guns in the saloons" policy was enforced, and helped to curb violent crime.

Fun Fact: Valentine participates in a mail rerouting program. During the time before Valentine's day, mail is rerouted through the city's post office, where it is given a special Valentine postmark as well as a Valentine's day message stamp.

The Dish: Runza
I had never heard of this food before I started looking around for cities that I could associate with Valentine's Day. When I ran across Valentine, Nebraska and started researching foods of Nebraska, this word popped up over and over again. Runzas are apparently so popular in Nebraska that there is even a chain of fast food restaurants name after it. When I looked it up I got really excited because of its history and knew I had to do it. Runza, also known as bierock, fleischkuche, or Kraut Pirok, is a meat and cabbage-filled bread dough that hails from the same German colony in Russia that my great grandfather and his family were from.

Almost every culture has a dish like this. Think of pierogies of Poland, humbow from China, or pasties from Britain. Samosas and empanadas are other examples. A dish that is small enough to be held in your hand, has a hearty filling, but with a casing that keeps it from making a total mess when you eat is important. You can make them ahead of time and take them to work or school and eat them on the go if need be. I was very happy to see that my own heritage has its own contribution to this delicious and practical culinary tradition.

And now a bit of a tangent in which I wax poetic about Volga Germans and my own background. Back in the mid 1700's, Catherine the Great, who was German but had married into the Russian royal family, took over as Queen(apparently there was a whole thing and a deposition of her husband and a conspiracy to assassinate him and all sorts of drama) and invited Germans into the country to settle the vast prairie-like lands along the Volga river. They were given complete autonomy and did not have to pay taxes or serve in the military. They spoke their own language, established their own churches, and kept to themselves. My great grandfather was born in Saratov, Russia, which was in the middle of this area. When he was a very young child, the attitude in Russia was changing towards the Volga Germans. They were told they had to start paying taxes, serving in the military, and basically to completely assimilate with the greater Russian population. Many of the people, my family included, didn't want to do this, so they left. Many of them settled in the Midwestern states of the US, but my family want to Canada and settled in Calgary, Alberta. These areas in both the US and Canada have a similar environment to the land they had known in Russia. Not everybody left, however, and the majority of those who stayed behind would end up being rounded up during the Second World War and shipped off to Siberia, seeing as Germany was an enemy state to Russia. A lot of people died there, but those who survived ended up staying and there is still a large population of ethnically German Russians in Siberia today.

Ok, now that I am finished with that, I can get back to the actual dish. I found a few good recipes online and used those to base mine off of. I had planned to make the bread dough myself but I had a time crunch at the last minute and when I compared prices to buying a bag of bread flour versus buying those bags of frozen dough(I used Rhodes brand) and seeing it was pretty much the same price, decided to get the already made dough instead. I would like to do this again sometime and make the dough myself.

The filling was really simple. I switched out ground chicken for the ground beef and kept the seasonings exactly as it called for in the recipe. I used only fresh cabbage in mine but I can see how using sauerkraut or a mixture of both could be amazing. If you like sauerkraut, that is. Which I do. You could even add diced cooked potato in this too if you wanted, but then you'd be dangerously encroaching into pasty territory.
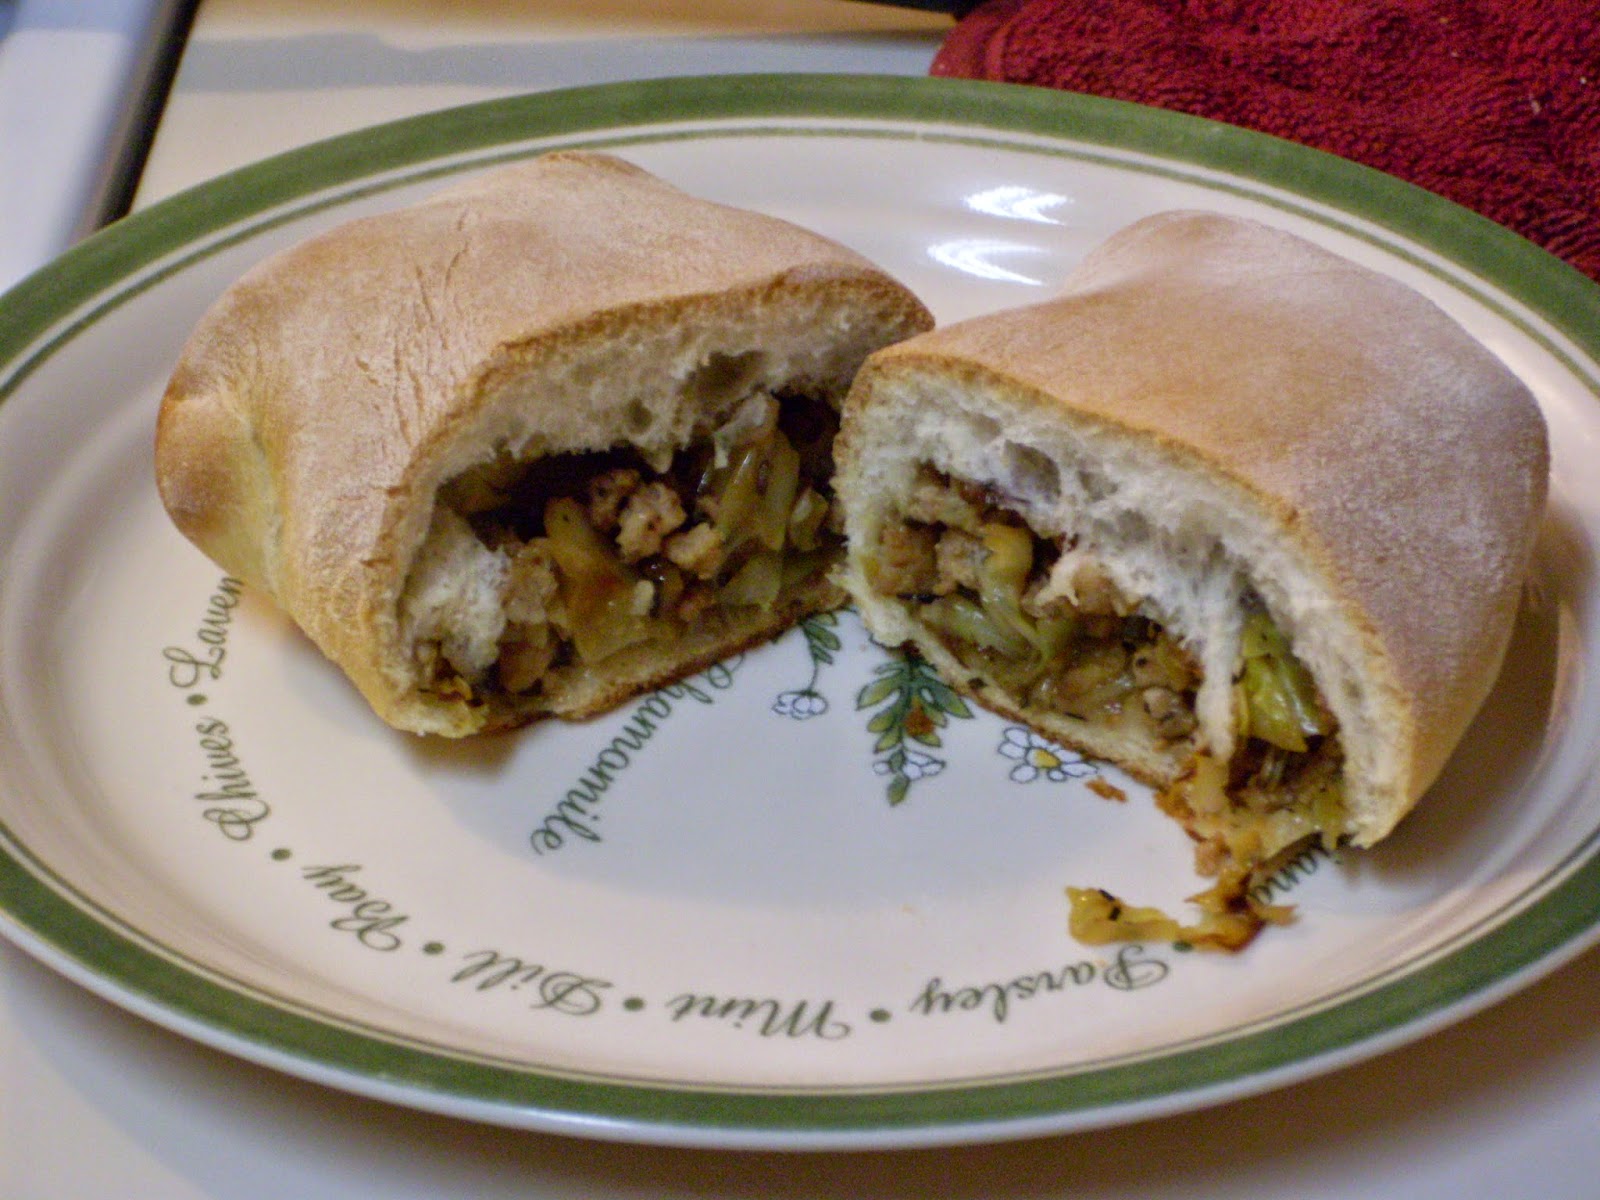
 After being filled and resting a second time. Just before putting them into the oven. I wasn't sure how big they'd get so I put them on two sheets.
After coming out of the oven. I moved them all onto one sheet to rest for a few minutes before trying one.

I wasn't able to fit as much filling in them as I would have liked. The recipe said to divide the dough into 8 pieces and it's possible that if I'd made the dough myself it would have made enough to create bigger pieces, but it was still filling. The cabbage is slightly bitter which works well with the salty, savory flavors mixed with it. The dough was delish and held its own against the filling. There was no mess and it was really easy to eat. I am not going to write out the recipe since I largely used one I can link to, so I will post the link to it here.
These were amazing! I forgot to add the egg wash on the top like the recipe said to do. Obviously it looks different without it and it might have been a bit crunchier with it, but I didn't miss it, personally. I followed the bread package instructions for cooking temp and time and did 25 minutes. I think the full 30 would have been too much time.

The next time you have a hankering for German food but want to try something a little different, I would highly recommend this. It was pretty simple to make and really good. I was originally going to serve this with roasted potatoes with caraway seeds, but I just made soup instead. Two of these plus the soup was a perfect-sized meal.

Sources: Just a reminder that I am not posting anything from Wikipedia, just assume that I use that as the base of my research and it's easy enough to look it up there so I don't feel the need to post a link to it. I just post links to the other sources.

The Recipe

Runza History

Valentine City History

Map

City Picture


Saturday, February 7, 2015

Dining In-A Culinary Tour of America: Pocatello, Idaho

The City: Pocatello, Idaho

Why Pocatello, you might ask? Well, there's sort of a family connection to this name. I've never been there, but it's a name that my cousin, when she was very young, used to call my uncle, as a sort of nonsensical "insult". I think it was before I was born, but I think about that every time I hear the name.
Pocatello was named after a Shoshone chief, though in 1918, a linguist named Sven Liljeblad did research and determined that the name wasn't actually a real name, but a combination of several Shoshone root words. The chief's daughter confirmed that her father had never been called Pocatello, but went by the name Tonzaosha, which means "buffalo robe."
Pocatello was established as a stop for the first railroad in Idaho, during the gold rush of 1860. When the gold rush ended, farmers and ranchers came to the area and settled in.(Those who made it alive, that is, and didn't succumb to such tragedies as dysentery or wagons falling off rafts and drowning all on board. Or those who didn't get distracted with hunting buffalo...I am dedicating this tangent to my Oregon Trail days in computer class in elementary school. If you never played this game, then you missed out on some pretty awesome fun!)
The city is the home of Idaho State University and has a population of about 54,255, according to the 2010 census. According to the 2000 census, the city is about 90.5% white, and 7.2% Hispanic or Latino. 75.4% of the population is Mormon.
Pocatello fun fact: In 1948, after a particularly harsh winter, the city mayor passed an ordinance which made not smiling illegal. It was never repealed, and on December 10, 1987, the city was declared the "U.S. Smile Capital". There is even an annual "smile event" to celebrate this!

The Food:
Both of tonight's recipes come from my Idaho Cookbook, that I got on my whirlwind trip to Yellowstone National Park with my sister and my cousin back when I was a student at the University of Washington. I try to collect cookbooks from every state I visit, if I run across any. When I think of foods from Idaho, besides the very obvious potato, I think of trout. There are a lot of rivers in this state, so they catch a lot of trout there. I went with this as opposed to potatoes. I also found a roll recipe I tested as well. The trout recipe was shared by somebody actually from Pocatello, so it's even more authentic! I will be copying the recipes exactly as they are written and will put my own notes in parentheses. I do not own these recipes. I am providing a link at the end for you to order the book for yourself or see if you can get it through your local library if you are interested in exploring the book more.


Garden Grilled Trout:
3 Tbsp. butter
1/4 cup dry white wine
4 trout, cleaned (I used fillets. I was going to get a whole trout but then I decided that I did not want to deal with the head or the tail. That's just gross. So I got two fillets for pretty much the same price as a whole one. I did keep the skin on, which is important to keep it from drying out.)
Salt and pepper, to taste
1/3 cup chopped fresh herbs(any combination basil, thyme, dill and tarragon) (My note: Look for a package that has a blend of herbs to save money. I found one that was organic dill, parsley, and thyme, specifically made for seafood.)
5 green onions, chopped

Melt butter and stir in wine. Generously brush each trout, inside and out with wine mixture. Sprinkle salt and pepper over skin(really you want to do it over the flesh, you don't eat the skin) and spoon herbs and onions into fish cavities.(I carefully put the herbs and onions on top of each side of the fish and then carefully sandwiched them together. This seemed to work pretty well.) Grill over charcoal, basting often.(I used my grill pan and it worked just fine.) Cook until skin starts to crack and meat is white. Garnish with parsley and lemon.-Dean Anderson-Pocatello

I am not terribly experienced with trout, I have eaten it as a kid but for some reason I thought it was pink, like salmon. I always thought of trout as "poor man's salmon" but it really isn't at all. It was white and very delicate. It needed a lot of lemon to bring out the flavor. There are a lot of bones, I have heard this many times and that might be why I avoided it. If you have needle-nose pliers, though, and are willing to give it a few extra minutes, you can remove all the bones and it's just fine. Don't spend extra money on the super expensive kitchen pliers, just get the cheapo ones from the hardware section of a store. They're exactly the same at a fraction of the cost.

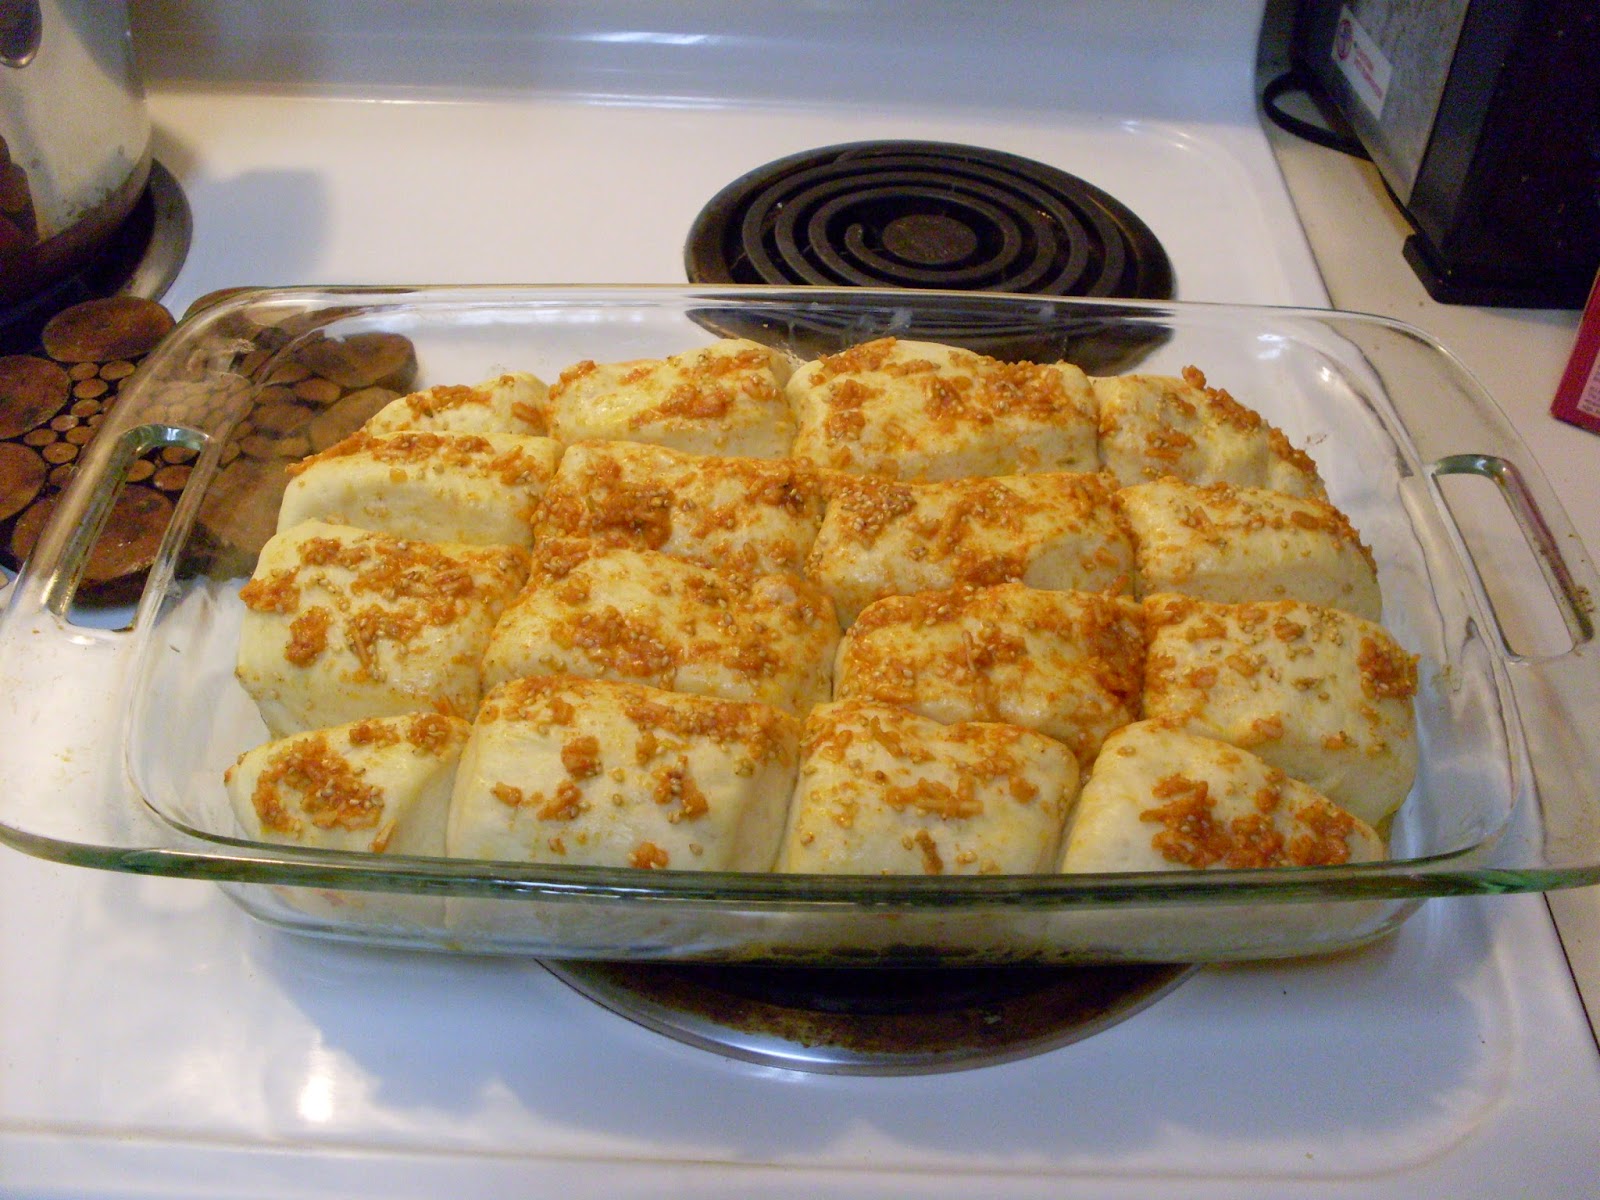
Before baking
 After baking

Pull Apart Onion Rolls
2 1/2 cups all purpose flour
1 pkg. dry yeast
1/4 cup milk
2 Tbsp. margarine(I used butter)
1 Tbsp. sugar
1/2 tsp. salt
1 egg
Onion Butter Filling:
2 tsp. Instant minced onion
2 tsp. water
3 Tbsp. melted butter
1 Tbsp. grated Parmesan cheese(I'm not a snob, I used the stuff from the can and it was just fine)
1 Tbsp. sesame seeds(mine were toasted)
1/2 tsp. paprika
1/4 tsp. garlic powder

In large mixer bowl, combine 1 flour salt and yeast. Set aside. In a saucepan, heat milk, margarine, sugar and salt, stirring constantly until butter is almost melted. Add to flour mixture. Add egg and beat at low speed for 1/2 minute, scraping sides of bowl constantly. Beat 3 minutes at high speed. By hand, stir in enough remaining flour to make a moderately stiff dough. Knead on floured surface until smooth and elastic. Place in greased bowl, cover and let rise until double. Punch down, cover and let rest 10 minutes. Roll dough into an 8-inch square. Combine filling ingredients and spread over surface of dough. Cut dough into 16 squares and place, filling side up, in a greased 1 1/2-qt. casserole.(I used a 9"x13" pyrex dish. I found that it was very difficult to lift the topped dough and place it into the dish without the melted butter mixture running all over the place. I cut it in the dish. I would recommend placing the dough in the dish first, then topping it, then cutting it. Or you could cut it and then spoon the topping over it. But get it in the dish first or you'll make a huge mess.) Cover and let rise until nearly double. Bake in 350 degree oven for 25-30 minutes(I did 25), covering with foil after first 15 minutes. Cool in dish 5 minutes, then carefully turn out onto serving platter. Serve warm.-Ruth Elliott-Viola

The rolls smelled really good going into the oven and I was surprised at how bland I found them when they'd baked. Maybe they needed more salt and Parmesan in the topping. That probably would have helped. Maybe if I'd sauteed fresh onions instead of using minced that would have helped too. Also, they were a little dry. I'm not sure if maybe I let them rise too much or in too warm of heat and it made them dry out, or what. I think they have potential though.

I was surprised at how not fishy the trout was. My apartment smells like herbs, not fish, which is really good. I might need to experiment with this fish more in the future. Sometimes it's hard though, when you live in salmon country, to branch out and try other fish. But fish is so good for you that I should probably make that effort. I served this with rice pilaf, and no vegetable because I was too lazy to make one. There's green stuff on the fish, that counts, right?

Sources:


Saturday, January 31, 2015

Dining In: A Culinary Tour of America-Glendale, Arizona

  
The City: Welcome, to Glendale, Arizona! I know there are other reasons we're all very excited to be here, but for now, we're going to study up on the history and the food! To start it off, a little piece of trivia: Glendale will be hosting the Super Bowl for the second time, but it hosted it for the first time back in 2008.

Glendale's population, as of 2010, was 226,721. According to the 2000 census, about 76% of the population is white, and about 5% of the population is African American. The average income is $19,124, and 11.9% of the population lives below the poverty line.

Glendale's official founding date is February 2, 1892, and the area had been a desert until it was irrigated and turned into land that was livable. Farming was the big monetary source for the area. A sugar beet factory drew in a lot of workers and income. The first World War also brought with it an increase in farming to the area which also brought in workers and a need for more housing.

The state of Arizona was a part of Mexico until 1848 when half the state was signed over to the United States. The other half of the state came into the nation in 1853. The territory was part of New Mexico until 1863, but didn't become its own state until 1912. As much as the connection with Mexico was strong, there was an even greater Native American population in the territory that still has a strong presence in the state to this day. Much of what we know as the "Wild West" was actually the territory of Arizona.

The Food:
Because I have already and will continue to focus on Native American food in other states, I wanted to focus on the connection to Mexico with Arizona. I picked two dishes to make and was very happy with how both of them turned out. And I did something I have never done before: I cooked with lard! I was scared of it, because it's so high in saturated fat, but I was even more afraid of cooking with shortening, which still has trans fat in it. I realized it was a "pick your poison" situation, and decided to go with the more natural fat, even if it's higher in saturated fat, rather than the laboratory-made trans fat. I think the lard also lent a little more flavor to the food than shortening would have done.

Frijoles de Olla, is a bean dish that I had never heard of before. Traditionally it's made in a clay pot, but since I didn't have one, I just used a regular pan. I learned something very valuable about beans tonight: you don't have to soak beans before cooking them! Don't waste your time or the water on it, just throw it in the pan and add your water and go. It still takes several hours to cook, but no longer than if you'd soaked them first. I adapted the recipe from two different recipes I found online and it is as follows:

2 cups dried beans of choice(I used pinto. I wouldn't recommend garbanzo or soy, they just don't evoke thoughts of Mexico, in my opinion)
Water
Salt
1/4 yellow onion, sliced
1 jalapeno pepper, seeded and cut down the middle(You can use a spicier pepper if you so desire)

Rinse and pick over the beans, taking out any rocks or wrinkled beans. Place the rest of the beans in a large pan big enough to hold them and about three inches of water. Bring this to a boil and reduce to a simmer. Simmer for an hour before adding the salt(I didn't measure, I just poured in what looked good to me. Also, I had planned on adding some dried oregano as well but I forgot. It was still good, but I would like to have had that additional flavor), the onion and the pepper.

Continue to simmer for another hour to an hour and a half or until the beans are fully softened. Keep an eye on the water level and add more if it starts to thicken too much. When the pepper halves are fully softened, remove them from the pot, dice them, and return them to the pot.

When the beans are softened, spoon them into bowls to serve on the side of your meal. The flavors are strong enough that they stand out well and you want to taste them by themselves as opposed to having them mixed in with something else. 

I really liked it and it made a lot, so there will be leftovers for my coworkers on Monday! They're vegan, and not spicy so nobody will have to worry about being afraid to try it!

And the other item I made...Homemade tortillas. I have had this recipe in my collection forever but I have never tried it yet. Boy was I missing out! I was sooo impressed with this one. I don't know that I can go back to the flavorless, textureless store bought ones after this. I may have been ruined for store bought tortillas now. It was definitely not a simple task. In was pretty involved and took a bit of time to get done, but the result was phenomenal. The recipe claims that leftovers can be frozen for later use and I might need to make a ton of these and keep them in my freezer instead of bags of the kind from the store. I followed the recipe, though I halved it, so I will write it out here. It's so old I have no idea of the original source. 

Flour Tortillas
4 cups all-purpose flour
1 1/2 tsp. baking powder
1 1/2 cups warm water
1 1/2 tsp. salt
4 Tbsp. lard or shortening(I went with lard, but if you'd like a vegetarian option, you should go with the shortening. Just note that even with the revamped formula, shortening still has trans fat in it.)

Combine dry ingredients in a mixing bowl. Cut in shortening.(I used a pastry cutter and this worked really well. Use it for longer than you think you need to and break down the fat really well into the flour.) Make a well in the center and add water, a small amount at a time, to form a dough. Knead dough in bowl until smooth and elastic. Cover and set aside for ten minutes. Form dough into egg-sized balls and flatten between palms. With rolling pin, roll each ball into a 6" circle, about 1/8" thick. Cook on preheated ungreased skillet over medium high heat, about two minutes per side, until tortilla looks speckled.(Be careful once you turn it because it will burn very quickly. I ended up turning them several times just to cook through but keep it from overheating on each side.) Cover with a clean towel to keep warm and soft until served.(I placed a plate on top of the pot of beans that had finished cooking. I turned the heat off but there was a lot of heat in the pot and it kept the tortillas hot and pliable.) The tortillas may be cooled and stored in plastic bags in the freezer for later use.

I forgot to count, but I think the half-recipe of this made about 8-9 tortillas. I actually burned the first one, but there was still plenty left. Most of them were almost round! I really liked the flavor and texture of these. They were thick, but not too thick, and chewy. They were crispy on the outside, but not crunchy, and were foldable. I made basic tacos for them and served the beans on the side. I swear they were the best tacos I've ever had! Also, a trick I learned: buy pre-marinated fajita-style chicken from the grocery store, and cook it while everything else cooks. This was too spicy for me and I cut it by adding sour cream to the chicken and mixing it together. It was amazing this way!

I would definitely make both of these recipes again. The beans were easy and not that hands-on. The tortillas were easy, but labor-intensive. I think it was well worth it, however. Give it a try sometime and let me know what you think! You may be spoiled for store bought too afterwards!

Citations:


Saturday, January 24, 2015

Dining In-A Culinary Tour of America: Cabot, Vermont


The City: Tonight, we travel southeast from Alakanuk, Alaska, all the way across the country, to the village of Cabot, Vermont. According to the 2010 census, the population of Cabot was about 1433 people. According to the 2000 census, about 95.96% of the population is Caucasian, with 3.13%, the second largest percentage, being made up of people of two or more races. 7.5% of the population lives below the poverty line.

Vermont was originally settled by the French, as a part of New France, which explains the culinary connections to French cuisine. They are also in close proximity to Quebec, sharing a border with the province. Prior to the European invasion of the Americas, the western part of the state was home to the Abenaki and Mohican tribes, both of which were Algonquin speakers. Their numbers declined with the arrival of more European settlers to the area in the mid 1700's.

Vermont has several culinary gems, including their legendary maple syrup, apples, and cheese. The state is also the home of Ben and Jerry's ice cream as well as the King Arthur flour company. Cabot Creamery is the state's most famous cheese company, best known for their cheddar cheese. Cabot Creamery was founded in 1919, and is a COOP consisting of private farms from all over New England.

The Food: I am not a fan of maple syrup, so I did not want to focus on this ingredient. I chose two dishes, a savory and a sweet, both pastries. For the savory I chose something called Tourtiere, which is basically a French word for "fancy pot pie". I had a recipe card that I altered for my own uses, and the recipe is as follows:

Tourtiere:
Cooking spray
1 lb. ground pork (I used ground chicken and since the brand I used only came in 13.3oz packages, I added more veggies to make up the difference)
1 tsp. salt (I ended up using more. Season as you go before you top it with dough and cannot add more.)
1/2 tsp. cinnamon
1/8 tsp. cayenne pepper
1/8 tsp. ground cloves
1 Tbsp. olive oil
1 cup finely chopped onion
1/2 cup finely chopped carrot
1/3 cup finely chopped celery
1(1lb.) russet potato, peeled and cut into 1/4" cubes
3 cloves garlic, minced
2 Tbsp. flour
1 1/2 cups chicken broth
3 Tbsp. freshly snipped chives(I didn't have fresh and used about half that amount in dried instead. It was just fine.)
1 pkg. refrigerated pie dough

1.) Preheat the oven to 400 degrees.
2.) Heat a large skillet over medium-high heat, and coat pan with cooking spray. Add pork to pan. Sprinkle with all the spices. Cook for 5 minutes or until browned and crumbled. Remove pork from the pan. Add 1 Tbsp. oil to the pan before adding all the vegetables and garlic at one time. Saute for five minutes or two, stirring well, until the potatoes begin to look slightly opaque. Return pork to the pan. Stir in the flour, mix well and heat through for a minute. Add the chicken broth, stirring well to combine, until thickened. Remove from the heat and add the chives. Season to taste to make sure it's flavored enough.
3.) Unroll one of the pie dough circles into the bottom of a standard size pie dish. Spoon out filling into the pie dish before topping with the second unrolled pie dough circle. Crimp the ends together and slice a few slashes into the top to help steam escape. You will definitely want to put this on a baking sheet before placing it in the oven. I didn't and it dripped all over the oven.
4.) Bake for 40 minutes or until golden brown. Let it cool off for a while before serving. Makes about 6 servings.

This was really tasty. I took it to a family gathering today and our youngest member, about 3 years old, gobbled up her piece and declared it delicious! I was wary of the spices but it worked really well, I thought. The leftovers I plan on eating cold, though I suppose I could reheat them if I wanted.


The second dish was the sweet dish. This one I focused on apples and cheddar. I had heard of Apple-Cheddar pie but I can't recall if I've ever tried it before. I researched several recipes. Many of them called for the cheese to be added in with the apple filling, which sounded absolutely vile to me and I refused to do that. I found a couple that the cheese is added to the dough and that sounded better to me. I had two recipes but I combined them and then made up the rest based on how I like to make apple pie now that I don't eat sugar when it can be helped. The dough is from the Williams-Sonoma recipe, and the altered filling is from the Epicurious recipe. I went to three stores in search of Cabot cheddar, but none of them had any. I ended up with Boar's Head Vermont Cheddar, but I really did want to use Cabot. The recipe is as follows:

Apple-Cheddar Pie: 
Dough-
2 1/2 cups all-purpose flour 
2 tsp. salt 
1 Tbs. sugar 
6 oz. white cheddar cheese, finely grated (I used orange cheddar. Also, I think ultimately this is too much cheese. I read a comment in one of the recipes that they used 4 oz. and liked it better. I think if I was to do this again, I would try that.)
16 Tbs. (2 sticks) cold unsalted butter, cut into 1/2-inch pieces 
1/3 to 1/2 cup ice water

1.) Combine the flour, salt, sugar, and cheese in a bowl. Mix well, breaking up any clumps of cheese you come across. Place this in the freezer for ten minutes.
2.) Cut up the butter, place it in another bowl and freeze for ten minutes as well.
3.) Add the flour mixture and the butter to a food processor.(Use a large one or do it in two batches. I had no business trying to do it all in one moderately-sized food processor. It was nearly a disaster and led to a lot of stress and cleaning up afterwards.) Pulse until the dough looks like coarse crumbs. Add the water and pulse until the dough just comes together. The dough should be slightly sticky but hold together.
4.) Divide dough in half and form into disks. Cover with plastic wrap and refrigerate for at least one hour.(This ended up making two pies for me. You can freeze one of the disks for another time if you like, or cut the recipe in half and only make one.)

Filling-
4 Honeycrisp apples (as large as you can find)
Lemon juice
1 Tbsp. flour

1.) Peel and core one of the apples. Grate with the small setting of a grater into a small saucepan. Collect any juices. Add a bit of lemon juice to keep from browning and simmer for ten minutes or so until softened. (I did this the day before and refrigerated until ready to use.)
2.) Peel and core the rest of the apples. Slice thinly into slices and place in a large bowl. Add lemon juice to bowl and stir after the addition of each apple to prevent browning. Add the grated apple and mix well. This replaces any sugar you need to add. Sprinkle with the flour and mix well. (If you intend to only make one pie, cut all of this in half.)

Assembly-
1.) Take one of the dough disks out of the fridge and let sit for a few minutes to soften slightly. Put on a floured surface and roll out until 1/4" thick. The cheese in the dough makes it a bit tougher than a traditional dough so I found that using a rolling pin with my hands on the pin directly as opposed to the handles worked much better. Also, rotate the dough every minute or so, but don't turn it over. You want to work the dough as little as possible. Make sure to keep the dough and pin well floured.
2. When the dough is rolled out enough, place on a baking sheet. Spoon half of the apples into the center of the dough and turn up the sides to encase the apples, leaving a hole in the middle for the apples to poke through. I was supposed to dot the apples with butter but I forgot this. The apples did get a bit browned, so I would definitely try to add some butter just to keep it from over-browning.
3.) Repeat with the rest of the dough and the apples, if making two.
4.) Bake at 400 degrees for 20 minutes and then turn down the oven to 375 degrees. Bake for another half hour or so, until golden brown. Remove from the oven and cool before cutting into.

Note: This was technically a galette, since it was a free-formed pie, but you could do it in a pie dish if you wanted. The recipes I researched used a double-crust, meaning it had a top and bottom crust. If you wanted to make it like this, prepare the ingredients just as I described, without cutting anything in half. Place half the dough on the bottom, top with the filling and then top with the second dough round. Crimp the edges, cut holes in the top to vent, and bake the same way. You might have to increase the time to ensure that the bottom cooks properly. I thought this tasted pretty good, in spite of it being a bit too cheesy. I will try another piece tomorrow when it has fully cooled off to make completely sure. I'm not sure you would want to top this with ice cream or whipped cream.

This was a fun baking challenge for me. I was amazed that I managed to pull off the homemade dough, which isn't something I am terribly good at doing. I loved getting to share the Tourtiere with my family. It's fun seeing other people enjoy something you work so hard on preparing. I would definitely make both of these again.


Citations:
Map

Picture 

Williams-sonoma apple-cheddar pie 

Epicurious Apple Pie with Cheddar Crust 

Cabot Cheese website 

Most of the facts about Vermont and the village of Cabot can be found in Wikipedia.