This week's recipe was a simple, yet very tasty, cornbread muffin. Wednesday, June 19th was Juneteenth, and I wanted to celebrate the holiday. Traditional foods for this holiday are picnic-style foods, as well as something red to drink. In addition to the muffins, I also whipped up a batch of my potato salad recipe. I was going to make a boxed variety of cornbread muffin but I was lucky enough to find the perfect recipe to try in my grandmother's recipe tin, so I made that instead. Everything turned out great!
This recipe is a clip-out recipe card from the Family Circle magazine, from June of 1966. It's a quick recipe, I whipped it up after work in the evening and I don't think it took much longer to make than a boxed variety would have taken to make.
Here's all the ingredients, minus the shortening that was melting on the stove. I always like these line-up shots!
First things first, all the dry ingredients are mixed in a bowl. I sifted the flour before measuring it, and then sifted it again with all the other dry ingredients before adding the cornmeal and whisking well.
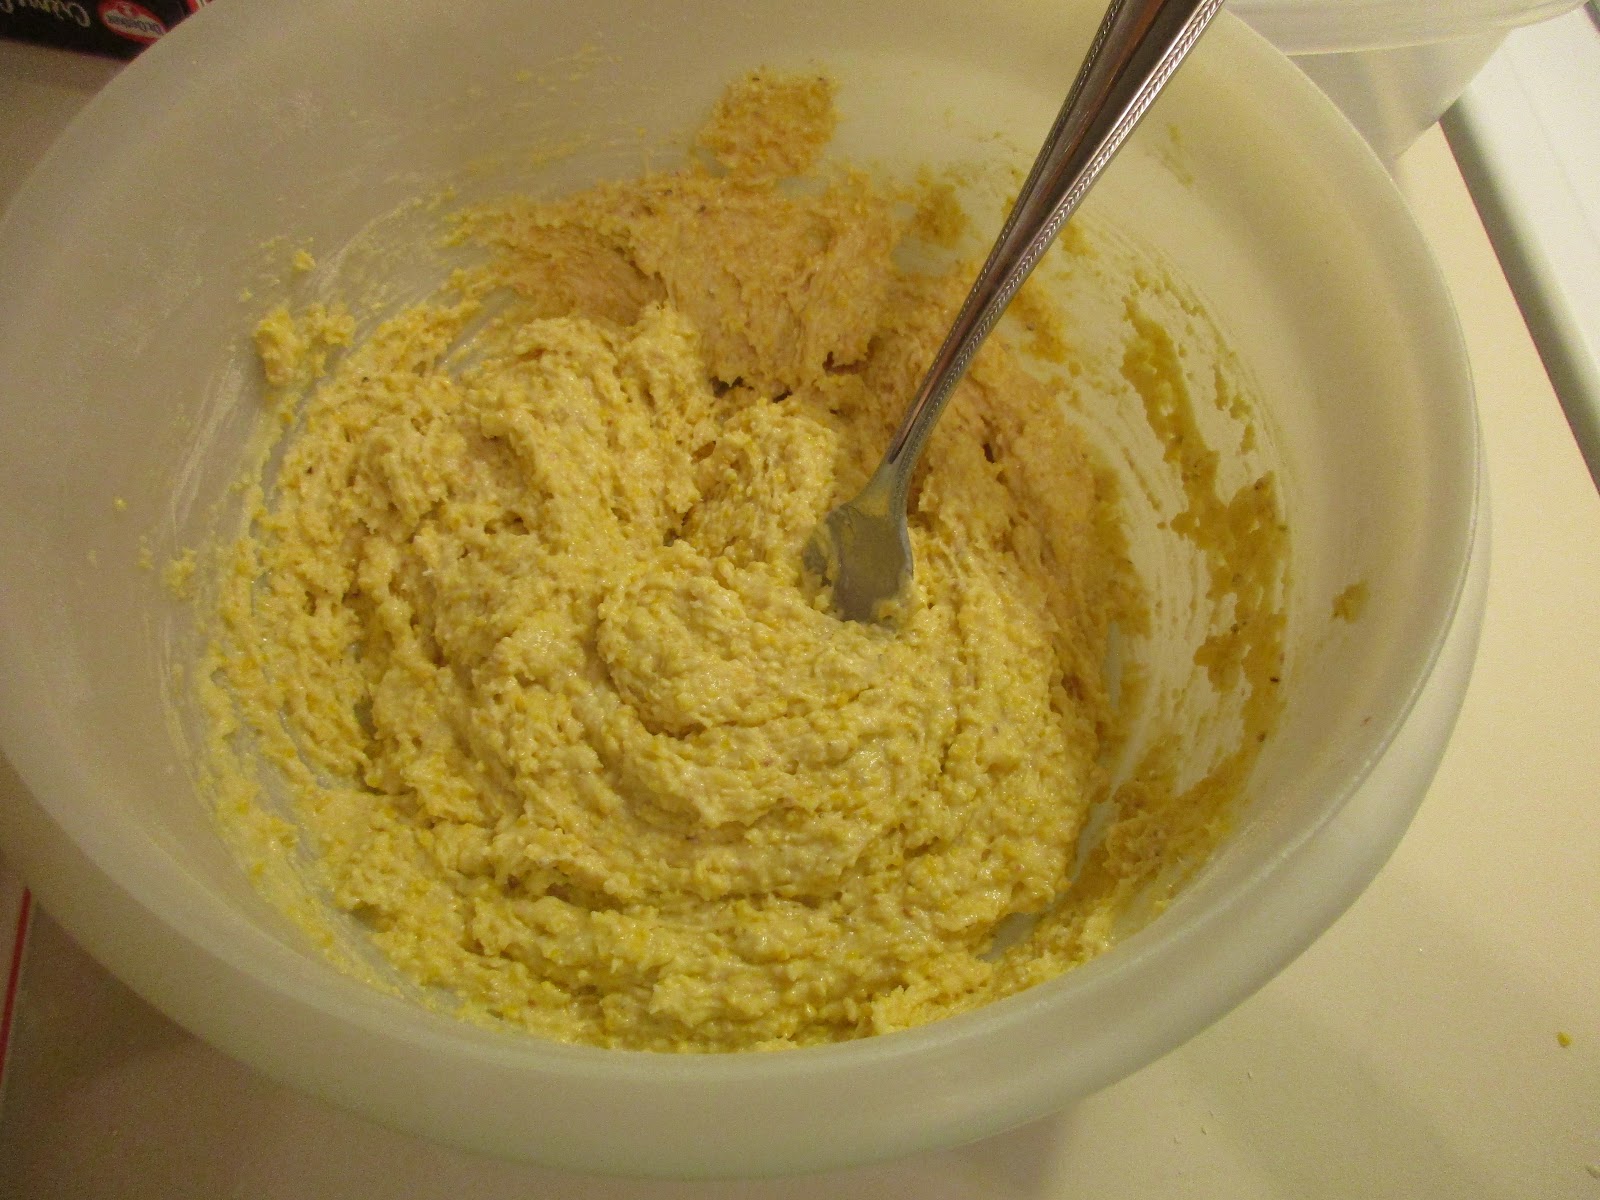
Here it is after you mix in the egg and buttermilk.
And here is the final product after you stir in the melted shortening. The difference is subtle, but you can see that it is a bit smoother than without it.
Here we go into the muffin tin! The bottom and sides did want to stick to the paper liners a bit, so you might consider spraying the liners with cooking spray just to help combat that.
And out of the oven, exactly the 20 minutes it calls for seemed to do the trick.
Here was my final dinner plate. I made the potato salad the night before, and bought the chicken from the deli that night. The red drink next to it is a store-bought frozen juice concentrate I got to help with my plantar fasciitis. What?-You're probably asking me right now. Yep. It turns out that rolling a frozen can of juice concentrate helps stretch and ice the muscles in your foot. And then you get to drink the juice afterwards. (My feet were clean and I had a towel over the can, don't worry!)
I ate the muffins with butter, and a glug of sorghum syrup to dip them in. The sorghum syrup was really tasty with it! I highly recommend this. The only thing to keep in mind with this recipe is that it doesn't not hold out over time. I tried them the next night and they were too dry to be edible. If you make this recipe, I recommend sharing it with others and eating it all the same day you make them.
So, there you have it! A really basic, simple cornbread muffin recipe that is a great starting place if you're not familiar with making them from scratch. It has just enough sugar to be slightly sweet, but not overly sweet like a lot of boxed varieties can be. This is a fast recipe, so don't worry about waiting till after work to make it. And for the most part, it's all ingredients people tend to have on-hand. All I had to buy was the buttermilk, which I never keep on-hand.
I encourage everybody to study up on Juneteenth, and try out this recipe next year to join in with the celebration! Happy eating and celebrating!
-Foodie
Showing posts with label cornmeal. Show all posts
Sunday, June 23, 2019
Sunday, February 7, 2016
Dining-In: A Culinary Tour of America-Hilton Head Island, South Carolina
The Location: Hilton Head Island, South Carolina
2013 population: 39,412; 75.9% white, 14.3% Hispanic. Per capita income $46,661.
The first signs of life on Hilton Head Island date back 15,000 years, though not much is known about the peoples who lived there at the time. More recent tribes include the Escamacus and the Yemassee. The first recorded European to make contact with the native peoples of the island was Francisco Cordillo, a Spanish explorer, in 1521. The island has changed hands over the centuries, to various European occupiers.
By the 1700's, the island was used as land for plantations and growing cotton. The oldest structure still on the island, is the Baynard Mausoleum, built in 1846. During the Civil War, the Confederacy built several forts on the island, while the Union built an army hospital there. The Union also conscripted many male slaves from the island to fight on their side, and with their wages, they were able to return to the island after the war and buy land and homes there. The town of Mitchelville was the first town in the United States built solely for freed slaves.
Hilton Head Island is one of the coastal areas of South Carolina known for being home to Gullah culture. Gullah is a combination of English, Native American, and West African cultures, most of which revolve around the cultivation and harvesting of rice. The land in South Carolina is particularly conducive to growing rice, and West African nations were renowned for their rice, so slaves from those nations were particularly in high demand. Because of the way rice was grown and harvested, the slaves were granted a lot of "free time," with which they preserved their culture, which they have passed down along the generations, where it remains intact to this day. It is not only known for its culinary, musical, and artistic elements, but is also its own dialect of English as well.
During the World Wars, Hilton Head Island was used as a lookout for German and Axis submarines, and as a military base. The city itself was not incorporated until 1983, and today the island is mostly used as a vacation destination.
The Food: Shrimp and Grits, and Blueberry Peach Cobbler
Full disclosure: I assigned this menu to the state of South Carolina completely randomly. The dishes are so Southern that I had to use them at some point in time, and South Carolina became the location assigned to them because all the other states had been chosen for other things. I had no idea that Shrimp and Grits was a very important dish in Gullah culture, or that Hilton Head Island was part of it too. I was very lucky to have paired them up, and it makes me look far more clever than I really am!
Shrimp and Grits:
I looked at a lot of Shrimp and Grits recipes and most of them called for cheese of some sort being added to the grits. This is a pretty common way of making them. However, I am one of those old-school believers in the "You don't mix cheese and fish" rule. It just didn't sound good to me, personally, so I looked for recipes that didn't have cheese in it, and came across a couple good ones. I ended up using them as a base, and to find the proper proportion of dried grits to liquid, but basically invented the recipe from there. I also had a good conversation with a coworker that left me with some ideas to build on as well. Unfortunately, it's one of those recipes without proper measurements. I will, however, include the links to the recipes so you can study those if you'd like!
So, you may be asking yourself right about now, what is a grit? Here is a handy explanation of just exactly, what a grit is:
Grits are also known as polenta. Polenta is the Italian version of grits. Grits are just the more humble version...To make my grits, I started with the liquid I was going to add to them. I started with chicken stock and added a handful of shrimp shells I had frozen after another one of my blog meals earlier this year that involved shrimp. I think it was my gumbo, another Southern delicacy! I threw in a bit of onion and a couple garlic cloves and simmered it for a while. It ended up smelling really shrimpy! I was a bit nervous because it was sooo shrimpy. I love shrimp, but sometimes it can be too shrimpy, you know what I mean?
I used 1/4 cup of grits, which was an adventure to find at the store. Hint: Don't go to the breakfast aisle to look for them. They only seem to carry instant, and as we all know, those are an abomination before the Lord. So, I looked very carefully on the pasta aisle, but they only had tubes of the already cooked kind and that isn't what you want either. It was also not available in the bulk section of my store. Where did I finally find it? The baking aisle...with all the small bags of specialty flours and grains. Go figure!
Anyway, I added the grits to the boiling stock, which I had strained and measured to one cup, and it wasn't enough liquid. Thankfully I had more chicken stock so I threw it on the stove, turned it on high and squeezed in some lemon juice to flavor it. You have to add boiling liquid to the grits to properly cook them. Bit by bit, you pour in more liquid and stir well, until its as thick or thin as you want it to be. Grits can be creamy and soupy like Cream of Wheat or it can be thick and chewy like oatmeal. Sometimes people add cream or milk to it, but I didn't. I just added the stock and mine were more creamy and soupy.
For the shrimp, I had purchased frozen, already shelled and deveined shrimp. I thawed them out and threw it in a frying pan with olive oil and some roughly cut garlic. I would have taken more time to chop the garlic properly but I was on the phone when I was cooking so I couldn't spare an extra hand. I squeezed in lemon juice and sprinkled salt, pepper, and some cayenne pepper and just sauteed it all until it was cooked through. To serve, I poured the grits into a bowl and dumped the shrimp on top. And that was it!
The grits probably took close to a half hour to cook, so make sure to know that going into it. The shrimp only takes a few minutes so don't do that till the very end. I looked at some videos online of how to cook Shrimp and Grits, and most of them have gravy involved. None of the recipes I found had gravy, but that might have been a fun addition. Next time!
This dish was really interesting. The grits were soft and slightly chewy. They were highly flavored from the stock I used. The shrimp were also highly flavored and blended well with the grits. They were just slightly spicy which went well with the grits too. The only issue I had was texture. It was all very soft and I wish there had been some sort of crunchy element to it. I'm not sure what I'd do to adjust that, but I'll keep thinking about it. The flavors were almost bordering on too strong, so I might cut back on the salt next time. The lemon works really well in this, so don't skip that!
Blueberry Peach Cobbler:
This is another quintessential Southern dish, and I actually managed to find one of my own recipe cards for this one! Unfortunately I don't know the original source. A couple notes: It's really difficult to find peaches in Seattle this time of year. And by really difficult, I mean impossible. It's also difficult to find them in frozen form at an affordable price. And by also difficult, I mean impossible. So, for the second time in this blog project, I willingly turned to canned peaches. I did manage to find some that were not steeped in corn syrup, so I went with those. I drained and rinsed them well and continued on with the recipe as it is described. For the blueberries, it was pretty much the same story, though I did manage to find affordable frozen berries. I measured out the 10 ounces it called for and let them thaw out before making the cobbler. And for the buttermilk, if you don't have any on-hand and don't want to buy a pint just for the amount you need for this, try this: Mix one Tablespoon of lemon juice in a one-cup measure and fill up the rest of the cup with regular milk. Mix well and let sit for about five minutes. The lemon juice will sour and thicken the milk and it will simulate the buttermilk perfectly.
Here is the recipe:
Filling-
6 large peaches, about 3 lbs., peeled and cut into thin slices
1 pt.(10 oz.) blueberries
1/2 cup sugar(I reduced this down to 2 Tbsp. and it turned out just fine.)
1 Tbsp. flour
2 tsp. lemon juice
Pinch nutmeg
Biscuits-
2 cups flour
2 tsp. baking powder
1/2 tsp. baking soda
1/4 tsp. salt
2 Tbsp. sugar
3 Tbsp. butter, frozen
3/4 cup low-fat buttermilk
Topping-
1 Tbsp. milk
2 Tbsp. sugar combined with 1 tsp. cinnamon
Preheat the oven to 375 degrees. Prepare a 2-qt. casserole dish by coating with cooking spray.(I used butter.) Set aside.
Place the peaches, blueberries, sugar, flour, lemon juice, and nutmeg in a large bowl and combine well. Transfer to the casserole dish.
For Biscuits-In a large bowl, combine the flour, baking powder, baking soda, salt, and sugar. Grate the frozen butter into the flour mixture so that you start with very small pieces.(This sounds like an ingenious idea until you try it out with the three-sided grater and half of it gets stuck inside and pretty much melts before you can get it out again. I did the best I could and placed the plate of grated butter back in the freezer for a couple minutes, but I wasn't able to get all of it out of the grater. If you have a single sided grater, I would recommend using that instead.) Rub with fingertips until fully incorporated. Add the buttermilk and stir just until moistened.(I found I needed a little more buttermilk than it called for when I mixed it.)
Drop the batter on top of the fruit to cover as much as possible. Brush with the milk and sprinkle the cinnamon-sugar evenly over the top.
Bake for about 35 minutes or until the biscuits are done and the fruit is bubbling.
Makes 8 servings
309 calories, 5 grams fat, 5 grams fiber
I found mine needed almost ten more minutes to bake until the cobbler was fully baked. To test them, you have to lift one up and look at the underside. If it's baked all the way through, it's good. If it's still wet, you need to cook it longer. Because of this, the tops of the biscuits were a bit hard. I wonder if I had left the milk and cinnamon-sugar to the very end and let it cook for just those last ten minutes, if it would have helped soften it at all. It might not, but it's worth a try for next time! If you eat ice cream or whipped cream, this definitely is something you'd want to eat it with. This was so good I ate two bowls of it last night! And it makes a lot so it's good for sharing with others. The original name of the recipe is Peach Cobbler with Light Biscuits, but because the blueberry ended up being the dominant flavor, I changed the name to reflect that. The canned peaches seem to have worked just fine in this dish, so it was a good choice that was also comparatively affordable.
I highly recommend both of these dishes. They required a bit of work but weren't difficult to prepare at all. Shrimp and Grits is a true Southern dish. Southern cuisine, I have learned over the course of this project, is one of the most blended cuisines I have ever seen. English, African, French, Caribbean, Native American, and Latino all blended together into something unique and so very American. It is the perfect embodiment of the term "melting pot". Do give it a try sometime!
Sources:
City Map
City Stats
City Pic
City History1
City History2
City History3
Shrimp and Grits History
Gullah Culture Video1
Gullah Culture Video2
Shrimp and Grits Recipe1
Shrimp and Grits Recipe2
Labels:
blueberries,
cornmeal,
grits,
peaches,
shrimp
Monday, January 18, 2016
Dining-In: A Culinary Tour of America-Conway, Arkansas
The Location: Conway, Arkansas
2013 population: 63,816; 75.3% white, 15.6% African American. 2013 per capita income: $24,465.
Conway was established as a railway town after the Civil War ended, by Asa P. Robinson. In 1878, a priest named Father Joseph Straub, who had founded the Duquesne University in Pittsburgh, Pennsylvania, moved to Conway. He built the St. Joseph Colony there. Both the railroad and Father Straub worked diligently to attract German and Catholic German families to the area. By 1889, more than 100 German families called Conway home.
Conway's proximity to the Arkansas River makes it a popular fishing destination.
Claim to fame: Conway is said to be the city that singer Conway Twitty took his name from.
The Food: Catfish, Collard Greens, and Cornmeal-fried Veggies
So, when I was thinking about what to do for the state of Arkansas, catfish immediately came to mind. I knew it was risky, though, because this is Seattle, and catfish is not native to this region. Nor is it particularly in high demand, which means the chance of me finding fresh catfish when I needed to, was very low. But I was determined to make it work. I lucked out, though. Last week my grocery store had one portion of catfish in the fresh fish section on discount. Not sure why it was discounted, because it was well within its use-by date. Probably because of demand, I would assume. Well, I snatch it right up and looked very carefully at the label. It did not say it had been previously frozen, so I made a risky decision and froze it. I normally would never do this to fish, but you can't keep fish in your fridge for a week before you use it, so it was either freeze it or not use it all.
I wanted a simple catfish recipe because I've never had it before and I wanted it to shine as a flavor and didn't want whatever I put on it to outshine or mask it. I found a very delicious and simple recipe that was also very easy to make. I was happy because it was steeped in Southern ingredients and just screamed "The South". Here is the recipe:
Pecan Catfish
1/2 cup cornmeal
1 teaspoon salt
1/4 teaspoon ground black pepper
1 1/4 pounds catfish
3 tablespoons vegetable oil
1/2 cup pecans, finely crushed
5 wedges lemon, for garnish
5 sprigs fresh parsley, for garnish
In a large bowl, mix the cornmeal, salt and pepper. Dip the catfish in the cornmeal mixture; coating well.
Place catfish on a flat, greased baking sheet. Pour the oil over the fish.
Bake in the preheated oven for 15 minutes or until catfish flakes easily when tested with a fork. Sprinkle with pecans toward the end of the cooking period.
Garnish with lemon wedges and parsley sprigs.
The only thing I didn't do was the lemon wedges and parsley sprigs. I just squeezed lemon juice over it all when it came out of the oven. I did it exactly as it was called for, except I put mine on parchment paper on the sheetpan instead of greasing a sheetpan. That worked just fine. I put the pecans on probably for the last 4 minutes. They will burn in an oven that hot, so don't add them too soon.
This one was really good! The sweetness of the pecan and the tartness of the lemon complimented the fish, but didn't overpower it. And that turned out to be a good thing, because catfish is a really delicate fish. It's a white fish, that just tastes really like the ocean, which is odd because it's a fresh water fish, but it does! It's like fish, but not fishy, if that makes any sort of sense. I highly recommend this one if you can ever get your hands on catfish.
And for my vegetable side, I knew I had to go with collard greens. This again was a risk because it's Seattle in January. Well, it turns out that collard greens are a cold weather vegetable, so I actually timed it perfectly. And it also turns out that my Safeway sells organic collard greens, so it wasn't too much of a challenge at all!
Most people prepare collard greens with ham flavoring the liquid. I am one of those unusual people who doesn't actually like ham-flavored things. I like ham, I like beans, and greens, and pea soup, but not together. So, that meant a vegetarian version. Luckily I ran across a great recipe that seemed easy enough.
Vegetarian Collard Greens
2 lbs collard greens
4 -5 garlic cloves, minced
1 large onion, chopped
3 cups vegetable stock
1 teaspoon salt ( to taste)
1 teaspoon smoked sweet paprika
1/2 cup apple cider vinegar
hot sauce (optional) or red pepper flakes (optional)
This meal might not have turned out perfectly, but it was a lot of fun to make. The catfish was delicious, and I do think the collard greens would have been really good if I hadn't burned them to smithereens...The veggies were ok, but the catfish was the star. Definitely try it out sometime if you can get your hands on some. It's worth it!
2013 population: 63,816; 75.3% white, 15.6% African American. 2013 per capita income: $24,465.
Conway was established as a railway town after the Civil War ended, by Asa P. Robinson. In 1878, a priest named Father Joseph Straub, who had founded the Duquesne University in Pittsburgh, Pennsylvania, moved to Conway. He built the St. Joseph Colony there. Both the railroad and Father Straub worked diligently to attract German and Catholic German families to the area. By 1889, more than 100 German families called Conway home.
Conway's proximity to the Arkansas River makes it a popular fishing destination.
Claim to fame: Conway is said to be the city that singer Conway Twitty took his name from.
The Food: Catfish, Collard Greens, and Cornmeal-fried Veggies
So, when I was thinking about what to do for the state of Arkansas, catfish immediately came to mind. I knew it was risky, though, because this is Seattle, and catfish is not native to this region. Nor is it particularly in high demand, which means the chance of me finding fresh catfish when I needed to, was very low. But I was determined to make it work. I lucked out, though. Last week my grocery store had one portion of catfish in the fresh fish section on discount. Not sure why it was discounted, because it was well within its use-by date. Probably because of demand, I would assume. Well, I snatch it right up and looked very carefully at the label. It did not say it had been previously frozen, so I made a risky decision and froze it. I normally would never do this to fish, but you can't keep fish in your fridge for a week before you use it, so it was either freeze it or not use it all.
I wanted a simple catfish recipe because I've never had it before and I wanted it to shine as a flavor and didn't want whatever I put on it to outshine or mask it. I found a very delicious and simple recipe that was also very easy to make. I was happy because it was steeped in Southern ingredients and just screamed "The South". Here is the recipe:
Pecan Catfish
1/2 cup cornmeal
1 teaspoon salt
1/4 teaspoon ground black pepper
1 1/4 pounds catfish
3 tablespoons vegetable oil
1/2 cup pecans, finely crushed
5 wedges lemon, for garnish
5 sprigs fresh parsley, for garnish
Preheat oven to 500 degrees F.
In a large bowl, mix the cornmeal, salt and pepper. Dip the catfish in the cornmeal mixture; coating well.
Place catfish on a flat, greased baking sheet. Pour the oil over the fish.
Bake in the preheated oven for 15 minutes or until catfish flakes easily when tested with a fork. Sprinkle with pecans toward the end of the cooking period.
Garnish with lemon wedges and parsley sprigs.
The only thing I didn't do was the lemon wedges and parsley sprigs. I just squeezed lemon juice over it all when it came out of the oven. I did it exactly as it was called for, except I put mine on parchment paper on the sheetpan instead of greasing a sheetpan. That worked just fine. I put the pecans on probably for the last 4 minutes. They will burn in an oven that hot, so don't add them too soon.
This one was really good! The sweetness of the pecan and the tartness of the lemon complimented the fish, but didn't overpower it. And that turned out to be a good thing, because catfish is a really delicate fish. It's a white fish, that just tastes really like the ocean, which is odd because it's a fresh water fish, but it does! It's like fish, but not fishy, if that makes any sort of sense. I highly recommend this one if you can ever get your hands on catfish.
And for my vegetable side, I knew I had to go with collard greens. This again was a risk because it's Seattle in January. Well, it turns out that collard greens are a cold weather vegetable, so I actually timed it perfectly. And it also turns out that my Safeway sells organic collard greens, so it wasn't too much of a challenge at all!
Most people prepare collard greens with ham flavoring the liquid. I am one of those unusual people who doesn't actually like ham-flavored things. I like ham, I like beans, and greens, and pea soup, but not together. So, that meant a vegetarian version. Luckily I ran across a great recipe that seemed easy enough.
Vegetarian Collard Greens
2 lbs collard greens
4 -5 garlic cloves, minced
1 large onion, chopped
3 cups vegetable stock
1 teaspoon salt ( to taste)
1 teaspoon smoked sweet paprika
1/2 cup apple cider vinegar
hot sauce (optional) or red pepper flakes (optional)
Wash greens well, submerging in a sink full of cold water to remove any dirt and grit. Drain well. Cut off the stems right where the leaf starts. Stack about 5-8 leaves on top of eachother, then roll lengthwise. Cut rolled up leaves into 1" slices widthwise. Repeat until all the greens are done, and add to a large pot.
Add all other
ingredients. Cover and bring to a boil over high heat, then reduce heat
to a simmer. Simmer for 45 minutes or until greens are extremely tender.
Serve hot, using a slotted spoon to drain the liquid from the greens.
So, this started off just fine, and I had it on the back burner doing its thing while I worked on everything else. I thought that it would be fine, because the greens would release their liquid and it would basically stew until I was ready to serve it. That's not how it ended up, unfortunately. I did not take an "after" picture, because I burned the heck out of it and it was ruined! I did try a not-burned bit just to see if it was salvageable. It was very bitter. I'm not sure if that's because collard greens are bitter or because it sat and burned for a half hour, but either way, it was not edible. I was sad, because it was a solid recipe! But, lesson learned, collard greens don't actually give off that much liquid, so make sure to add lots to the pot and check it once in a while!
To round out the meal, I wanted a starch and an interesting way of preparing it. I found a recipe that seemed pretty simple and went with it.
Arkansas Fried Veggies
1 cup milk
1 egg
1 cup cornmeal, or as needed
2 squash, sliced
2 red potatoes, cubed
2 green tomatoes, cubed
3 pods fresh okra, sliced into rings, or more to taste
1/2 onion, diced
1/2 green bell pepper, diced
2 tablespoons bacon grease, or as needed
Salt/pepper to taste
Whisk milk and egg together in a large bowl. Pour cornmeal into another large bowl.
Dip squash, potatoes, tomatoes, okra, onion, and green bell pepper into milk mixture; press vegetables into cornmeal to coat.
Heat bacon grease in a
large skillet over medium-high heat. Cook and stir vegetable mixture in
hot grease until golden and tender, 15 to 25 minutes. Season with salt
and black pepper.
I used this recipe as a base but didn't do all the vegetables listed. I used what I had on hand, which last night happened to be fingerling potatoes that I cut into quarters, green beans, and sliced frozen okra that I thawed out. I cooked the potatoes first because they need a lot more time than the other vegetables. As golden as they got on the outside, they were still not cooked through, so I threw them on a sheetpan and put them in the oven while the catfish baked. That seemed to be enough extra time to cook them through. I fried the other veggies while the potatoes baked.
This recipe was ok, but not amazing. The problem is that when you fry cornmeal, it gets rock hard, so you're eating these crunchy nuggets with little bits of cornmeal getting stuck in your teeth. I bet it would be better if you ground up the cornmeal into smaller pieces. That might have worked better.
There was a lot of cornmeal in this meal, but cornmeal, catfish, pecans, collard greens, okra, and bacon fat is pretty much the epitome of Southern food, so it's fitting for this menu!This meal might not have turned out perfectly, but it was a lot of fun to make. The catfish was delicious, and I do think the collard greens would have been really good if I hadn't burned them to smithereens...The veggies were ok, but the catfish was the star. Definitely try it out sometime if you can get your hands on some. It's worth it!
Sources:
Sunday, November 29, 2015
Dining-In: A Culinary Tour of America-Tahlequah, Oklahoma
2013 population: 16,359; 46.4% white, 29.2% Native American. Per capita income: $17,056.
Tahlequah, legend has it, is derived from the Cherokee word "Ta'ligwu," which means "two is enough". According to the legend, after the Cherokee people arrived in Oklahoma, upon finishing their trek along the Trail of Tears, there was to be a meeting with three tribal elders for them to decide upon a location for the Nation's new permanent capital. Only two of the elders showed up, so they decided that two was enough, and made the decision themselves. In 1839, Tahlequah was named the capital of two Cherokee tribes based out of Oklahoma: the Cherokee Nation, and the United Keetoowah Band of Cherokee Indians, and remains the capital of both to this day. The oldest public building in the state is located in Tahlequah: the Cherokee Supreme Court Building.
Tahlequah has a Cherokee language immersion school, and children from elementary school age through middle school age are taught 100% in Cherokee. This causes some issues, however, when students are tested for statewide testing, they are tested in English, and therefore do not do as well. When they graduate to high school, classes are taught bilingually, however. Most street signage in Tahlequah is also bilingual. The Cherokee language is part of the Iroquois language group, and is one of the first Native American languages to have been written down. A Cherokee silversmith by the name of Sequoyah, or Ssiquoya, created a syllabary(alphabet) in 1821, and it was officially adopted by the Cherokee Nation in 1825.
The original Cherokee Nation was first recognized by the United States government in 1794, until 1907. Prior to their removal by the United States government to Oklahoma, the Nation's territory extended from Texas to North and South Carolina, and up from Tennessee down to Georgia and Alabama. The Cherokee, along with the Seminole, the Choctaw, the Creek, and the Chickasaw, were what is referred to as the "Five Civilized Tribes" by the United States government. They were called this because they adopted many of the traits that the United States favored, such as conversion to Christianity, slave ownership, a centralized government, and intermarriage with white people.
So, how did a large, well-organized group of people come to live in Oklahoma when they had enjoyed such a large territory? Well, in 1830, the United States government passed the Indian Removal Act. This would remove all of the "Five Civilized Tribes," one by one, from their territories and move them all to Oklahoma. The route they took would become known as the "Trail of Tears". The first instance of this term comes from the removal of the Chocktaw Nation in 1831.
Between 1830 and 1850, the "Five Civilized Tribes" and any white members of their families, and any of their slaves, were forcibly removed from their lands. The Cherokee removal started in 1838, when gold was discovered in Georgia. In the summer of 1838, 16,543 Cherokee were removed from their territory, and put into concentration camps. About 353 people died during that time. The death march to Oklahoma started in the autumn of 1838, and an estimate of 2,000-6,000 people were killed along the way, due to freezing temperatures and extreme weather. They arrived in Tahlequah on March 18, 1839.
The Food: The Other Side of Thanksgiving
You might be asking yourself why I chose to celebrate this horrible moment in history at this particular holiday. Well, I don't consider this a celebration of the Trail of Tears, or what was done to the Cherokee or any other Native American tribe in our long, and mostly sad, history between the United States government and the Native Americans. I know a lot of people struggle with allowing themselves to enjoy Thanksgiving, knowing what we are responsible for. I don't know how much of the original story of Thanksgiving is actually true, and how much of it is myth, but I like to think of it as a moment in time in which we had many paths to choose from. Paths in which we worked together with other groups of people, and lifted ourselves up equally and coexisted peacefully and lovingly. Ultimately, though, we did not take that path, but chose a path of ignorance and selfishness and hatred. But for that one moment, all things were possible. I think it's a good time to not only look at what we have in our lives to be grateful for, but to also remind ourselves to choose the path of peace and love and working together.
The state of Oklahoma is difficult to find, shall we say, culinary gems that I wanted to feature on this blog, so that meant looking outside of the usual Euro-centric cultures that I too-often default to. I remembered a piece of information from school about the Trail of Tears ending in Oklahoma, and that's where I started my research. I looked up my schedule for when Oklahoma was going to be featured, and saw it was the weekend after Thanksgiving, and thought it was a sign that it was meant to be. But this presented some other issues. What to eat? I had resisted for this entire project, the idea of doing fry bread for a Native American food post. I have wanted to feature more Native American food, but so much of it is so obviously post-Columbian in nature that I wasn't sure I wanted to go there. Unfortunately, I had very little luck finding anything doable that was pre-Columbian. This was one of the first times I talked over a blog post with somebody else prior to doing it. I talked to my friend, Mika, and expressed my concerns and issues. I only wanted to feature Native American food if I could do it with the utmost respect, and honor it as best as I could. It isn't my culture, after all. Whenever I write about a meeting of two cultures in this project, I present it as a good thing to celebrate, but how do you celebrate this particular meeting of cultures? Her suggestion was to just go for it, and express my misgivings, and that it is a celebration, of sorts. A celebration that, in spite of all that was done to them, and all the people and land lost over the years, the Cherokee, and other tribes, are still here. They were not wiped out entirely, and though they are not nearly what they were before, they still exist. The United States government failed in their attempts to wipe them all out, and that, is deserving of a celebration, in my opinion. And so, I decided to do the fry bread, because if there is one dish I would assign as "Native American" more than any other, it would be fry bread. Each tribe seems to have their own recipe, and within the tribes, each family probably has their own take on it as well. Mika also helped me find some other recipes to try, and I ended up with four! It was a proper feast. All the recipes come from the internet, and I will include the links in the sources section at the end of this blog.
I think this is the first time I have done a beverage for this blog project. I ran across a recipe that sounded so unusual to me I knew I had to try it. I figured it would either be the best thing or the worst thing I've ever had, and I was lucky that it turned out to be amazing! Here is the recipe:
Pinole
1 cup cornmeal(the recipe calls for blue or white but my store only had yellow. I opted for the medium grind and I think that was a good call.)
1/4 cup sugar
1/4 tsp. cinnamon
Milk
Pour the cornmeal out onto an ungreased sheetpan and put into a 425 degree oven for 10-15 minutes. Every few minutes, take the pan out and stir the cornmeal around. This will brown very quickly and mine actually got to the edge of burned, but was still ok. It may smoke, so make sure to turn on your stove's fan or you may set off your fire alarm. When it's toasted, pour it onto a plate or another sheetpan to cool off.
When the cornmeal is cool, combine it with the sugar and cinnamon and mix well. When you are ready to drink, heat one cup of milk and one Tablespoon of the cornmeal mixture over medium heat for 15-20 minutes. You don't really want it to boil, and make sure to stir often.
This was a crazy good drink. It almost smelled like chocolate, and the cinnamon tasted really good. The texture is really rich and you think you're drinking something really unhealthy, but it's just because the cornmeal softens and has a really amazing texture. You will need to stir it often while drinking, but I was surprised at how much I liked this drink. The mix makes a lot, and I'll keep it around for special treats.
The cup has the pinole in it, and the cut up item behind it is the unfried fry bread. I have seen fry bread, and have eaten it once before, but never made it myself. It turned out to be very simple and delicious! Here is the recipe:
Cherokee Fry Bread
1 cup flour
2 tsp. baking powder
1/2 tsp. salt
3/4 cup milk
Mix the ingredients in a medium bowl, adding more flour to make a stiff dough.(I found mine needed almost an entire cup more.) Roll out the dough onto a floured board as thin as possible. Cut into strips 2" x 3" (I used a pizza cutter to do this) and fry in an inch or so of oil over medium heat. Brown on both sides.
My first batch was flat, but all the rest bubbled up more like fry bread is supposed to. I think the oil wasn't quite hot enough for the first batch. I loved watching these bubble when you put them in the oil. They were sort of like a cross between a pancake and a tortilla. They were awesome!! I ate them plain but the recipe said you could add honey if you wanted.
In my search for an entree, I kept running across something called "Cherokee Chicken". I'm always a little wary of recipes with titles like these. If they are authentic at all, they've usually been Americanized beyond recognition, but I found a recipe for it on a Native American message board, so I felt a little better about using it. It was super simple and used ingredients I was familiar with, but put them together in such a unique way that I was was just really impressed with the result. It's also Thanksgiving-worthy, as you'll see...
Cherokee Chicken
1/4 cup vegetable oil
1 garlic clove, minced
2 Tbsp. butter or margarine
2 Tbsp. minced onion
1 green pepper, minced
Salt/pepper to taste
1 frying chicken, disjointed (I bought two chicken breasts, with skin and bones, because my store didn't have a whole chicken and I didn't really need that much. Because of this I cut the recipe in half and it worked out just fine)
8 oz. can whole cranberry sauce (Because I try to limit my sugar intake, this was a place to cut out sugar by making my own cranberry sauce. I made my own with a bag of cranberries, about a half cup of unsweetened applesauce, a teaspoon of lemon juice, and about 1/2 cup of water used to rinse out the jar of applesauce and boiled it all in a pan until the berries popped and everything got nice and thick.)
Instructions:
Heat oil and butter in a 12" skillet. (I used a large pan with a lid. A Dutch oven would have been awesome for this too, if I had one.) Add chicken; cook until golden brown on all sides.
Remove chicken from the pan and move to a plate. Pour off all but 2 Tbsp. fat. Add green pepper, garlic and onion; cook until soft. Add cranberry sauce, salt and pepper. Return chicken to the pan and turn a couple times to cover all sides in the sauce. Cover, simmer 25 minutes. Every once in a while, turn the chicken to continue flavoring all sides with the sauce.
Serves 4 to 6.
This was amazing! I was a bit concerned about the cranberries in this recipe. I mean, cranberries are native to this continent, but they are not found anywhere near where the Cherokee used to live or in Oklahoma, so why were they used in this recipe? There was a note on the message board that said the cranberries had come to be used instead of wild berries that were originally used in the recipe, so I felt better about using them. This definitely works in keeping with Thanksgiving flavors. And I think the homemade cranberry sauce kept it from being too sweet. This was worth every step it took to make this.
And as if all of these recipes weren't enough, I decided I needed a dessert too. I ran across a unique recipe that I was sure I could reduce the amount of sugar from and still have a good texture and flavor. It turns out I was right! I probably ate five of these tonight...
Cornmeal Cookies with Dried Cranberries
3/4 cup butter
3/4 cup sugar(I used 1/4 cup sugar and 1/2 cup unsweetened applesauce instead)
1 egg
1 tsp. vanilla
1 1/2 cup flour
1/2 cup cornmeal
1 tsp. baking power
1/4 tsp. salt
1/2 cup dried sweetened cranberries
Cream the butter and sugar(and applesauce if using). Add the egg and vanilla and blend well. Stir in the flour, cornmeal, baking powder, and salt until combined. Stir in the cranberries until well mixed.
Drop dough from tablespoon on a greased cookie sheet. Bake at 350° for about 15 minutes until lightly browned.(Mine were a little smaller than a Tablespoon and made two full dozen. I cooked them for slightly less time, maybe 12 minutes.)
Makes about 1 1/2 dozen.
You should be really jealous of me and the meal I ate tonight. Or, you could try out all the recipes yourself and you can partake of the amazingness as well! I had no idea cornmeal was so versatile. I have used it a lot over the last year during this project. I know corn is native to this continent, but there is something about cornmeal in particular that seems to be so very American. I used it in two very different ways tonight. Ways I have never used it before. Maybe it's another example of two worlds colliding. Instead of death and destruction, though, it created something amazing and beautiful. Perhaps I could look at it as a glimpse of the world we could have had, if we'd taken that other path so long ago when we'd first had the chance to...
Sources:
Cornmeal Cookie Recipe
Fry Bread Recipe
Pinole Recipe
Cherokee Chicken Recipe
City Stats
City Map
City Pic
City History
Trail of Tears Map
Sunday, November 1, 2015
Dining-In: A Culinary Tour of America-Hallowell, Maine
The Location: Hallowell, Maine
2013 population: 2,343 people; 94.6% white, 1.6% two or more races. Per capita income: $35,148.
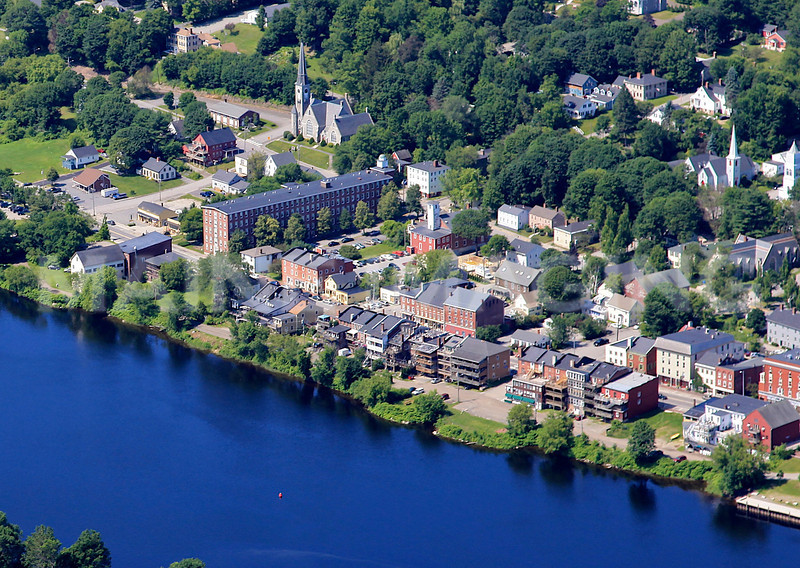
Prior to the European invasion, the land around Hallowell was home to the Penobscot, or Panawahpskek, tribe. Hallowell was named for Benjamin Hallowell, a merchant from Boston. It was originally part of the city of Augusta, but it became its own town when Augusta broke off from it in 1797. The entire area was a part of the state of Massachusetts to begin with, but in 1820, Maine seceded from Massachusetts, and became its own state.
From 1815 to 1908, granite was the major industry for Hallowell. Ice was also a large part of their economy. Today, though, the city is known for its antique shops and pubs. For the most part, Hallowell has been a town relatively untouched by the major events of American history, though they did send many men to fight for the Union during the Civil War. The city today leans more liberal, in terms of politics, as it did then. Many people joined the war in order to help abolish slavery.
Why Hallowell? Because it's Halloween, of course! What a perfectly named city for this holiday!
The Food: A Duo of Desserts
I haven't done an all dessert post since Washington state's trio of apple desserts. Maine has a lot of seafood dishes it's known for, but as with last week with Maryland, there are so many kinds of seafood I don't eat that it wasn't very practical for me to feature them. This meant I had to get a bit more creative. With the fact that I would be doing this on Halloween, I decided to go in the dessert direction. Maine is also known for blueberries, and I opted for a recipe that heavily featured blueberries in their honor. Further research revealed a dish I have heard of, but never tried. I knew this was the time to try it!
First up is a recipe I found in my own collection. It comes from the Taste of Home magazine, unknown date.
Blueberry Oat Cake
2 eggs
2 cups buttermilk
1 cup packed brown sugar(I used 1/2 cup brown sugar and 1/2 cup unsweetened applesauce and I think it turned out just fine)
1/2 cup vegetable oil
2 cups flour
2 tsp. baking powder
1 tsp. baking soda
1 tsp. cinnamon
1/2 tsp. salt
2 cups quick-cooking oats
2 cups fresh or frozen blueberries, unthawed
1 cup chopped walnuts(I used pecans because they are naturally sweeter in taste than walnuts), optional
Powdered sugar
In a mixing bowl, beat the eggs, buttermilk, brown sugar(and applesauce, if using) and egg. Combine the flour, baking powder, baking soda, cinnamon and salt; add to batter. Beat on low speed for 2 minutes(or by hand, which is what I did). Fold in oats, blueberries and walnuts(or pecans), if desired.
Transfer to a greased and floured 10" fluted tube pan(Bundt cake pan). Bake at 375 degrees for 45-50 minutes or until a toothpick comes out clean.(Note, this cake is way too thick for a toothpick to do any good. I used a bamboo skewer since it was long enough to get to the bottom.) Cool for 10 minutes before removing from pan to a wire rack to cool completely. Dust with powdered sugar.
Makes 12-16 servings
This is what happens when you didn't see the part about flouring the cake pan until you just typed up this recipe 30 seconds ago, and try to remove it while it's still too hot. This was a literal hot mess, but it tasted good. I was able to dislodge the top half of the cake and sort of put it back together, but unfortunately it definitely crumbled when I cut pieces from it. Again, the flavor was fantastic and I'm sure if I'd floured the pan and had let it cool longer than the 10 minutes it called for, it would have done better. I have used my Bundt pan many times and have rarely had this bad of an issue.
Next up, a New England staple called Indian Pudding. I don't know about you, but I am not necessarily comfortable eating a dish with the word "Indian" in it, when it isn't actually Indian food. This dish has an interesting history. In England, it is made with wheat and is known as Hasty Pudding. You may have heard of this. It's pretty well-known, and even has its own club. When people started traveling to the New World, they discovered new ingredients, such as corn, that when dried and ground, was a grain that could be used in a variety of ways. The Europeans referred to it as "Indian meal," and from there comes the name of this dish.
I would argue that Indian Pudding is one of the first, if not the first Americanized recipe. Or to be even more historically-accurate, the first New Englandized recipe. America, of course, wouldn't be in existence for a little while longer. Taking a well-known recipe from England and substituting ingredients available in the New World, though in a very simple and humble dish, was the beginning of what would become American food culture.
If I was to rename this dish, I would propose calling it "Yankee Pudding," because it refers to the region in which it was invented, and acknowledges its American-ness. Though we were introduced to corn from the Native Americans, they never ate it in this form.
The recipe I used is from the internet, but I will type it out here, along with any changes or notes of my own.
Maine Indian Pudding
2 cups milk
1/4 cup cornmeal
1/2 cup milk, cold(Note, the website lists this as 1/4 cup, but the instructions say 1/2 cup. I used 1/2 cup, so I changed the quantity in this section to match because it was confusing otherwise.)
1/2 cup dark molasses, not blackstrap(I am not the biggest fan of molasses. I cut this down to 1/4 cup and did 1/4 cup of raisins to give it additional sweetness. I still found it to be overwhelmingly sweet and if I was to do this again, I would probably have cut it down to 1/8 cup, which is 2 Tablespoons of molasses and the rest raisins. With molasses, a little really does go a long way.)
1 tsp. salt(Because I did cut down on the amount of molasses, the salt came through a bit more than it should have. If you reduce the quantity of molasses, I would cut the amount of salt in half.)
1/4 cup sugar
1 tsp. cinnamon
4 Tbsp. butter
1 3/4 cups milk, cold
*Scald 2 cups of milk in a double boiler.
*Mix the cornmeal and 1/2 cup cold milk until smooth. Stir into the hot milk and cook over the hot water for 20 minutes, stirring frequently.(When you do this, you will be wondering what, if anything, is happening with your mixture. The milk will get frothy as you stir it but not much will change until about the last 5 minutes when it starts to thicken. Just keep faith in what you're doing and know that it will turn out ok in the end.)
*Add the molasses, salt, sugar, cinnamon, and butter; mix well.
*Pour into a buttered dish.
Pour the last 1 3/4 cups cold milk over the top of the pudding.
*Bake at 250 degrees for three hours(I started this about 4.5 hours before I wanted to serve it. The dish is based on something called Hasty Pudding, which is ironic, because it takes hours to prepare. Go figure!) Remove from oven and let sit for 30 minutes. Serve with ice cream or whipped cream, if desired.
Makes 4-6 servings.
As you can see, the cake was better-looking once I dug the top half out of the pan. It's just a facade though, it's definitely a chunky cake. The pudding is really interesting. The milk poured on the top sort of soaks into the pudding and also evaporates and creates a skin. Normally I don't like skin on pudding, but this was different. Because of the sugar and molasses, it was almost like the top of a burnt creme where you have to break through the caramelized sugar topping. It provided the majority of the texture. The rest of the pudding is very soft, but that gave you something to bite into and chew. The raisins also were really good in this. And not only is this something that doesn't call for a lot of cornmeal, which means your cornmeal goes a long way, it's also properly gluten free! So, all you gluten free eaters can partake of this and not worry about it! I cannot vouch for using an alternate non-dairy milk. It may or may not turn out the same. Try that out at your own risk, but do let me know if it works for you!
I really liked both of these desserts. Even though the pudding was a bit too molasses-ey for my tastes, it was still tasty. It was cool to use cornmeal in a completely different way too. I have used cornmeal a lot in this project. It's a New World ingredient after all, so it should feature highly in a project about American cuisine. For some reason, the pudding evoked images of the past. You can feel the history in it. The cake was delicious as well, but a much more straight-forward dessert. Both of these also make a lot. These would be good for groups. I had enough for tasting tonight, and to try tomorrow, and still had enough to share with my parents, my grandparents, and still have enough of the blueberry cake to take to work on Monday to share with my coworkers! You should definitely give these recipes a try!
Sources:
City Info
City Pic
City Map
Indian Pudding Recipe
Indian Pudding History
City History
2013 population: 2,343 people; 94.6% white, 1.6% two or more races. Per capita income: $35,148.
Prior to the European invasion, the land around Hallowell was home to the Penobscot, or Panawahpskek, tribe. Hallowell was named for Benjamin Hallowell, a merchant from Boston. It was originally part of the city of Augusta, but it became its own town when Augusta broke off from it in 1797. The entire area was a part of the state of Massachusetts to begin with, but in 1820, Maine seceded from Massachusetts, and became its own state.
From 1815 to 1908, granite was the major industry for Hallowell. Ice was also a large part of their economy. Today, though, the city is known for its antique shops and pubs. For the most part, Hallowell has been a town relatively untouched by the major events of American history, though they did send many men to fight for the Union during the Civil War. The city today leans more liberal, in terms of politics, as it did then. Many people joined the war in order to help abolish slavery.
Why Hallowell? Because it's Halloween, of course! What a perfectly named city for this holiday!
The Food: A Duo of Desserts
I haven't done an all dessert post since Washington state's trio of apple desserts. Maine has a lot of seafood dishes it's known for, but as with last week with Maryland, there are so many kinds of seafood I don't eat that it wasn't very practical for me to feature them. This meant I had to get a bit more creative. With the fact that I would be doing this on Halloween, I decided to go in the dessert direction. Maine is also known for blueberries, and I opted for a recipe that heavily featured blueberries in their honor. Further research revealed a dish I have heard of, but never tried. I knew this was the time to try it!
First up is a recipe I found in my own collection. It comes from the Taste of Home magazine, unknown date.
Blueberry Oat Cake
2 eggs
2 cups buttermilk
1 cup packed brown sugar(I used 1/2 cup brown sugar and 1/2 cup unsweetened applesauce and I think it turned out just fine)
1/2 cup vegetable oil
2 cups flour
2 tsp. baking powder
1 tsp. baking soda
1 tsp. cinnamon
1/2 tsp. salt
2 cups quick-cooking oats
2 cups fresh or frozen blueberries, unthawed
1 cup chopped walnuts(I used pecans because they are naturally sweeter in taste than walnuts), optional
Powdered sugar
In a mixing bowl, beat the eggs, buttermilk, brown sugar(and applesauce, if using) and egg. Combine the flour, baking powder, baking soda, cinnamon and salt; add to batter. Beat on low speed for 2 minutes(or by hand, which is what I did). Fold in oats, blueberries and walnuts(or pecans), if desired.
Transfer to a greased and floured 10" fluted tube pan(Bundt cake pan). Bake at 375 degrees for 45-50 minutes or until a toothpick comes out clean.(Note, this cake is way too thick for a toothpick to do any good. I used a bamboo skewer since it was long enough to get to the bottom.) Cool for 10 minutes before removing from pan to a wire rack to cool completely. Dust with powdered sugar.
Makes 12-16 servings
This is what happens when you didn't see the part about flouring the cake pan until you just typed up this recipe 30 seconds ago, and try to remove it while it's still too hot. This was a literal hot mess, but it tasted good. I was able to dislodge the top half of the cake and sort of put it back together, but unfortunately it definitely crumbled when I cut pieces from it. Again, the flavor was fantastic and I'm sure if I'd floured the pan and had let it cool longer than the 10 minutes it called for, it would have done better. I have used my Bundt pan many times and have rarely had this bad of an issue.
Next up, a New England staple called Indian Pudding. I don't know about you, but I am not necessarily comfortable eating a dish with the word "Indian" in it, when it isn't actually Indian food. This dish has an interesting history. In England, it is made with wheat and is known as Hasty Pudding. You may have heard of this. It's pretty well-known, and even has its own club. When people started traveling to the New World, they discovered new ingredients, such as corn, that when dried and ground, was a grain that could be used in a variety of ways. The Europeans referred to it as "Indian meal," and from there comes the name of this dish.
I would argue that Indian Pudding is one of the first, if not the first Americanized recipe. Or to be even more historically-accurate, the first New Englandized recipe. America, of course, wouldn't be in existence for a little while longer. Taking a well-known recipe from England and substituting ingredients available in the New World, though in a very simple and humble dish, was the beginning of what would become American food culture.
If I was to rename this dish, I would propose calling it "Yankee Pudding," because it refers to the region in which it was invented, and acknowledges its American-ness. Though we were introduced to corn from the Native Americans, they never ate it in this form.
The recipe I used is from the internet, but I will type it out here, along with any changes or notes of my own.
Maine Indian Pudding
2 cups milk
1/4 cup cornmeal
1/2 cup milk, cold(Note, the website lists this as 1/4 cup, but the instructions say 1/2 cup. I used 1/2 cup, so I changed the quantity in this section to match because it was confusing otherwise.)
1/2 cup dark molasses, not blackstrap(I am not the biggest fan of molasses. I cut this down to 1/4 cup and did 1/4 cup of raisins to give it additional sweetness. I still found it to be overwhelmingly sweet and if I was to do this again, I would probably have cut it down to 1/8 cup, which is 2 Tablespoons of molasses and the rest raisins. With molasses, a little really does go a long way.)
1 tsp. salt(Because I did cut down on the amount of molasses, the salt came through a bit more than it should have. If you reduce the quantity of molasses, I would cut the amount of salt in half.)
1/4 cup sugar
1 tsp. cinnamon
4 Tbsp. butter
1 3/4 cups milk, cold
*Scald 2 cups of milk in a double boiler.
*Mix the cornmeal and 1/2 cup cold milk until smooth. Stir into the hot milk and cook over the hot water for 20 minutes, stirring frequently.(When you do this, you will be wondering what, if anything, is happening with your mixture. The milk will get frothy as you stir it but not much will change until about the last 5 minutes when it starts to thicken. Just keep faith in what you're doing and know that it will turn out ok in the end.)
*Add the molasses, salt, sugar, cinnamon, and butter; mix well.
*Pour into a buttered dish.
Pour the last 1 3/4 cups cold milk over the top of the pudding.
*Bake at 250 degrees for three hours(I started this about 4.5 hours before I wanted to serve it. The dish is based on something called Hasty Pudding, which is ironic, because it takes hours to prepare. Go figure!) Remove from oven and let sit for 30 minutes. Serve with ice cream or whipped cream, if desired.
Makes 4-6 servings.
As you can see, the cake was better-looking once I dug the top half out of the pan. It's just a facade though, it's definitely a chunky cake. The pudding is really interesting. The milk poured on the top sort of soaks into the pudding and also evaporates and creates a skin. Normally I don't like skin on pudding, but this was different. Because of the sugar and molasses, it was almost like the top of a burnt creme where you have to break through the caramelized sugar topping. It provided the majority of the texture. The rest of the pudding is very soft, but that gave you something to bite into and chew. The raisins also were really good in this. And not only is this something that doesn't call for a lot of cornmeal, which means your cornmeal goes a long way, it's also properly gluten free! So, all you gluten free eaters can partake of this and not worry about it! I cannot vouch for using an alternate non-dairy milk. It may or may not turn out the same. Try that out at your own risk, but do let me know if it works for you!
I really liked both of these desserts. Even though the pudding was a bit too molasses-ey for my tastes, it was still tasty. It was cool to use cornmeal in a completely different way too. I have used cornmeal a lot in this project. It's a New World ingredient after all, so it should feature highly in a project about American cuisine. For some reason, the pudding evoked images of the past. You can feel the history in it. The cake was delicious as well, but a much more straight-forward dessert. Both of these also make a lot. These would be good for groups. I had enough for tasting tonight, and to try tomorrow, and still had enough to share with my parents, my grandparents, and still have enough of the blueberry cake to take to work on Monday to share with my coworkers! You should definitely give these recipes a try!
Sources:
City Info
City Pic
City Map
Indian Pudding Recipe
Indian Pudding History
City History
Labels:
blueberries,
cakes,
cornmeal,
desserts,
pudding
Saturday, September 26, 2015
Dining-In: A Culinary Tour of America-Bristol, Rhode Island
The Location: Bristol, Rhode Island
2010 census: 22,954; 94.0% white, 2% Hispanic. 2013 per capita income: $30,527.
Today, the city is home to large Italian, Azorean, and Portuguese-American populations, but prior to the European invasion, the land was home to the Wampanoag and Narragansett Native American tribes. Bristol was where the first battle in the King Phillip's War, a war between the Native population and the European settlers, took place in 1675. The Native Americans eventually lost this war, and this would lead to more wide-spread colonization of the area by Europeans.
Bristol was originally part of Massachusetts before being transferred to the Rhode Island colony in 1747. Despite being a northern town, due to the fact that it was a successful port town, it became a center for the slave trade. During the Revolutionary War, Bristol was attacked twice by the British navy.
Claim to Fame: Bristol is the home of the oldest 4th of July celebration in the United States. It was started in 1785 by Reverend Henry Wight of the First Congregational Church. The parade that still happens today, was started in the early 1800's. Today, the celebrations begin on Flag Day in June, and last through Labor Day weekend. You might be asking me, why didn't you do this place for 4th of July? What a perfect opportunity that you missed! Well, there are two very good reasons. One, I didn't do a 4th of July post. And two, I didn't know about this until afterwards. This would have been a perfect location to do a 4th of July post. The other option was Delaware, which was the first colony of the United States. But I ended up skipping the 4th, so it doesn't matter now!
The Food: Rhode Island Johnny Cake with Raspberry Syrup, and Green Onion and Apple Sausage
Besides seafood, the one item I kept coming across for Rhode Island, was the Johnny cake. For those of you who are not familiar with the term or have never read the Little House on the Prairie books, a Johnny cake is basically a cross between cornbread and a pancake. They are a very simple, very basic, humble food that can be made quickly and with very little preparation. I had my pick of recipes, but chose one from a cookbook I have never had the opportunity to use before. One of the things I like to collect from used book stores is the Time/Life cookbook collection that came out in the 60's and 70's. Each one is a large, hardback book with various regions of the United States and the world. The one I used was specifically for Northeastern foods of the United States. These are fun books. If you can get your hands on them, I highly recommend them. I will write out the recipe the way the book says, but will add some notes based on my experience.
Rhode Island Johnny Cake
1 cup white cornmeal(I used yellow because that's what I had on hand. Some will say this isn't as authentic, but that's ok.)
1 tsp. salt
1 Tbsp. butter, softened, plus 1/4 cup butter, melted, plus 4 butter pats
1 cup boiling water
1/4-1/2 cup milk
Syrup
Combine the cornmeal, salt, and softened butter in a deep bowl. Stirring constantly, pour in the water in a thin stream. When the butter melts and the liquid is absorbed, add 1/4 cup milk. (I made a half batch of this and noticed that the liquid didn't absorb very well into the cornmeal. I ended up having to add more cornmeal to absorb it all. It probably ended up being a 2:1 ratio of cornmeal to liquid, rather than 1:1.) Beat until the batter holds its shape lightly with a spoon. If necessary, add more milk by the teaspoonful.
Heat a skillet or griddle over moderate heat until hot. Brush the skillet lightly with melted butter. To form each cake, ladle 1/4 cup of the batter into the pan. Cook 1-2 cakes at a time, leaving enough space so that they can spread into 5" rounds. Fry them for 3 minutes on each side, or until they are golden and crisp around the edges. As they brown, transfer the johnny cakes to a heated plate and drape with foil to keep them warm while you cook the rest, brushing the pan with melted butter as necessary. If the batter thickens, thin it with an additional tablespoon of milk.
Top each cake with half a pat of butter and syrup. Serve at once.
Makes 8 cakes
These were so easy to make. There is no leavening agent in them, so I suppose technically, a person could make and eat these during Passover if they wanted to. They are also gluten free, and I would imagine you could use any alternative milk you wanted and use oil instead of butter to make them vegan. You could probably also fry these in bacon grease if you wanted to impart more flavor to them. They're a very plain, very basic food and I definitely think they were better with the syrup I made.
Raspberry Syrup
Ok, I'll admit, this was more of a sauce than a syrup, but it was really delicious! I just made it up as I went, so this is actually one of my own creations! Here is the recipe:
1 pt. raspberries, washed
1/2 cup unsweetened applesauce
1/2 tsp. ground cinnamon
Wash the raspberries, but don't drain all the excess water off. Keep some of it and place all of the berries in a small saucepan. Combine with the applesauce and heat on medium until the raspberries are hot enough to break apart when stirred with a spoon. Once they are broken apart, turn off the heat and add the cinnamon. Mix well and set aside until ready to serve the johnny cakes.
This was really good. Just sweet and tart enough but not overpoweringly so. This could probably also act as jam for toast if you have any leftovers, like I do. Or over ice cream, if you like.
To go with the johnny cakes, I made homemade sausage. I found this recipe in my card collection, but I don't know the original source. It turns out it's not that hard to make sausage from scratch! I had ground pork last weekend that needed to be used before this week, so I actually made the sausage, formed the patties, and froze them last weekend, but didn't try them until tonight. Here's a tip I learned the hard way: When freezing them in one large package, put a layer of foil or plastic wrap between each patty or you'll have to thaw all of it and chisel them apart to use...
Green Onion and Apple Sausage
1 1/2 lb. ground pork
1/2 tsp. salt
1/2 tsp. pepper
1/8 tsp. cayenne pepper
1/8 tsp. white pepper(I don't have white pepper, so I left this out.)
1 1/2 tsp. dried sage, crushed
4 green onions, thinly sliced
1 cooking apple, cored, peeled, and finely chopped
1 Tbsp. butter
In a large bowl, combine pork, salt, peppers, sage, green onions, and chopped apple. Mix thoroughly and form into six 3/4" thick patties. (At this point, they can be wrapped and frozen, if you want.)
In a large, heavy skillet, melt butter. Cook patties in butter until sausages are brown on both sides, and centers are no longer pink (10-12 minutes total).
Makes 6
This recipe is also easy to cut in half, which is what I did. Since I had to thaw all of them, I will be having the rest over the next couple days, which is fine, because this was really rather tasty! I do think it could have used a smidgen more salt than it called for, and my sage is rather old, so it could have been "sagier" if I'd had fresher.
I served this with scrambled eggs topped with cheese for a really decadent and fancy breakfast for dinner. Making breakfast food is difficult because timing is so important. Everything has to be done all at the same time in hopes of serving it all hot on the same plate. The cakes were finished first, so I kept them under foil. A few minutes later, the eggs were done and then the sausage at the last minute. and it was all pretty darned delicious! I definitely don't have time to cook like this during the week for my breakfast, so this is a special weekend treat. I cooked everything in its own pan, so it does create several dishes to wash, but it was worth it!
I definitely recommend these recipes, but honestly, the real stand out was the raspberry syrup. It was ridiculously easy to make and tasted so good! You really do need to try it out!
Sources:
City Map
City Pic
Johnny Cake History
4th of July History
City History-This has some really amazing pictures in it
2010 census: 22,954; 94.0% white, 2% Hispanic. 2013 per capita income: $30,527.
Today, the city is home to large Italian, Azorean, and Portuguese-American populations, but prior to the European invasion, the land was home to the Wampanoag and Narragansett Native American tribes. Bristol was where the first battle in the King Phillip's War, a war between the Native population and the European settlers, took place in 1675. The Native Americans eventually lost this war, and this would lead to more wide-spread colonization of the area by Europeans.
Bristol was originally part of Massachusetts before being transferred to the Rhode Island colony in 1747. Despite being a northern town, due to the fact that it was a successful port town, it became a center for the slave trade. During the Revolutionary War, Bristol was attacked twice by the British navy.
Claim to Fame: Bristol is the home of the oldest 4th of July celebration in the United States. It was started in 1785 by Reverend Henry Wight of the First Congregational Church. The parade that still happens today, was started in the early 1800's. Today, the celebrations begin on Flag Day in June, and last through Labor Day weekend. You might be asking me, why didn't you do this place for 4th of July? What a perfect opportunity that you missed! Well, there are two very good reasons. One, I didn't do a 4th of July post. And two, I didn't know about this until afterwards. This would have been a perfect location to do a 4th of July post. The other option was Delaware, which was the first colony of the United States. But I ended up skipping the 4th, so it doesn't matter now!
The Food: Rhode Island Johnny Cake with Raspberry Syrup, and Green Onion and Apple Sausage
Besides seafood, the one item I kept coming across for Rhode Island, was the Johnny cake. For those of you who are not familiar with the term or have never read the Little House on the Prairie books, a Johnny cake is basically a cross between cornbread and a pancake. They are a very simple, very basic, humble food that can be made quickly and with very little preparation. I had my pick of recipes, but chose one from a cookbook I have never had the opportunity to use before. One of the things I like to collect from used book stores is the Time/Life cookbook collection that came out in the 60's and 70's. Each one is a large, hardback book with various regions of the United States and the world. The one I used was specifically for Northeastern foods of the United States. These are fun books. If you can get your hands on them, I highly recommend them. I will write out the recipe the way the book says, but will add some notes based on my experience.
Rhode Island Johnny Cake
1 cup white cornmeal(I used yellow because that's what I had on hand. Some will say this isn't as authentic, but that's ok.)
1 tsp. salt
1 Tbsp. butter, softened, plus 1/4 cup butter, melted, plus 4 butter pats
1 cup boiling water
1/4-1/2 cup milk
Syrup
Combine the cornmeal, salt, and softened butter in a deep bowl. Stirring constantly, pour in the water in a thin stream. When the butter melts and the liquid is absorbed, add 1/4 cup milk. (I made a half batch of this and noticed that the liquid didn't absorb very well into the cornmeal. I ended up having to add more cornmeal to absorb it all. It probably ended up being a 2:1 ratio of cornmeal to liquid, rather than 1:1.) Beat until the batter holds its shape lightly with a spoon. If necessary, add more milk by the teaspoonful.
Heat a skillet or griddle over moderate heat until hot. Brush the skillet lightly with melted butter. To form each cake, ladle 1/4 cup of the batter into the pan. Cook 1-2 cakes at a time, leaving enough space so that they can spread into 5" rounds. Fry them for 3 minutes on each side, or until they are golden and crisp around the edges. As they brown, transfer the johnny cakes to a heated plate and drape with foil to keep them warm while you cook the rest, brushing the pan with melted butter as necessary. If the batter thickens, thin it with an additional tablespoon of milk.
Top each cake with half a pat of butter and syrup. Serve at once.
Makes 8 cakes
These were so easy to make. There is no leavening agent in them, so I suppose technically, a person could make and eat these during Passover if they wanted to. They are also gluten free, and I would imagine you could use any alternative milk you wanted and use oil instead of butter to make them vegan. You could probably also fry these in bacon grease if you wanted to impart more flavor to them. They're a very plain, very basic food and I definitely think they were better with the syrup I made.
Raspberry Syrup
Ok, I'll admit, this was more of a sauce than a syrup, but it was really delicious! I just made it up as I went, so this is actually one of my own creations! Here is the recipe:
1 pt. raspberries, washed
1/2 cup unsweetened applesauce
1/2 tsp. ground cinnamon
Wash the raspberries, but don't drain all the excess water off. Keep some of it and place all of the berries in a small saucepan. Combine with the applesauce and heat on medium until the raspberries are hot enough to break apart when stirred with a spoon. Once they are broken apart, turn off the heat and add the cinnamon. Mix well and set aside until ready to serve the johnny cakes.
This was really good. Just sweet and tart enough but not overpoweringly so. This could probably also act as jam for toast if you have any leftovers, like I do. Or over ice cream, if you like.
To go with the johnny cakes, I made homemade sausage. I found this recipe in my card collection, but I don't know the original source. It turns out it's not that hard to make sausage from scratch! I had ground pork last weekend that needed to be used before this week, so I actually made the sausage, formed the patties, and froze them last weekend, but didn't try them until tonight. Here's a tip I learned the hard way: When freezing them in one large package, put a layer of foil or plastic wrap between each patty or you'll have to thaw all of it and chisel them apart to use...
Green Onion and Apple Sausage
1 1/2 lb. ground pork
1/2 tsp. salt
1/2 tsp. pepper
1/8 tsp. cayenne pepper
1/8 tsp. white pepper(I don't have white pepper, so I left this out.)
1 1/2 tsp. dried sage, crushed
4 green onions, thinly sliced
1 cooking apple, cored, peeled, and finely chopped
1 Tbsp. butter
In a large bowl, combine pork, salt, peppers, sage, green onions, and chopped apple. Mix thoroughly and form into six 3/4" thick patties. (At this point, they can be wrapped and frozen, if you want.)
In a large, heavy skillet, melt butter. Cook patties in butter until sausages are brown on both sides, and centers are no longer pink (10-12 minutes total).
Makes 6
This recipe is also easy to cut in half, which is what I did. Since I had to thaw all of them, I will be having the rest over the next couple days, which is fine, because this was really rather tasty! I do think it could have used a smidgen more salt than it called for, and my sage is rather old, so it could have been "sagier" if I'd had fresher.
I served this with scrambled eggs topped with cheese for a really decadent and fancy breakfast for dinner. Making breakfast food is difficult because timing is so important. Everything has to be done all at the same time in hopes of serving it all hot on the same plate. The cakes were finished first, so I kept them under foil. A few minutes later, the eggs were done and then the sausage at the last minute. and it was all pretty darned delicious! I definitely don't have time to cook like this during the week for my breakfast, so this is a special weekend treat. I cooked everything in its own pan, so it does create several dishes to wash, but it was worth it!
I definitely recommend these recipes, but honestly, the real stand out was the raspberry syrup. It was ridiculously easy to make and tasted so good! You really do need to try it out!
Sources:
City Map
City Pic
Johnny Cake History
4th of July History
City History-This has some really amazing pictures in it
Subscribe to:
Posts (Atom)