Sunday, August 23, 2015

Dining-In: A Culinary Tour of America-Des Moines, Iowa


The Location: Des Moines, Iowa


2013 population: 207,510 people. 67.9% white, 13.3% Hispanic. Per capita income: $23,723

Des Moines was incorporated on September 22, 1851 as Fort Des Moines. It was named for the Des Moines River which translates to River of the Monks in French. Prior to and after the European invasion, there were numerous Native American tribes who lived in Iowa. As with the whole of the Midwest and American expansion, the region was a crossroads for many different tribes as they were pushed further west over the decades as more Americans and Europeans took over their land, displacing them. Fort Des Moines was built to try and control the Meskwaki and Sauk tribes. They had already been forced to move from the eastern half of the state, their homeland. They did not fare well in their new land.

By 1857, the city's name was shortened to Des Moines. In 1864, coal mining became an important industry with the opening of the Des Moines Coal Company. It was very active until the early 1900's when the coal was used up.

The city has undergone several transformations and beautification projects over the years, changing the shape and look of the city. Today, Des Moines is home to several large financial and insurance giants such as Wells Fargo and Allied Insurance.

Through my research of the city, I was unable to find a lot of outstanding events or points in time of interest. Des Moines appears to be a city that has largely kept its head down and gotten its work done. It doesn't make waves, it just moves ever on with the changing times. It has always been a politically active city, though, and the state of Iowa is one of the shapers of past and current American politics.

Iowa is also the setting to one of my favorite musicals: The Music Man. If you've never seen it, you really should. It's a lot of fun. The movie takes place in a fictitious town, but one of the songs I think perfectly embodies the state, and therefore, the city of Des Moines:


So, why are we in Des Moines today? Well, we are here for the world-famous, or at least nationally-famous, Iowa State Fair! The Iowa State Fair began in 1854 in the city of Fairfield. It was moved to Des Moines permanently in 1878. With a few exceptions, it has been held every year since then. It is known for attractions like the Butter Cow sculpture which was introduced in 1911. They also have a double ferris wheel. They are also well-known for their loved of deep-fried foods and foods on sticks. Deep-fried butter and the deep-fried Snickers bar are some of the more outlandish items they have fried up over the years. In honor of that, I decided to partake in my own deep-fried feast.

The Food: Deep-Fried Everything


Deep-frying is something I never really do. I have done it when I worked in the restaurant industry, but never really do it at home. I eat deep-fried foods, but I never really make it for myself. I decided that if I was going to deep-fry a meal, I was going to do it right. I borrowed my parents' table-top small deep-fryer and some oil from them and picked out several recipes to try. I had more recipes planned but didn't do all of them because I hit my deep-fried threshold before dessert.

Did you know that you can eat too much deep-fried food? I didn't, but I learned that last night. I don't really know why, I made corndogs, onion rings, deep-fried pickles, sweet potato chips, and corn fritters. That really shouldn't have been too much...OMG that was so much deep-fried deliciousness! No wonder I had no stomach for dessert. I was going to make a dessert batter and try deep-frying apple and nectarine slices, but it was a no-go.

I found a recipe for Iowa State Fair corndogs online and they worked brilliantly. I will share the link because I didn't alter the recipe except to use chicken dogs instead of beef hotdogs. I think it turned out really well. There's something thrilling about making your own corndogs. They're easy to buy at the grocery store at the deli or in the freezer section, but there's something cool about making your own. You control the ingredients more and the quality is better. I used chopsticks for the sticks. The cheapo kind you get with teriyaki and you keep them in your silverware drawer and never use, but you don't want to throw them out either. This is the perfect use for them.

I also used the extra batter from the corndogs to dip dill pickle wedges in and deep-fried those. If you have never tried the amazing treat that is a deep-fried pickle, do yourself a favor and try one. They are so good!

The sweet potato chips really don't need a recipe. I had half a sweet potato left over from last week's chili recipe and thought this would be a good use of it. All you do is peel it, slice it as thinly as possible and throw it in the fryer. Sprinkle a little salt on them when they're done and you have sweet potato chips! I had originally thought to do them in french fry form, but the shape of the potato was such that chips were a better option. They weren't overly sweet and were really good!

The last two recipes I used my own recipes for so I'll write them out here.

Sweet Onion Rings: (I made a half batch but will write out the original recipe)
3 cups buttermilk
2 sweet onions, thinly sliced into rounds, then separated into rings
3 cups flour
3 Tbsp. onion powder
3 Tbsp. garlic powder
1 1/2 tsp. salt
1 1/2 tsp. pepper
4 cups canola oil

Pour buttermilk into large bowl. Add onion rings; toss to coat. Let stand 1 hour, tossing occasionally. Mix flour, onion powder, garlic powder, salt, and pepper in another large bowl.
Preheat oven to 350 degrees. Pour enough oil into heavy large skillet to reach depth of 3". Heat over medium-high heat to 350 degrees. Working with a few onion rings at a time, shake off excess buttermilk, then turn onion rings in flour mixture to coat. Fry onion rings until golden brown, adjusting heat as necessary for each batch to maintain temperature to 350 degrees, about 2 minutes. Transfer onion rings to paper towels to drain, then place on baking sheet and keep warm in oven while frying remaining rings.
Makes 6 servings

The only things I did differently was to leave out the onion powder because we were out. I added a dash of cayenne pepper instead. I also added a bit of Tabasco sauce to the buttermilk to flavor the onions more. I breaded all the onions before starting to fry them and used a deep-fryer instead of the pan. These were amazing! They were really crispy and the onions were so thin that they basically melted when you ate them. I probably ate too many of these.

The other recipe is for the corn fritters.  This is apparently a family recipe but I've never had the occasion to try it. It's not an Iowa recipe, but it is corn, and corn and Iowa go hand-in-hand, so I thought it was a good time to try it. I changed it to deep-fry the fritters, but I'll write out the recipe as it is stated, which calls for pan-frying. The batter is essentially a pancake batter, so pan-frying would result in a pancake-type finished product, but when you deep-fry them, they are more like a savory doughnut. I chose this recipe because I also had leftover creamed corn from last week's blog recipes and wanted to use it up. I think this was a great way to use it because there were delicious!

Seabeck Corn Fritters:
1 1/3 cups flour
3/4 tsp. baking powder
1 tsp. baking soda
1/4 tsp. salt
2 Tbsp. sugar(I cut it down to 1 Tbsp and they were quite sweet from the corn. I don't think you need 2, personally.)
1 egg
2/3 cup milk
2/3 cup cream-style corn
1/3 drained canned whole kernel corn(I used frozen because that's what we had on hand. It was just fine.)
1 qt. corn oil

1.) In a medium mixing bowl, stir together flour, baking powder, baking soda, salt, and sugar.
2.) In a small mixing bowl, beat the egg and milk to blend, stir in cream-style corn and whole corn.
3.) Make a well in the center of the flour mixture; add corn mixture and stir until dry ingredients are moistened.
4.) Pour oil into a large iron skillet, filling 1/3 full. Over medium heat, heat oil to 375 degrees.
5.) Drop mixture by Tbsp. into oil, no more than 3-4 at a time. Fry until brown. Turn once. Drain on absorbent paper.
6.) Serve at once with syrup.(I did not do this.)
Makes about 18 fritters; can be doubled.


I made so much food that I called my parents to come up and eat the rest of it. They came up at about 8pm and devoured the rest of the food, with the exception of the plate they took down to my grandparents to try. There was only a tiny bit leftover in the end, but I had reached my limit and could eat no more. Deep-fried foods are delicious, but they really are best in moderation. I can't imagine eating like that every day, but there are some people who do. I don't know how they manage it, but they do! I would highly recommend any of these recipes, but maybe don't make every one of them all at once. It's a bit overwhelming. Amazing, but overwhelming!

Sources:
City Stats

City Map

City Pic

Iowa Native American Tribes History

Iowa State Fair Corn Dog Recipe


Sunday, August 16, 2015

Dining-In: A Culinary Tour of America-Fort Collins, Colorado

 
The Location: Fort Collins, Colorado


2013 census: 153,061 people. 82.9% white, 10.3% Hispanic. Per capita income $29,987

Prior to the European invasion, the region was home to multiple tribes of Native Americans. The Cheyanne, Arapaho, Ute, Kiowa, Comanche, and Apache all lived there. Forts like Fort Collins were built to protect white settlers and their interests, and maintain control over the Native American population. By 1878, reservations for each tribe had been established and they were forced to move there. All but the Ute were moved out of the state of Colorado, to other nearby states.

Fort Collins was built in 1862. It was only used by the United States Army for a few years when settlers arrived in the area. The fort was decommissioned in 1867. The city surrounding the fort was built up in the 1870's and 1880's. The sugar beet and lamb industries were the top industries that helped build up the city's economy. It remained an economically strong city even through the Great Depression. World War Two brought with it a population boom and much of the city's original structures were replaced with newer models.

Politically, the city was known to be rather conservative. Alcohol was banned from the late 1890's until 1969 when students at Colorado State University protested against it. Today, the city is known for its robust beer culture.

Fort Collins is the fourth largest city in Colorado. It is also said to be one of the cities that was the visual inspiration for Disneyland's Main Street, USA, when Walt Disney was designing the park.

The Food: Chili and Cornbread

Colorado is a unique state in our country. It is part of the West, but it is also part of the Midwest, and it is part of the Southwest as well. Its cuisine is influenced by all of these cultures. It's known for its beef and lamb production, neither of which I eat. This presented some problems for me when trying to pick a meal for this state. I didn't want to just go with the Denver Omelet, because I felt that was too easy. I originally did plan on it, if I couldn't find anything else to use. In the end, though, I settled on chili and cornbread. I had a recipe card for chicken chili in the slow cooker and it even called for beer, so that fit in perfectly with the city's beer culture, though truth be told, that was a coincidence because I picked out the recipe before researching the city's history. It was a lucky choice, I guess!

I altered the recipe a little, as I always seem to do, so I will write it out how I did it, because I think it worked really well.

Slow Cooker Chicken Chili
1lb. ground chicken
3 Tbsp. + 2 tsp. chili powder
1(15oz.) can kidney beans, drained and rinsed
1(15oz.) can white beans, drained and rinsed
2(14.5oz) can fire-roasted tomatoes
1 med. sweet potato, peeled and shredded(about 10 oz.)
2 zucchinis, shredded
1(15oz.) can chicken broth
1/4 cup instant tapioca
1-2 chipotle chiles in adobo sauce with seeds, chopped
2 Tbsp. reduced sodium soy sauce
1 Tbsp. salt
1 Tbsp. onion powder
2 tsp. granulated garlic(I didn't have this and used powdered garlic and it was fine.)
1 tsp. dried oregano
1 tsp. ground cumin
1/4 tsp. cinnamon
Pinch ground cloves
1/2-3/4 cup lager-style beer, optional

Put the chicken in the slow cooker. Add 3 Tbsp. of the chili powder and the rest of the ingredients except the beer. Stir everything together, cover, and cook on low for 6-8 hours.

Just before serving, stir in the remaining 2 tsp. of the chili powder, the beer if using, and season with more salt and pepper to taste. Divide the chili among warm bowls.
Toppings: Sour cream, shredded cheddar or Monterey Jack cheese, chopped green onions.

Makes 6-8 servings.

This chili was amazing! I did the 8 hours and stirred it a few times throughout the day just to make sure everything blended together. When I added the beer and last of the chili powder I left the lid off and turned it onto high for a while to help burn off some of the alcohol because it was a little bitter otherwise. I used 2 chipotle peppers, but if spice is an issue, you might only use one. I wouldn't recommend skipping it entirely since that's the only spice source in the recipe. Chili powder isn't spicy, so there's nothing else in it to give it the spice you want in chili.

The recipe originally called for two pounds of ground chicken, but I felt that was too much and substituted half of it with the zucchini. I think it worked out just fine. The flavor blends overnight in the fridge and is even better the next day. Chili freezes really well, so I will be putting one-cup portions into zip-lock bags to freeze for later meals. It's a good way to make a batch of chili go a long way!


 The cornbread recipe I found online and it hails from an inn in Colorado. Cornbread is pretty generic as a dish so I wanted to find one relevant to the state. This also marked the use of a new ingredient for me. I have never used creamed corn before. It has a really deep corn flavor but a sort of strange texture for my tastes. It's probably fine cooked into things but I don't know that I would really ever eat it plain. And this means I need to find something else to cook it in this week because I have about a third of the can left and I don't want it to go to waste. I spent good money on it.

Since the recipe is online I won't write it out here, but I will talk about the one change I made to the recipe. I made a half batch since it was easily divided in half. Instead of a half cup of sugar, I used a half cup of unsweetened applesauce, my main go-to for replacing sugar. Since I don't know what it would be like if I'd used sugar, I guess I can't say for sure if it worked just the same. I think it turned out fine, though. It's a different type of cornbread because it's more wet from the applesauce and creamed corn, but it was supposed to be that way. My first piece crumbled when I took it out of the pan, but the second piece held up better. It just needed to sit for a while before being cut. I found it sweet but not overly sweet and really delicious with some butter on it.


This would be an ideal autumn meal, but it's good any time of the year because the crockpot keeps from heating up the kitchen. I was really happy with the results of this meal. It was easy to make and very tasty. I highly recommend it!

Sources:
City History

Native American History

Cornbread Recipe

City Stats

City Map

City Pic

Sunday, August 9, 2015

Dining-In: A Culinary Tour of America-Greeneville, Tennessee

The Location: Greeneville, Tennessee

2013 population: 15,020; 83.7% white, 7.8% Hispanic. Per capita income: $18,693

Greeneville was named after Nathanael Greene, a Revolutionary War hero. It was also the home and is the final resting place of President Andrew Johnson.

Archaeology places humans inhabiting the region as far back as 10,000BCE. The Cherokee tribe were living there prior to the European invasion. European settlers began taking over the area in 1772. Greeneville was officially made a town in 1786.

The state of Tennessee has a unique place within the history of the American Civil War. Part of the state supported the Union and part of the state supported the Confederacy. The eastern half of the state, the half that Greeneville is part of, supported the Union and had a long history of participating in the Abolitionist movement prior to the war's outbreak. The eastern half of the state went so far as to fight to become its own state in order to side with the Union, but they were denied, and the entire state of Tennessee would side with the Confederacy. Greeneville and the rest of the eastern side of the state participated in acts of civil disobedience in order to continue their fight for the Union, even though they were occupied by the Confederacy. Railroads were destroyed and bridges were blown up. At least two people were executed for their acts of rebellion against the Confederacy. Today, Greeneville's county courthouse has monuments to both the Confederacy and the Union and is thought to be the only city in the United States with tributes to both sides of the Civil War.

The Food: Fried Green Tomatoes and Peach Hand Pies


Tennessee is known for their barbecue, but because I have featured that already and am reserving the right to do so again, I didn't want to overdue barbecue. This led to researching other popular dishes of the region. I have never had fried green tomatoes before but it is such an iconic Southern dish, I knew it would be the perfect time to try it. I had originally planned a different city with a different menu, but when my parents went to the Edmonds Farmer's Market yesterday and ran across a couple of green tomatoes for me, I made a last minute switch to try them out. I'm really glad I did because they were soooo good!

Fried green tomatoes were not necessarily a Southern delicacy. They were an American delicacy. They showed up in menus throughout the country over the years. They had a popularity that waxed and waned. They were waning and possibly poised to fade into obscurity when a little movie, based on a book, came out in 1991. Fried Green Tomatoes, starring Jessica Tandy, Kathy Bates, and Mary Stuart Masterson, made a hit out of the dish, which began showing up everywhere in the Southern states. I suppose you could call the dish, a neo-classic. The movie is fantastic, and I highly recommend it. I have not read the book, but I hear it is also quite excellent.

I had a recipe card that I intended to follow, but I was missing eggs and didn't want to run to the store, so I had to completely revamp the recipe. I decided to really revamp it, so the recipe is entirely mine. I will write it out here.

Fried Green Tomatoes:
2 green(unripe red) tomatoes(Or however much you want depending on how many people you're making it for.)
Equal parts unseasoned breadcrumbs and cornmeal(Sorry, I didn't measure anything. Just use enough so that it looks like it'll coat all the tomatoes you have.)
Salt/Black pepper, to taste
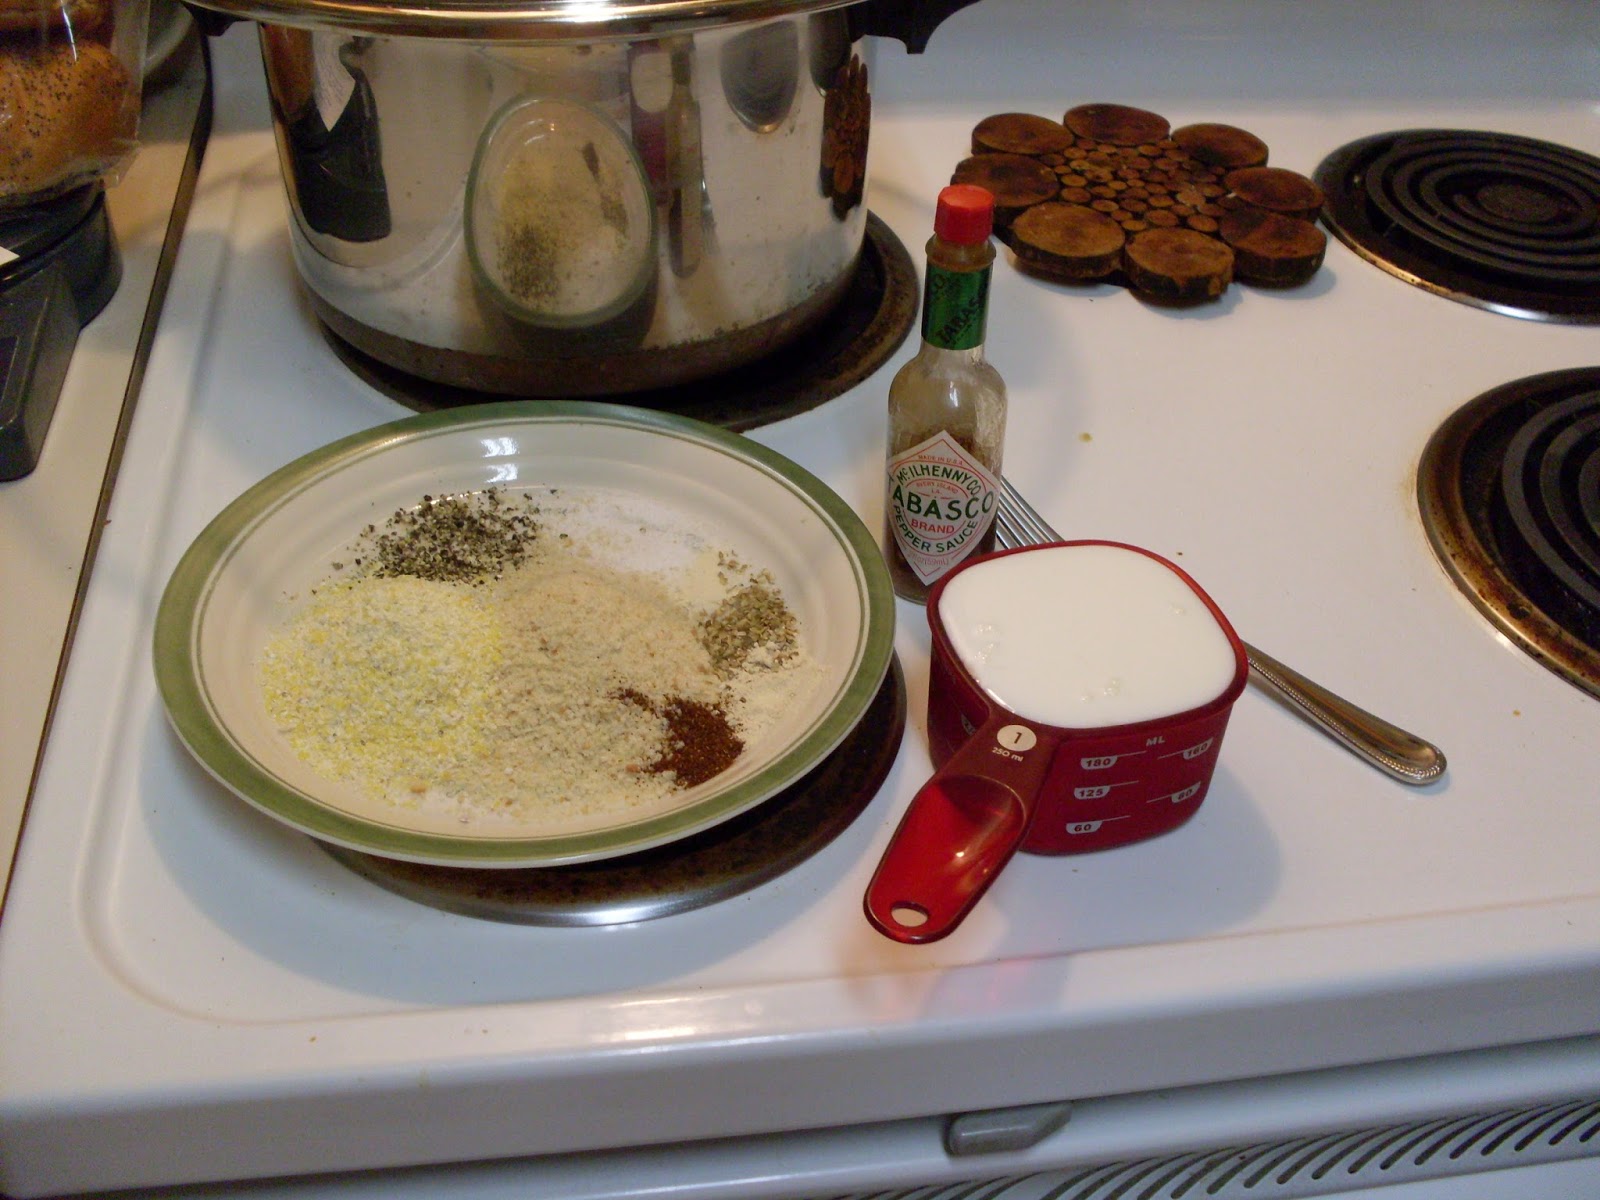
1/2 tsp. each chili powder, garlic powder, oregano, and onion powder
1 cup buttermilk(I made mine homemade by pouring 1 Tbsp. white vinegar into a 1 cup measure and filling the rest of the cup with milk. Let it sit about five minutes before using.)
Tabasco, to taste
Butter/Canola oil/Bacon grease(You can use any of these or a combination of them. I made a batch for my parents with butter and canola oil, but mine I made with bacon grease and canola oil.)


Slice the tomatoes crosswise into 1/2" slices. On a plate large enough for dredging the tomatoes, combine the flour, cornmeal, and dried seasonings. Mix well. Pour the buttermilk into a bowl large enough to hold the tomato slices; you can do this in rounds if you need to. Add the Tabasco to the buttermilk and mix well. Soak the tomato slices for a few minutes in the buttermilk before dredging in the cornmeal mixture. Set the coated slices onto another plate and let sit for five minutes or so to let the coating adhere firmly to the tomatoes.

Heat the oil of your choice in a large frying pan over medium heat. When hot, add the tomato slices. You will have to be very gentle with these when they fry because the tomatoes are delicate and the coating is even more delicate. It will fall off very easily if you are not careful. When they are deep brown, remove them from heat and gently dab at them with a paper towel to absorb the excess oil.

You can eat these plain or with a sauce of your choice, but I made mine into a BLT. Well, a BT, because I didn't use lettuce. I bought some lovely poppyseed kaiser rolls, sliced one in half, and toasted it in the oven. I fried up thick-cut bacon and used some of the leftover grease from it to fry the tomatoes while the bacon rested and the roll toasted. Mayonnaise on the roll, then tomato slices, then the bacon, and it was fantastic!! It was just out of this world! I also tried a couple of the tomato slices plain to know what the texture and flavor of it was just on its own. I can see why this has become such a popular dish because it was just ridiculously delicious.

Peach Hand Pies:
Peach pie is another dish synonymous with the South and I felt they paired well with tomatoes. Both are in the height of their season this time of year. It's the perfect summertime dessert. I have done peach pie for this blog before, but this was different because they were individual-sized. I had a recipe card for it and I based mine off of it. I made a few changes based on my tastes. The recipe was for 16 servings, but I only bought enough dough for half, so I only made half. Now I have too much peach filling leftover and I'm not sure what to use it for. I will write out the recipe based on eight servings so you don't accidentally buy too many ingredients.

1/2 Tbsp. butter
2 tsp. cornstarch
3 Tbsp. sugar(I substituted unsweetened applesauce and it worked just fine.) + 1/2 Tbsp sugar(I actually did use this.)
1 lb. ripe peaches, unpeeled, pitted, and cut into 3/4" pieces
Pinch salt
1/2 Tbsp. lemon juice
1 pkg.(15oz) refrigerated unbaked pie crusts (The kind you unroll yourself, not the ones in a pie tin)
1/2 Tbsp. milk

1.) In nonstick 12" skillet, melt butter over medium heat. In cup, mix cornstarch with 3 Tbsp. sugar. Stir peaches, sugar mixture, and salt into butter in skillet. (If you use applesauce like I did, don't mix that with the cornstarch first, just add all of the ingredients to the skillet and stir well to mix.) Cook 25 minutes or until peaches are very soft and mixture thickens and boils, stirring frequently. Boil 1 minute. Remove skillet from heat; stir in lemon juice. Cool completely. (Mixture can be made up to 1 day ahead and refrigerated until ready to use.)

2.) Preheat oven to 425 degrees. Let pie crusts stand as label directs.
3.) On work surface, unfold 1 dough round; cut into quarters. Spoon 2 Tablespoons of filling in strip down center of each quarter, leaving about 3/4" dough uncovered at each end. Fold dough over filling. With fork, press edges together to seal. Transfer pies to ungreased cookie sheet. Repeat with remaining dough and filling. (You will need two cookie sheets for them.)
4.) Brush tops of pies with milk; sprinkle with remaining sugar. With knife, cut 1" slit in top of each pie to allow steam to escape during baking.
5.) Place cookie sheets on two oven racks. Bake 18-20 minutes or until golden brown, rotating cookie sheets between upper and lower oven racks halfway through baking. Transfer pies to wire racks to cool.
Makes 8 pies

This was one of the best meals I've had in a while. Tomatoes and peaches really do go well together. Both are fruits, and sweet. They evoke images of the South and summertime. I highly recommend both of these. You will not be disappointed. I promise!

Sources:
City Info

City Map

City Pic

City History

Fried Green Tomatoes History

Sunday, August 2, 2015

Dining-in: A Culinary Tour of America-New Bedford, Massachusetts


The Location: New Bedford, Massachusetts
2013 census: 95,078 people; 66.5% white; 22.2% Hispanic. Per capita income $20,517

New Bedford is nicknamed "The Whaling City," because it was a large whaling port in the 19th century. Fun fact: In 1841, Herman Melville shipped off on the Acushnet whaling ship from New Bedford. His experiences on that ship would inspire the story of Moby Dick.

Prior to the European invasion, the region was home to the Wampanoag tribe who numbered approximately 12,000. New Bedford was settled by Europeans in 1652. The city's first newspaper was founded in 1792, as was the first post office. When Europeans began to arrive, they came in several different waves of ethnic groups. First came the British Protestants, and then the Irish. With the advent of the first cotton mill in 1846, came the Portuguese. After them came the Polish and Eastern European Jews in the late 1800's.

New Bedford, along with Fall River and Greater Providence, have the largest Portuguese American population in the entire country. Every year, New Bedford is host to the Feast of the Blessed Sacrament, a festival devoted to Portuguese and Portuguese-American culture. This year marks the 101st year, and it runs from July 30-August 2nd. Events include a parade, fado singing(think Portuguese blues, a genre dominated by women), and tons of Portuguese food. The feast was started at the Church of the Immaculate Conception in 1915. It was an homage to a similar feast celebrated each year in Madeira Island.

 Here is a video of an example of fado singing. It's quite lovely, I think.


And here is a video of folk music and dancing at a past Feast of the Blessed Sacrament, so you can visualize what it's like there.


In honor of the Feast of the Blessed Sacrament, an event that I was first introduced to in the movie Passionada, a lovely romance starring Jason Isaacs wearing a horrible wig, I decided I had to partake in it when I began this food blog. I have never cooked Portuguese food before and it all looks so amazing, so I was very excited to try it. I chose two recipes and both of them included ingredients I'd never used before. It turns out that I will probably never use one of them again...

The Food: Caldo Verde and Bacalhau

 Salt Cod, out of the box

Bacalhau: Basically salt cod cakes or fritters. I used a recipe from The Frugal Gourmet on Our Immigrant Ancestors cookbook by Jeff Smith. The recipe did not turn out so I will not bother writing it out here. I'll just explain what happened.


Salt cod, after soaking for a day

I cooked with salt cod for the first and probably last time yesterday. Salt cod has a long history, it dates back at least 500 years. It was a way of preserving food for the long winter months and some say it makes the fish taste even better. That might be a bit of an exaggeration. It took an email, a trip to two different stores and $12 for me to track down the salt cod. It is not easy to find in Seattle. But find it I did. I followed the instructions to soak it in water starting late Thursday night. I kept it in a pan of water in the fridge and changed the water several times on Friday and Saturday morning. I think maybe I did it too soon because it didn't seem to have any flavor when I finally cooked it up. All the salt was gone. To cook the fish, you just simmer it in water for about a half hour. Do you know what the smell of boiled over fish water on your stove as it evaporates on the burner smells like? I hope you don't. Because I do, and I wish I didn't...

The breading was made by leaving fresh bread out to dry and grating it into breadcrumbs. I didn't have quite enough so I used panko for the rest. You mix this with olive oil, fresh garlic, and spices. When the fish is cool enough to handle, you crumble it into flakes and mix it into the breadcrumb mixture. I did not realize until it was too late that it was not boneless fish. I got some of the bigger bones out, but I'm pretty sure I was feasting on fish bones last night...Not a pleasant thought.


The breading didn't keep the cakes together. It needed more of a binder, maybe an egg or milk or something. When I formed the cakes, they just crumbled but I fried them up anyway. It turned into basically a breaded fish hot mess hash. The flavor was pretty good, though the fish was no longer flavorful. The garlic was a very good addition and worked really well with it. I put some lemon juice on it and that turned out pretty good too, but it wasn't enough to save this trainwreck of a dish. Because salt cod is so expensive, hard to track down, and labor intensive to prepare, I don't know that I will ever try this one again, but it was a fun experiment. I think if I ever want to try it again, I'll splurge and go to a restaurant that has them on the menu.

Caldo Verde: This sounds like a really exotic dish, but it's Portuguese for kale and potato soup with linquica sausage. Linguica sausage is another new ingredient to me that took a while to track down. It looks like kielbasa but it's redder and has a milder flavor. In case you want to try this sometime, Safeway carries it. It's a tad expensive, but it's there. If you can't find it, kielbasa would make an ideal substitute. I have heard this of this dish over the years but never attempted it before. This one was a winner, thankfully! I will post the link to the original recipe because I found it online.

Caldo Verde is what you would call "peasant" food. It has humble ingredients like potatoes, sausage, and kale. The sausage flavors the soup but isn't a main component. The potato and kale are definitely the stars of the show. Some versions also include beans, but I chose one that didn't since I don't always like beans in my food. It was very simple and pretty quick to prepare. It might not be the ideal food for an 85+ degree day, but it worked out just fine.

You start with four large russet potatoes, scrubbed, peeled, and sliced thin. Put them in a large pot and cover with two quarts of chicken stock. Cook for about 20 minutes until the potatoes are cooked through. In the meantime, chop two cloves of garlic and a small onion and saute in olive oil until softened. Put these into the pot with the potatoes. When the potatoes are cooked, remove the pot from the heat and puree with a hand-held blender or in a regular blender. If you have neither of these available, a potato masher would probably work though it might be chunkier than with the other methods.

At the same time as the potatoes are cooking saute 6 ounces of thinly-sliced linquica sausage in olive oil and when that has cooked until browned put in 1 lb. julienned kale(I used purple kale but use whatever you like the most. Just cut it off the stems and julienne in long strips.) to the frying pan. Cover and let cook down until partly cooked before pouring that and the sausage into the pot of pureed potato soup. Return the pot to medium heat and cook through until the kale has cooked down. Mix well before serving. You can put olive oil on the top if you like though I skipped that step.


The soup was really good and I think it'll be even better reheated. Soup always tastes better the next day, doesn't it? I gave some to my parents and grandparents to try and froze a couple servings so I'll get to enjoy it later on. The fish cakes tasted pretty good but visually they just didn't work. I think they're too impractical to try again, but I really did enjoy experimenting with it. I'll just wait until I get to go to the Feast of the Blessed Sacrament in person one day to try them made by people who actually know what they're doing. Do try the soup though, you won't regret it!

Sources:
Feast of the Blessed Sacrament website

Caldo Verde Recipe

City Map

City Pic

City Info

City Info


Sunday, July 26, 2015

Dining-In: A Culinary Tour of America-Kailua, Hawaii

The Location: Kailua, Hawaii


2010 census: 36,513 people. 2013 per capita income: $25,138. 2010 census: 43.8% white, 21.1% Asian.

Kailua means "Two seas" or "Two currents" in Hawaiian. It is estimated that people came to Kailua and the rest of Hawaii in the 500's AD. During the 1500's, Kailua became home to the "Ali'i", or the ruling class that governed the region. Kailua became the residential seat for the Ali'i, replacing Waikiki.

Kailua remained a small town throughout the years of colonization by various cultures, until World War II, when Fort Hase and Naval Air Station Kaneohe Bay were built. This brought in a large increase in population that never went down again after the war ended. The area continued to grow, with a hospital, churches, and schools being built. The first supermarket was opened in 1947.

Kailua Beach is thought to be the best beach in the entire state. It is a popular destination for all kinds of surfing, including traditional and wind surfing. President Obama has visited Kailua five times on his winter vacation during his tenure as president. This has increased tourism to the area, with people hoping to catch a glimpse of the president or his family.

The Food: Traditional Luau

This blog posts marks the halfway mark for this project. For my 25th post, I am honoring the 50th state! I researched foods from Hawaii that predated colonization of the region. Hawaii has been influenced by many cultures over the years, including American, Japanese, and even Russian. I wanted to find as close to "true" Hawaiian food as I could. This led me on a journey and a search for ingredients I've never used in my life and were rather perilous if used improperly. For this meal, it wasn't about the final product or how delicious it tasted. It was about trying out new ingredients and preparing them in ways I've never done before. And it was a lot of fun!

One of the ingredients I love most from Hawaii was one I wasn't able to use for this post. Pineapple, widely regarded as Hawaiian, is actually not Hawaiian. Pineapple hails from Brazil, which means, it's presence in Hawaii is the result of colonization. Coconuts were on the ok list, because these are thought to have been brought over by the Polynesian peoples who first inhabited the Hawaiian islands. They are also said to be responsible for bringing taro root to the land as well, which was something that played a very prominent role in my meal.

All of my recipes came from the internet, so I will not write them out here. I will write about the experience and result of making them and you can refer to the link to see the original recipe, if you are interested in trying it.

Lau Lau Pork:

This is the recipe that required the most amount of hard-to-find ingredients, and one that I was never able to find. I don't think it was missed, however. This dish required a trip to two different stores to procure everything. I visited my local Asian market for the second time in two weeks and became the very proud owner of frozen banana leaves and fresh taro leaves. Banana leaves are used to line the crockpot or whatever vessel you use to make the Lau Lau Pork. If you are like me, then you have never seen a banana leaf in person before. They are big! I unwrapped them and they are as tall as, if not taller, than I am! I only needed one to line my crockpot, so I put the rest back in the freezer for future use. What future use they might have besides making more Lau Lau Pork, I have yet to find out. But that will be the challenge, won't it?!

The taro leaves are also big, though not quite as large. They are also poisonous if not handled properly. Fun right?! Believe me, I treated these with great care, and wore gloves and everything. Apparently it's not like you get poisoned and die, but it can lead to skin irritation and kidney stones if not cooked thoroughly. So, treat it properly, treat it with care, but don't be terrified of it. If you know me, then you know how I feel about taking great risks to my personal safety. So, if I can do it, so can you! I cut the stems off the leaves and boiled them a couple at a time in water for a few minutes. This acts to start the cooking process and also makes them more pliable for folding.

For the pork, I just used pork spare ribs that I cut into large pieces. The dish is traditionally made with salted butterfish as well as pork, but I didn't have access to butterfish, so I left it out. For the seasoning, I used a combination of reduced-sodium soy sauce and red Hawiian sea salt. It's actually a sort of coral color and it colors the pork as well. If you can find this in your grocery store, I would recommend using it over Kosher or table salt. It's worth the extra money.


Two taro leaves are overlapped and then you place some of the seasoned pork mixture in the center. Fold it up like a burrito and if you are able to get your hands on the ti leaves that I was unable to get, use those to tie it up. If not, use toothpicks like I did. I used three toothpicks per bundle. Place each bundle into the banana leaf-lined crockpot and repeat until they're all used up. I had one taro leaf leftover so I just placed it on the top to help cover everything.


Put a cup or two of water into the crockpot over the leaf bundles. Place another piece of banana leaf over the top, and fold in the overhanging leaf so it's all well contained. Place a piece of aluminum foil on top of that and top with the lid. Turn the crockpot to low and cook for at least 8 hours. Make sure you actually plug in the crockpot, unlike me. Fortunately my sister was home when I called her on my way to go see Ant-Man and she was able to plug it in for me. Otherwise this would have been a blog meal fail. A very sad and expensive one.

The banana and taro leaves smell strong when you cook them. It reminds me of the smell of jasmine rice, if you are familiar with that scent. The taro flavors the meat and blends well with the soy-salt seasoning. The recipe I based mine off of calls for 4-6lb. of pork, but I used about 1.75lb, so I did the seasonings based on two pounds. This meant 1 1/2 Tbsp. each red salt and reduced soy sauce. However, when I saw just how much one tablespoon of salt looked like on the meat, I chickened out and left it at that. The water you add to the crockpot does help dilute the saltiness a bit so it turned out perfectly for my tastes, but if you like things salty, go ahead and add that extra 1/2 Tablespoon of red salt. This turned out really good!

Poi:


Poi is made from taro root. It is gluten free, fat free, and full of vitamins. Taro root, like the leaves, can also be poisonous if not cooked thoroughly. I got mini taro roots, which most likely means that they were picked before they were fully grown, from the same Asian market that the banana and taro leaves came from. They are sort of hairy on the outside, so when I thoroughly washed these(while wearing gloves), I tried to get as much of that off as I could.

This was a really simple recipe to make. Cover the taro root with water and boil it for about an hour or until softened completely. Remove from the water and peel. Traditionally, poi is made by men. The cooked taro root is placed on a wooden board and mashed with a rock. It's a sacred tradition in Hawaii, so you should enter into making it with reverence. For the people, for the land, and for the ingredient. However, I'm not a man, and though I do have a wooden cutting board I could have used, I didn't have access to a rock, so I just used my potato masher. I think it turned out pretty much the same.


Poi is pretty much everything you've ever heard about it. It's softer than mashed potato, and has a slightly bitter taste to it. I ended up sprinkling a little of the red salt into it just to give it a bit of flavor. I ate a little of it but it definitely isn't something I would seek out again. I did wonder what it would be like if I prepared it like mashed potatoes, meaning adding milk and butter to it. It sort of congeals when it sits for a while so it also made me wonder what breading and frying it would be like. It also turns purple when it oxidizes, but when I ate it, it was still off-white in color.

Haupia: Coconut Pudding

I have never had luck making pudding, besides the packaged kind where you add milk. I tried many times when I was in high school to master pudding-making, only to be banned by my parents from trying it again after so many failed attempts. So, you probably won't be terribly shocked to hear that my pudding-making attempt was yet again a fail. The recipe is basically coconut milk flavored with sugar and vanilla and thickened with cornstarch. You pour it into a pan and let it chill and cut it up into squares. Alas, mine never thickened enough and ironically, turned out to be like what we know as pudding. Except it wasn't supposed to be that way at all. Sigh. The flavor was on point, though. I replaced the regular sugar with coconut sugar, which is an actual thing. The recipe said 4-6 Tbsp. cornstarch and I used 4. I probably should have used 6...But as I said, the flavor was good.


Not everything from this meal turned out perfectly, and not all of it was to my tastes. But that wasn't important. The important thing was immersing myself in ingredients and a culture not my own, for a day. It was a good way to see the world from somebody else's perspective. The Lau Lau pork was fantastic and I have leftovers that I will eat with rice. This was a wonderful meal to make in the summer time, even though yesterday was cold and rainy. It made me think of hot, tropical days in the sun, something definitely lacking in yesterday's weather.

I would highly recommend Lau Lau pork. It takes a bit of prep work, and a trip to an Asian grocery store for the proper ingredients, but once it's in the crockpot, the job is done. If you don't think you're brave enough to try poi, rice would be a perfect starch for this. The haupia, if done properly, would be a good dessert, but if you don't care about pre vs. post colonization ingredients, fresh pineapple would also be a lovely finish to the meal. In fact, I might have some tonight with my leftovers!

Aloha!

Sources:

Haupia and Lau Lau Pork recipe

Kailua info

City pic

City Map

Lau LauPork-my recipe based on this one.

Haupia-my recipe based on this one.

City Info

Poi Recipe


Sunday, July 19, 2015

Dining-In: A Culinary Tour of America-Dearborn, Michigan


The Location: Dearborn, Michigan

2013 census: 95,884 people; 87.9% white(of this, 42.4% are people of Arab ancestry. People of Middle Eastern descent are counted as white for US census purposes. As of 2000, the number of Arab Americans in Dearborn was 40,000.); 4.% African American. Per capita income as of 2013-$19,592.

Dearborn is a suburb of Detroit. Prior to the European invasion, the region was home to Algonquian-speaking Native American groups. The French were the first Europeans to establish a trading post and other connections in the region, though this was lost to them as part of losing the Seven Years' War with Britain. Dearborn was established in 1836, named after Henry Dearborn, a general in the Revolutionary War. It was incorporated in 1893. Today, Dearborn is home to several prestigious museums, including The Henry Ford, and The Arab American National Museum.

Dearborn is the often thought of as the Arab-American capital of the nation. Like other towns with large ethnic enclaves, this town has grown to house a large group of Arab Americans who either immigrated here, or were born there. Immigration began in the first half of the 20th century, with most people coming to work in the auto industry.

While not all Arabs are Muslims, many of them are, which makes Dearborn the city with the second largest Muslim American population, behind New York City. With this comes a lot of fear and misinformation by some people. The internet is rife with it. Contrary to popular internet belief, Sharia Law has not taken root and is not the "law of the land" in Dearborn. It is not the hub of ISIS in America, nor is it where terrorists are born and bred. For the most part, it is home to people who merely wish to be left alone to practice their religious beliefs in peace. There is also a certain amount of harassment they must endure as well, unfortunately. One popular story on the internet shows a video of white Christians being "stoned" by "cruel" and "aggressive" Muslims as they are driven out of a community festival. What the video doesn't show, however, are the protest signs filled with words of hatred and messages about "burning in hell", etc. The video does show people throwing empty pop cans and water bottles and driving the protestors back out of the festival with very little assistance from the police, from whom the protestors demanded help. However right or wrong it may be to counteract hateful protestors who are harassing you and your community, one does need to see the entire story in its proper context before passing judgement on a huge section of the American population.

So, you might be asking me right now, why Dearborn, and why now? I have been looking forward to this post since I started this blog. This past Friday night marked the beginning of Eid al Fitr, the huge celebration at the end of Ramadan. Ramadan is the month of fasting that most Muslims participate in. During this time, no food or liquid may be consumed during daylight hours. Imagine what that must be like, particularly in the hot summertime. Ramadan occurs at different times each year, but this year it took place in the super hot summer. This is dedication! While there are many different ethnic groups who are predominantly Muslim, I wanted to focus on Middle Eastern food because I love it so much and haven't cooked it in a very long time. Dearborn fit into this perfectly, and with Eid falling on the actual day I planned on doing the post for it, I couldn't resist. Though I did not partake in the fasting, I did partake in the feasting, and so, I present to you...

The Food: Middle East Feast

This ended up being one of my favorite meals so far. When this project is over, I will go through it and pick my top ten meals and favorite dishes, etc. This one is guaranteed to be in my top ten. It was just that good. It was also one of, if not the most labor intensive meals I've done so far. Many of the posts I've done have been crockpot meals or simple dishes, but this one took hours over the course of two days to prepare and I loved every second of it. I made three dishes- an entree, a side, and a dessert.

This post also marks a first for me in that I went to a family gathering and shared my food with my family. Many of them read this blog but have never had a chance to actually try the food, and this was their chance to taste some of it, finally. I'm glad it all turned out as well as it did because I had an audience to impress! They seemed to like it all, or at least they were very polite and ate it anyway!

Shish Tawook:


This entree was a last-minute thing because I was going to have access to an actual grill and wanted to take advantage of it. It is a flavorful dish, and I really enjoyed it. Grilled chicken skewers that were marinated in a yogurt-based marinade. There were tons of spices and lemon juice and it was just fantastic! The recipe comes from the internet and I didn't alter it at all. I will share the link in my sources section at the end, but I won't type it out here.


Fatoosh Salad:
Salad:
1 large pita bread(I tripled this recipe and ended up using the entire package of pita bread even though it was more than it called for.)
2 cups finely torn romaine lettuce, lightly packed(I used a combo of romaine and Boston lettuce and I liked the contrast of colors and textures.)
2 ripe tomatoes, chopped(Even though I tripled the recipe, I only used this amount and it was fine.)
1 small cucumber, peeled, seeded, and chopped(I used one regular-sized English cucumber. I did not peel it though I did seed and chop it.)
2 green onions, thinly sliced
2 Tbsp. minced parsley(I skipped this)
1/2-1 tsp. oregano(The recipe doesn't specify fresh or dry and I didn't want to spend the money on fresh so I actually used dried and put it in with the dressing. I would recommend doing this if you plan on using dried.)
Dressing:
2 Tbsp. lemon juice(Fresh-squeezed really is best for this one.)
2 Tbsp. olive oil
1/2 tsp. crushed garlic
Pinch salt/pepper

For Salad: Slice the pita bread into 8 triangles. Separate each triangle in half, creating 16 pieces total. Place on a baking sheet and toast briefly under the broiler, just until crisp and lightly brown. Watch closely so the bread does not burn. (Will only take a few minutes.) Break the triangles into large pieces and set aside. Combine the remaining salad ingredients in a large bowl.
For Dressing: Combine the lemon juice, olive oil, garlic, salt, and pepper(Summer's Note: And add the oregano here if using dried) to taste in a small bowl, and whisk until well combined. Pour over the salad and toss gently. Add the toasted pita pieces just before serving and toss once more. Serve at once.

Makes 4 servings; 142 calories, 8 g. fat, 3 g. fiber

This salad was fabulous! It's sort of a Middle East version of a Panzanella, the Italian bread salad. Since I was making this to take to a gathering, I had to prep everything and put them in separate containers and assemble it at the party. I transported the lettuce in that bowl and had the dressing in a carefully sealed container that I would be able to shake to mix the dressing. Everything was carefully packaged to prevent spilling and it turned out wonderfully! The lemon is tart but not overwhelming. It's really light and refreshing. I highly recommend this salad!

Ma'amoul-Date-filled Cookies:
1/4 cup orange blossom water(Available at Middle Eastern grocery stores though I found mine at the HT Market out on Aurora next to Oaktree Cinema. Do not use the smaller bottles that can be found in some alcohol sections of grocery stores as this is essentially orange extract. What you need is the type made from actual water and orange blossoms. Believe me, I know the struggle of finding this but it's worth it. I went to four stores before finding it and after buying the wrong kind first. If you know of a store that sells rose water, chances are they sell this too. Try that place first.)
2 cups flour
1 cup semolina
1 Tbsp. sugar
1/2 tsp. salt
1 cup butter, cubed
1 1/2 cups pitted dates, chopped
2 Tbsp. powdered sugar

*In a small bowl, combine orange blossom water with 1/3 cup water. Refrigerate for 5 minutes.
*In a large bowl, whisk together flour, semolina, sugar, and salt. Using pastry blender, cut in butter until mixture resembles fine bread crumbs; drizzle orange blossom water over flour mixture, stirring briskly with fork until dough holds together. Form into ball; press into disc. Wrap in plastic and refrigerate until firm, about 15 minutes. (Can be refrigerated up to 3 days.)
*Meanwhile, in saucepan over medium-high heat, bring dates and 1 cup water to boil. Reduce heat and simmer until thickened and smooth; about 5 minutes. Let cool. (Summer's note: This can be done ahead of time as well. Just reheat over low heat until the chill is gone when you go to fill the cookies. Keep covered in the pan in fridge or put in a leftover container and refrigerate.)
*Drop dough by 2 Tbsp. onto waxed-paper-lined baking sheet to make 26 mounds. (Summer's note: I didn't measure this, I just pulled the dough into 26 pieces and then pulled parts off the larger ones and added to the smaller ones to make sure they were all approximately the same size. The dough is very workable and forgiving so don't worry about overworking it.) Place 1 ball in palm of hand; press thumb halfway into center of ball, forming a cup shape to hold filling. Spoon in 1 tsp. filling; fold dough over filling and pinch edges to seal. (Summer's note: This did not work because there's not nearly enough space to put that much filling without it spilling out the edges when you try to seal it. What works better is this: Take the ball of dough in your hand and pat it down as thinly as possible so it resembles a small pizza dough, or a potsticker wrapper. Place the teaspoon of filling in a line along the center and fold dough in half. Seal the edges so it resembles a potsticker but place sealed-side down on the baking sheet.) Repeat with remaining balls and filling. Place, pinched side down and about 1" apart, on parchment paper-lined or greased baking sheets. Refrigerate until firm, about 15 minutes.
*Bake in center of 400 degree oven until bottoms are golden grown, 20-25 minutes. Transfer to rack. Dust with powdered sugar. (Summer's note: I did this in one turn with the oven. I put one rack on the top and one on the bottom and switched them halfway through baking and it did just fine. I found mine only needed about 19 minutes to cook, possibly because I'd had to stretch the dough thinner than it called for.)
Makes 26 cookies; 153 calories, 7 g. fat, 1 g. fiber


These were fantastic! I had a hard time not eating all of them myself. My family enjoyed them a lot as well, which surprised me since many of them don't like cooked fruit mixing with dessert products, generally speaking. So, they must really have been good! The flavor of the orange blossom water is difficult to describe. It's floral, but not overwhelming. It's not particularly orangey, but has a slight citrus flavor. I wouldn't recommend not using it and if you were inclined to try rose water instead, I would not use the amount listed in this recipe. Rose water is much stronger and way more overwhelming. I would cut it down to maybe a half teaspoon and regular water to make up the difference. I also think walnuts or pistachios would be an amazing addition to this cookie. Mixed in with the dates would be the natural place to put them.

This was an amazing meal and I'm so happy I got to share it with others! I love Middle Eastern food so all the hours I put into it, were spent in love and joy of the food. If you have never tried anything like these recipes, please try them out. You might just fall in love with a cuisine that has a rich, and very long history. You will be transported half way around the world, but remember, that it's also just as American as any other food I have celebrated here!

Sources:
Shish Tawook Recipe

City Info

City Map

City Pic

I am not going to post links to the hatred I found on the internet regarding the citizens of Dearborn. The video and story I referred to can easily be found online and I will leave that up to you to research if you are so incline. I choose to not spread hate, either on this blog or in my life in general.


Sunday, July 12, 2015

Dining-In: A Culinary Tour of America-Mesilla, New Mexico


 The Location: Mesilla, New Mexico

2013 census: 1,896 people; 48.2% Hispanic, 48.1% white. 2012 per capita income $34,206
Mesilla means "Little Tableland" in Spanish. Prior to the European invasion, the area was home to the Mansos and the Apache Indigenous peoples. The entire region was incorporated in 1848 when the Treaty of Guadalupe Hidalgo was signed, establishing the US border further south, which made Mesilla part of the United States. By 1850, the region was being colonized by the US, displacing the Apaches who were already living there. When the Apaches acted to defend their lands, the US government responded by building Fort Fillmore to fight against them. At this time, the US declared the whole area part of the United States, even though Mexico still claimed it as theirs. It took three years to settle the issue, but the United States eventually bought the land from Mexico, making it officially part of the US.

During the Civil War, Confederate troops from Texas invaded and the Union troops stationed at Ft. Fillmore surrendered. The Confederate troops took over the fort and Mesilla became the capital of the Confederate Territory of Arizona. In 1862, the Battle of Glorieta was fought and lost by the Confederates, forcing them to retreat back to Texas, thus ending Mesilla's involvement in the war.

During the time of the Wild West, Mesilla was a commercial and social hub. Events such as stage plays, cockfighting and bullfights were lively draws to the city. The clientele coming to such events were known for their lawlessness and the city was a rather violent place to live. People like Pancho Villa and Billy the Kid were known to frequent the town. Two stagecoach lines went through Mesilla, making it easy to get to.

When the railroad was coming through the territory, Mesilla bid for it but bid too high and it went to Las Cruces instead. The commercial and social dominance of the region was then shifted to Las Cruces and Mesilla had very little growth after that point. Because the people who live there still wanted to keep the flavor of history, much of the town was carefully preserved or rebuilt to look like it had in the 1800's and today it is known for its tourist appeal because of this. Each year the city holds large Cinco de Mayo and El Dia de Los Muertos celebrations which draw many tourists to the town.

The Food: Posole

Normally I would wax poetic about the history of the dish I made, but what I discovered made me so uncomfortable that I am actually not going to write about it here. If you want to know, you can easily find it on the internet, but do so at your own risk. The basic history, though, is this: Posole comes from Mexico and has a very long history that goes back to ancient times. It was a dish eaten in ritualistic fashion for spiritual ceremonies and though it is still very popular now, the recipe has changed over the years.

Posole is essentially a meat, chile, and hominy stew. This is the first time I have ever eaten hominy and I have been looking forward to trying it for a long time. It did not disappoint. The flavor and texture of hominy is fantastic! It tasted like eating corn tortillas in little nugget form. It's chewy and filling and acts as the starch in the dish. At first I was concerned that such a simple recipe would be enough to work for an entire meal. The hominy is definitely enough to fill you up. Though I did dip a flour tortilla in the sauce and that was lovely too. And because New Mexico is known for their chiles, I wanted to feature a dish that used them, and this dish did just that. In fact, the chiles and sauces I bought came from New Mexico, which made it feel extra special to me.

 I had a basic recipe I found and a couple recipe cards of my own but I really just turned this into my own dish. I will share the link of the base recipe but type out what I did. This was really easy and I did it in the crockpot so it was even easier! I got a late start but it still ended up being done in a few hours anyway. It was a bit spicy, so you might cut back on the spices I added if you like less spice. Here's the recipe:

Summer's Crockpot Posole-
1 (25oz) can hominy, drained and rinsed
1 (15 oz) can green enchilada sauce
1 (15 oz) can red enchilada sauce
1 (4oz) can diced mild green chiles
1/2 onion, diced
3 cloves garlic, chopped
3/4 lb. pork spare ribs, trimmed of fat, diced in bite-sized pieces
1(ish) Tbsp. canola oil
1(ish) tsp. chili powder
1/4 tsp. cayenne pepper
Salt/Pepper to taste
Cilantro-You might think this is a travesty, but I used dried cilantro because I am one of those cilantro haters. However, I don't hate the taste as much as I cannot stomach the smell, so dried cilantro fixed that issue for me. I didn't have to chop any, but I got a bit of the flavor, but not so much that it ruined it for me. You are more than welcome to use fresh if you like, but if you do, add this to the crockpot about a half hour or so before you'll be serving the posole. You can also use it as a topping for the dish too.

In a frying pan, saute the onions and garlic until softened. Add the pork and brown on all sides. Add chili powder, cayenne pepper and salt and pepper to taste. Mix well.

Pour the hominy, enchilada sauces, and green chiles into the insert of a crockpot. Rinse out the inside of the cans with water and add this to the crockpot. When the meat is browned, pour the contents of the frying pan into the crockpot as well. Stir well and put the lid on it. Turn it on high for about 3 hours. This makes 4 servings.

This was such a delicious meal and it was so easy to make. I think the hominy was the best part and I really need to research other dishes for it because I could see myself eating that all the time now. If you like spicy foods, you will like this. And if you prefer one of the colors of enchilada sauce over the other, you can absolutely use all of one or the other. I just couldn't make up my mind so I did one of each. I highly recommend dipping tortillas in the sauce. It's really good that way! If it's too spicy for you, I suppose you could mix in some sour cream to cut the heat a bit, but I didn't try that. If you try it like that, you'll have to let me know what you think!

Sources:
City History

Basic Recipe

City Pic

City Map-Note, the blue is Mexico, not the ocean.

City Info