Showing posts with label jewish cuisine. Show all posts

Sunday, June 9, 2019

What's in Grandma's Recipe Tin?-Piña Colada Cheesecake

All right, so this week's recipe was a fun one! It presented quite a challenge to me, one I really enjoyed conquering! I chose this cheesecake recipe for a specific reason. One of my friends has some health issues that makes eating difficult, and this weekend is the Jewish holiday of Shavuot/Shavuos, the "dairy" holiday, as she explained it to me. She encouraged me to eat as much dairy as I possibly can this weekend in her stead, and I happily stepped up to the challenge! And as her grandmother passed away just a couple days ago, I thought if I could find a good recipe that fit the dairy bill, I could use my grandmother's recipe, to honor her grandmother's memory. So, I looked through the box and found one cheesecake recipe that has cream cheese, butter, and sour cream all in the ingredient list. That's quite a bit of dairy in one recipe, so I knew it was the perfect one to try out.

The recipe's original title is "O Grancho Cheese Cake" or at least that's what it looks like written on the card. There is no known source of this recipe written on the card, so I don't know if that's the name of the person who created the recipe or a company from long ago that created it, or what, but to me, it means nothing. And it tells me nothing about the cheesecake. I looked at the list of ingredients to see if anything stood out. Crushed pineapple in the batter, and coconut flakes in the crust. Bingo! Piña Colada Cheesecake, a much better and accurate name for this recipe.

As I said, this recipe presented me a few challenges. There were very little instructions on what to do to make the crust other than "mix and press in buttered spring-form pan," and that basically tells me nothing. I had to guess and hope for the best. Fortunately for me, it all worked out rather well! And as it turns out, you don't need to butter the pan. So, without further ado, let me share the recipe with you:

Piña Colada Cheesecake

16 oz. cream cheese
2 tsp. vanilla
1 1/4 cups sugar
3 eggs, beaten
3 cups sour cream*
1 can crushed pineapple** (reserve the pineapple juice)
Crust:
1 cup Graham cracker crumbs
1/2 cup slivered blanched almonds, toasted
1/2 cup coconut flakes
1/2 cup butter
1/2 cup sugar
1/2 tsp. almond extract

Mix the cream cheese, vanilla, and sugar well, until fluffy.
Add the beaten eggs, and blend well.
Add the sour cream and mix until completely blended.
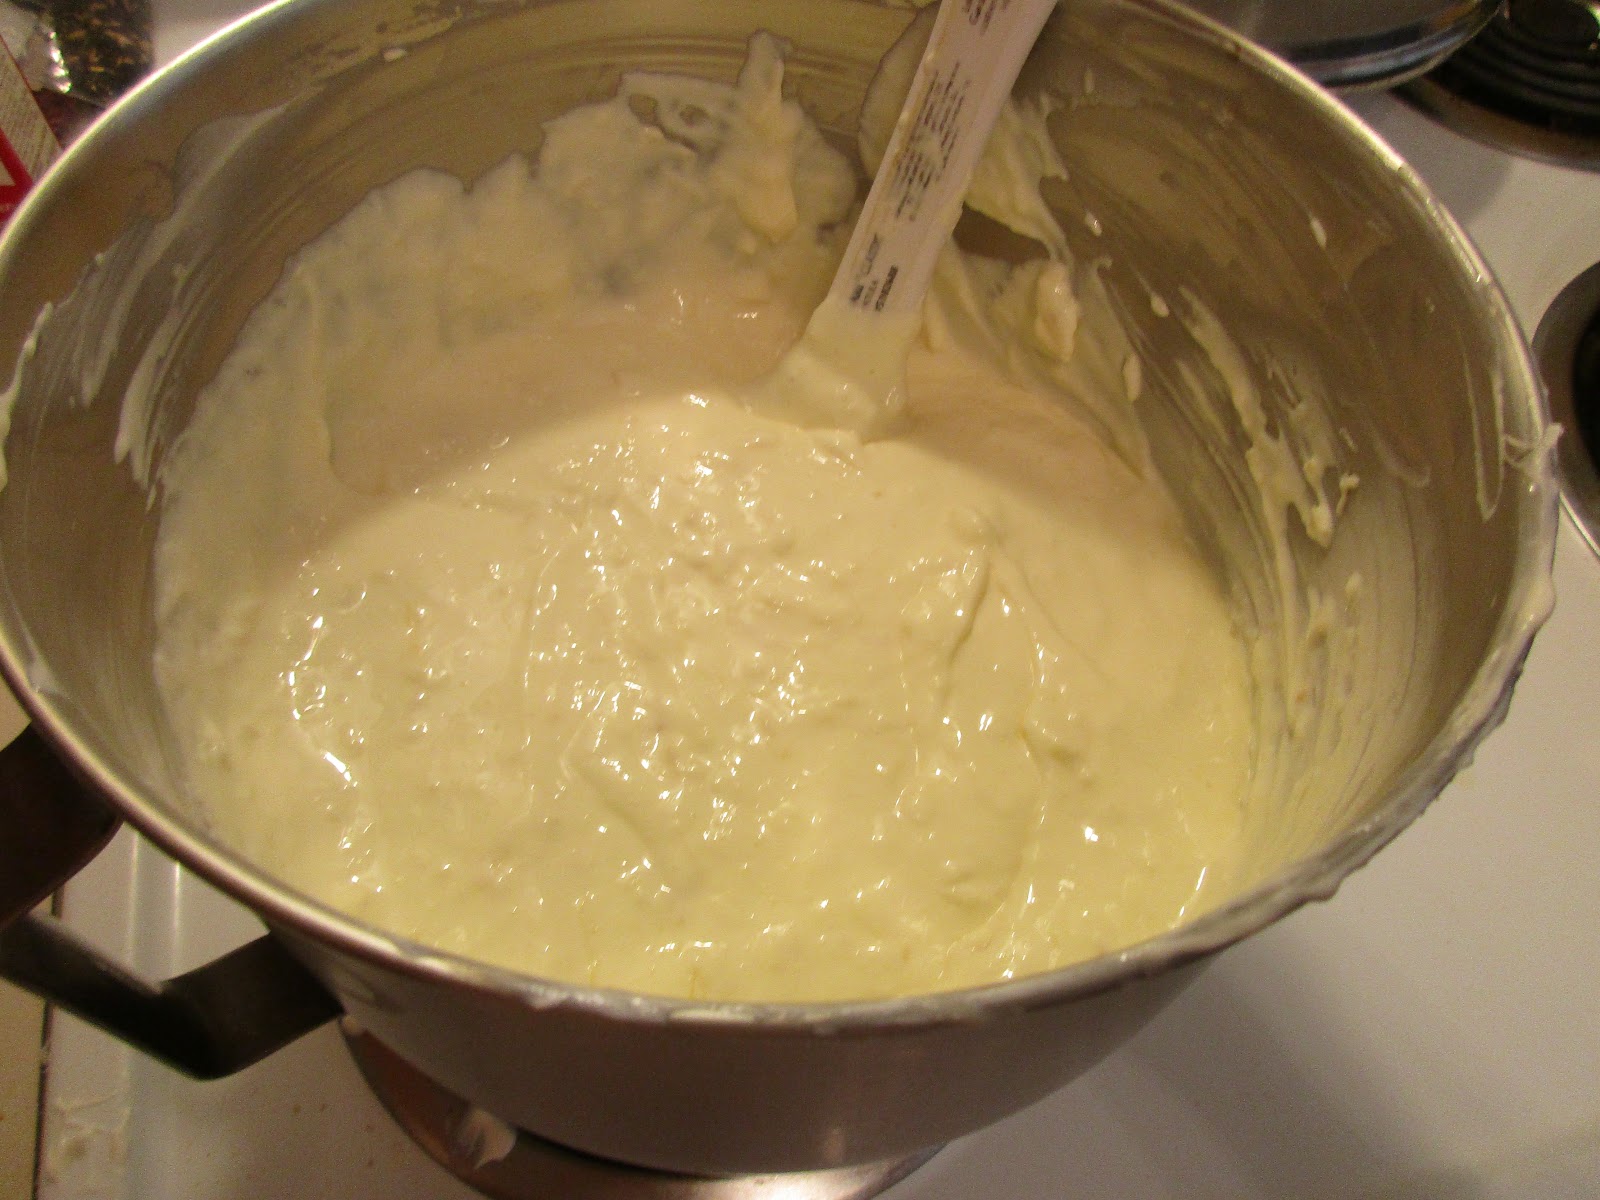
Fold in the well-drained pineapple, and set aside to pour into the crust.
To make the crust:
If you have whole graham crackers, use a gallon-size bag and a rolling pin or a food processor to grind them. I used a food processor for mine. When well-ground, place them in a bowl large enough to fit all the crust ingredients. Place the coconut flakes and toasted almonds in a food processor and process until they're the same size as the crushed graham crackers. Place them and the sugar in the bowl with the cracker crumbs and blend well.

Melt the butter and add the almond extract to it. Pour into the bowl and stir well to fully incorporate it with the crust ingredients.
Dump the crust ingredients into a springform pan and press into the bottom and up the sides. This makes enough to cover the sides nearly to the top. Try to make sure it's uniform, especially on the bottom.
Preheat the oven to 375 degrees. Bake the crust for two minutes to help it set. When that's done, remove it from the oven and pour the batter into the crust. It will nearly cover the sides of the crust.
Bake for 1 hour in the oven, before checking to see how set it is. You will definitely want a sheet pan under this on a lower rack, because butter will melt out of the bottom of the pan and you will regret the mess to clean up, if you don't.

After 1 hour, it may need a little more time to bake. Cheesecake baking is difficult in that it's really hard to tell if it's done, unless you have done this a lot. As I haven't baked a cheesecake in probably 15+ years, I was definitely rusty, and erred on the side of baking longer than it probably needed.
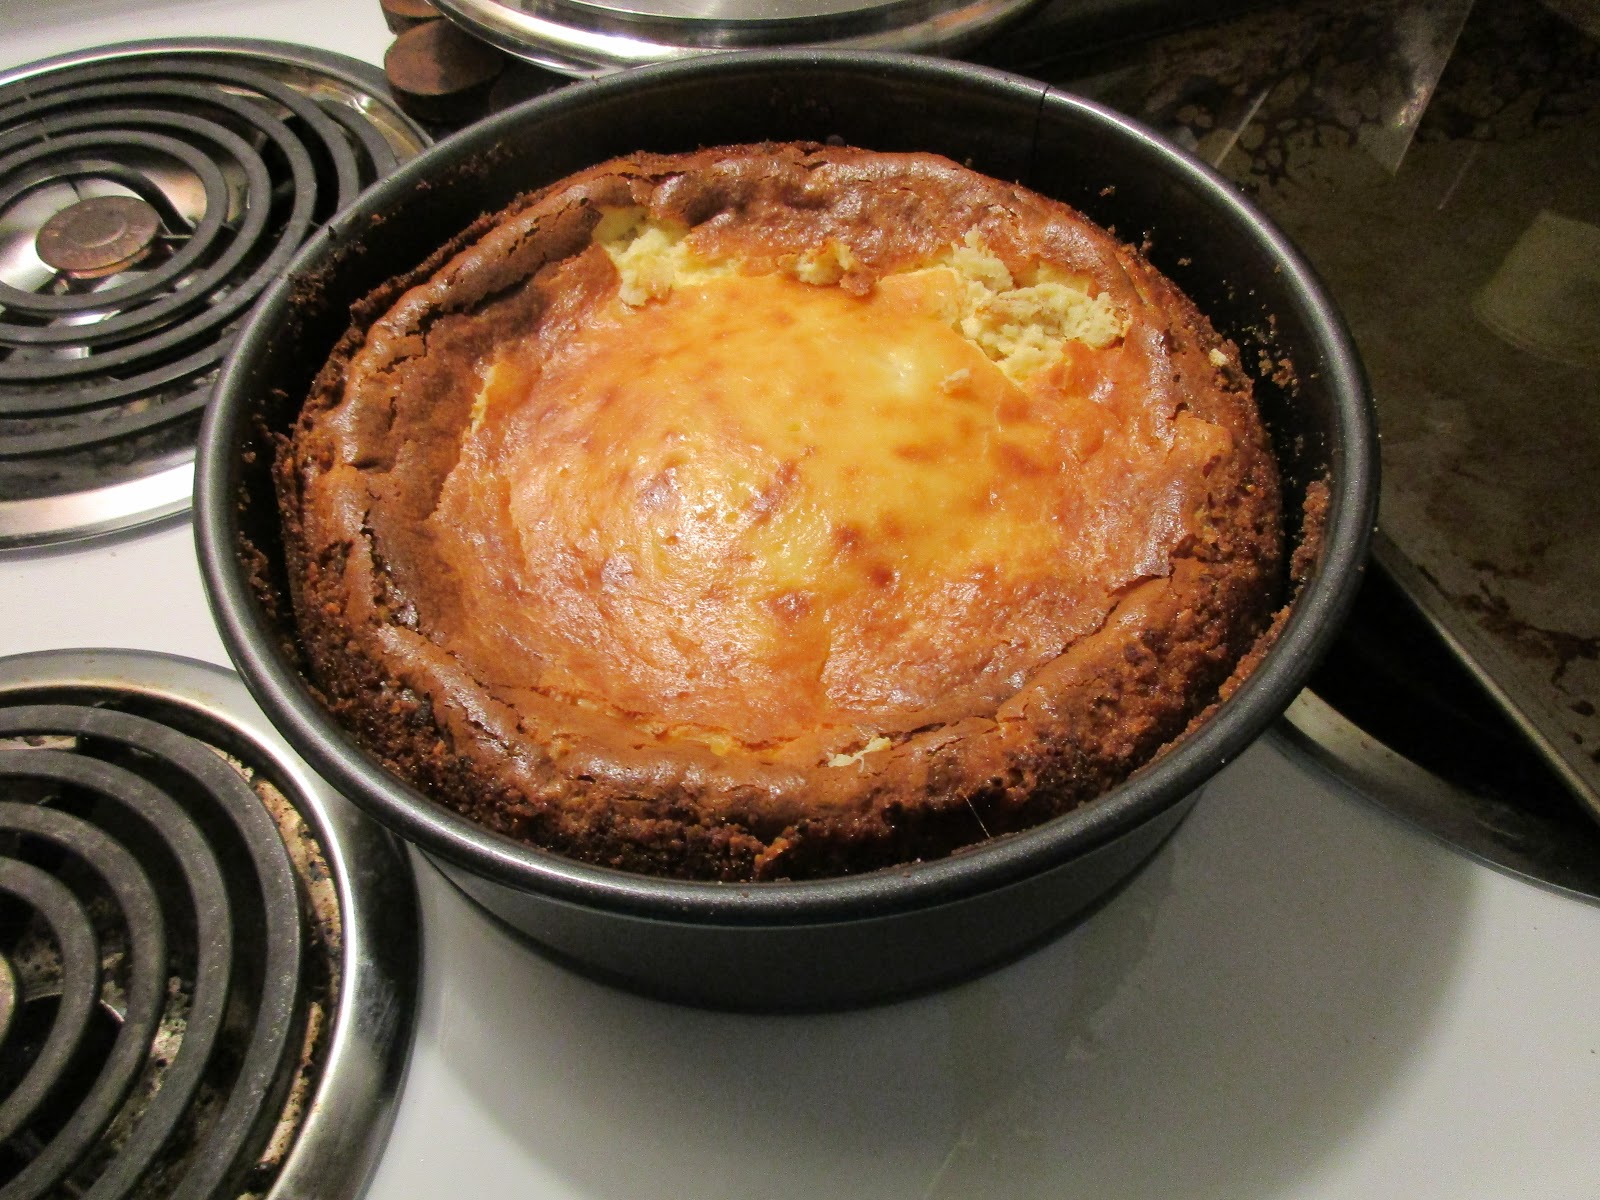
This was after an hour and 15 minutes, and just out of the oven.
This is after it fell. Cheesecakes fall, it's just what they do, don't worry when it happens to yours! It's browner on top than I would like, and cracked around the edge, but I would rather have a browner top than a raw center. Figuring out just the right time to bake comes with practice, and I need more of it, I think! I will admit, it's not the prettiest cheesecake I've ever made or seen, but it's the taste and texture that matters most. I was happy with the results, ultimately. When this is done, let it sit for a while to cool down a bit before placing it in the fridge to cool overnight.
The next day I took it out of the fridge and removed the side of the springform pan. It was time for a taste test.

I found it actually tasted better when it wasn't super cold, so I recommend letting it sit for a while and come closer to room temperature. The texture isn't perfect, and I can't tell if it's because of the pineapple, or over-baking, or a combo of both, but the flavor is pretty good. But it wasn't pineappley enough for my tastes. So, I thought and thought about it and the answer came to me: the leftover pineapple juice that I had saved from the crushed pineapple. I poured it into a pan and and slowly reduced it over medium heat until it was thick and syrupy. Can I just tell you how amazing it tastes poured over the cheesecake?! I poured the rest of it over the rest of the cheesecake and then for a bit of texture, I sprinkled the extra graham cracker crumbs on the top.
I left a little bit without graham crackers on top so that when I take it to work tomorrow, my coworkers can try it with or without if they like.

So, what did I learn from this baking experiment? I learned that I miss making cheesecake and I should probably do it more often to perfect the timing. I learned that even when a recipe doesn't have all the steps written out, if you have enough of a cooking/baking foundation, you can pretty much figure it out, even without them. I learned that pineapple in the cheesecake might make the texture taste a bit funny, but it still tastes great. And honestly, it's the pineapple syrup that takes it over the top. Do not miss this step. Don't be afraid to experiment. It didn't call for that at all, but it just "made" the dish!

This cheesecake is really rich, and the original recipe says it makes 12 servings. I didn't cut mine into 12 pieces, but feel like those are probably big slices and can probably be cut smaller to make more servings. There's a lot of sugar in this, so smaller pieces are probably the way to go!

Cheesecakes feel really fancy, but they aren't that hard to make. They are hard to gauge the doneness, however. That just takes time and practice. What better time to start practicing, than right now!

I don't know if this recipe is kosher or if my friend's grandmother would have enjoyed it. Some people really hate coconut! But I did take some time while making the cheesecake to think about the elders in our lives, and how it's good to listen to them and learn from them while we have them in our lives. This project is helping me to remember that. I would encourage all of us to listen to our elders, learn from them, learn their stories, while they're still here with us. Make sure to hug your grandparents while you still can!

Happy Baking!
-Foodie

*I actually measured the sour cream into cups, rather than used a pint and an 8oz. container of sour cream. This ended up using a few tablespoons more than those, so make sure you have plenty of sour cream on hand!
**The original recipe does't say what size of a can to use and I had every intention of buying an 8oz. can, but the store brand was all out of that size and there was no way I was paying the price of the name brand, so I ended up with a 19oz. can of the store brand, which was probably still cheaper than the smaller size of the name brand. I didn't use all of it, but as you'll see later, I did use all the juice from it, so I recommend the larger size can.


Sunday, April 5, 2015

Dining-In: A Culinary Tour of America-Lakewood Township, New Jersey

The City: Lakewood, New Jersey
According to the 2010 census, there are 92,843 people living here. 84.3% are white, 6.35% are African American. The per capita income is $16,430, and 26.1% live below the poverty line. Why did I choose this town, you may ask. Well, because it is home to one of the largest Orthodox Jewish communities in the entire country. Jewish people make up 59% of the town's population. And this weekend is Passover!


The first European settlers to the area arrived around 1750 and turned the region into several sawmills. The early 1800's brought with it a changeover to ironworks. The town was renamed Lakewood in 1850 and used as a vacation spot for locals. Several large hotels were built to encourage visitors.

Lakewood Township houses one of the largest yeshivas in the world. A yeshiva, is a Jewish school system and can be from elementary age all the way though post graduate age. The yeshiva in Lakewood, Beth Madrash Govoha, has about 6500 students, all male, and is a university-age school.Tuition to the school is negotiable, the idea behind it being that no student should be denied their chance to study the Torah because they cannot afford to.

The Food: Matzo Ball Soup

If I had to point to one food and say, "This is it. This is Jewish cuisine," I would probably point to Matzo Ball soup. This is of course a gross generalization of a culture that spans the globe. Matzo Ball soup is not a food eaten by all sects of Jewish population, but I would say that it is the best known dish in this country. I think most non-Jewish people would probably identify that dish as the one they think of first and foremost when they think about Jewish cuisine.

I have a deep respect and love for Jewish cuisine. As a food historian, I have never run across a culture whose cuisine is so steeped in their history, or vice versa. Everything they eat seems to tell the story of who they are as a people and where they have come from. It is transportable and edible history, easily passed from one generation to the next. It is genius.

Matzo Ball soup has its roots in Germany and Poland, and the tradition traveled with immigrants to the United States, who largely settled on the East Coast, in cities like New York, and Lakewood Township. Matzo, to anybody unfamiliar with it, is a flat, wheat-based cracker with little flavoring. It is eaten largely during Passover to commemorate the emergency flight out of Egypt by the slaves. With little time to prepare, the women were unable to make proper breads with yeast and created these flat crackers instead. Each year, for the duration of the Passover celebration, Jewish people generally don't eat foods with yeast. That a soup from these crackers would become a popular dish at this time of year, isn't terribly surprising. The soup is a chicken soup base, with the matzo balls added as the main starch. Though this dish started off as a Passover dish, it has since become a year-round delicacy.

There were many recipes I could follow but I chose to only use the matzo ball recipe and create my own chicken soup. I did use some of the spices but added my own as well. I will write out my soup recipe, and link to the matzo ball recipe I used.

Matzo Ball Soup:
1 qt. container chicken broth
1 qt. water(I used the container of broth after it was emptied to get as much flavor out of it as I could)
1 large chicken breast, with skin and bones
1 onion, unpeeled, quartered
3 carrots, chopped in large chunks
3 celery stalks, chopped in large chunks
1 pinch each dried dill, dried thyme, whole black peppercorns
2 bay leaves
2 whole cloves

Place the chicken in a large pot and cover with the water and broth. Bring to a boil and reduce down to a simmer, turning the chicken several times to cook all the way through. During this time, there will be stuff that floats to the top of the liquid. Carefully remove this with a spoon.

When the chicken is cooked, remove it from the pot and add the vegetables and herbs to the simmering liquid and continue to cook. Let the chicken rest until it's cool enough to handle and remove skin and bones before shredding the meat. Place in the fridge until ready to use.

When the vegetables are softened but not mushy, turn off the heat and strain into another pot, leaving the veggies and herbs behind. From the veggies, pick a few of the best and chop them up. This will be the vegetables for the soup. Discard the rest.

Now it's time to make the matzo balls. I read up about "floaters" and "sinkers" and decided on a floater recipe. I made my own matzo meal, instead of buying it pre-made from the store. I bought one box of crackers and crushed them up in my food processor. They break down into little bits but not powder. If you try this yourself, don't worry, it's supposed to look like that. I followed the recipe exactly except I added a pinch of thyme to it to reflect the flavors of the broth I had made.


Since the broth I had made didn't make enough to cook the mazto balls in, I used heavily salted water instead. This also helps keep any of them from breaking up and possibly clouding the broth. I cooked the matzo balls in a covered pot, and according to the comments I read from the recipe I had chosen, keeping it covered is vital. They half boil, half steam. I followed the recipe exactly as it said and when I lifted up the lid, they were definitely still floating, though the middles looked like they hadn't cooked all the way yet. I flipped them over to help finish cooking, and then they sunk. I don't know why, but they sunk. I thought they'd be like when you fry doughnuts and you flip those over, but no...they sank. I had to very carefully fish them out of the water.


At this time, I added the veggies and shredded chicken back to the broth and heated it through. I had never added any salt to this, so I flavored it at this point. It took quite a bit of salt to get it right. To serve, I put four matzo balls in the bottom of the bowl and poured the soup over it. Four ended up being too much. Three is a better amount for one serving, I think.

The broth was too carroty for my tastes, so next time I would probably use one less carrot. It was a bit too sweet for me, hence the need for so much salt to balance it out. The matzo balls taste and look probably exactly as they are supposed to. However, my palate and taste buds aren't used to them. I wasn't the hugest fan of them, I have to admit, sadly. Maybe if I had tried one made by a professional who knew what they were doing, it would be different. Or maybe if I had been raised with it as a part of my diet, it would be different. There isn't much flavor to a matzo, so it doesn't lend a lot to the finished product, but for me it was mostly the texture. I'm just not used to it. I should also mention the fact that I don't tend to have a lot of luck with chicken noodle soup, or chicken soups in general. I have no idea why, but it's one of the things that seems to elude me...And yet I keep trying!

Making the soup, regardless of the turnout, was fun. It was time consuming and very involved, but it was fun. It was nice to feel like I was participating in something that thousands of other people around the world are participating in right now. Preparing a dish that has traveled halfway around the world, and has been passed down from one generation to the next, and contains the story of who they are in it, is a joy and a privilege. And as with several other dishes I have made in this series, Matzo Ball soup has woven its way into American cuisine. It might not be my story or my history, but it is a beautiful one that is worth knowing by everybody.

Sources:


Matzo Ball Recipe

Map

Article about the Yeshiva system in Lakewood

City Pic

Matzo Ball History

More Matzo Ball History